|
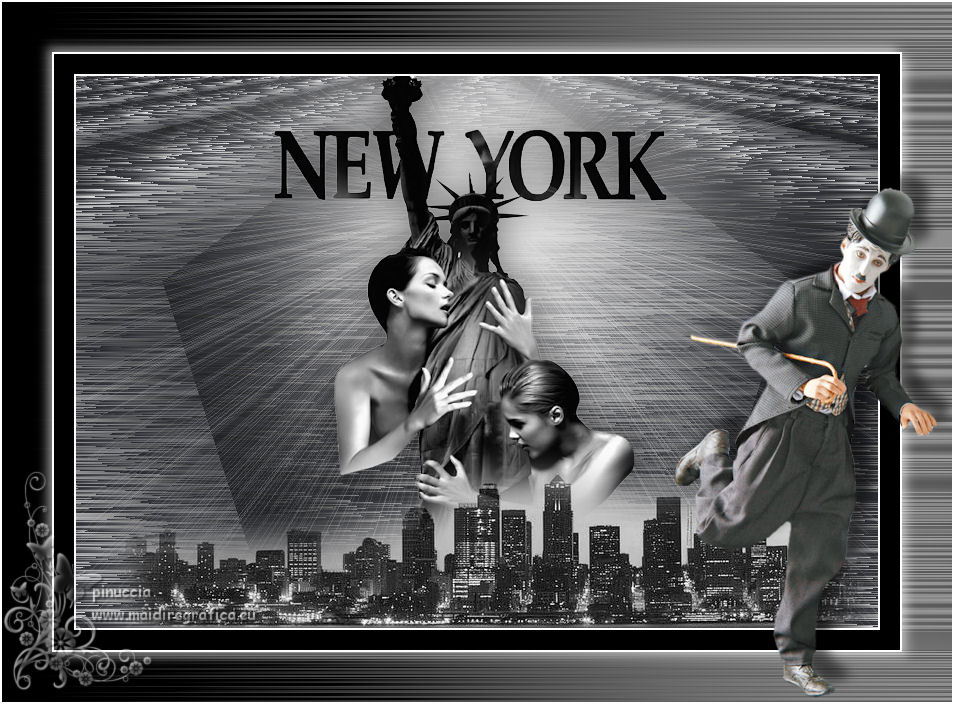
TAG NEW YORK


This tutorial was translated with PSPX7 but it can also be made using other versions of PSP.
Since version PSP X4, Image>Mirror was replaced with Image>Flip Horizontal,
and Image>Flip with Image>Flip Vertical, there are some variables.
In versions X5 and X6, the functions have been improved by making available the Objects menu.
In the latest version X7 command Image>Mirror and Image>Flip returned, but with new differences.
See my schedule here
 French translation here French translation here
 Your versions ici Your versions ici
For this tutorial, you will need:
Material
here
Tube calguisnewyork30810 by Guismo
Tube AnaRidzi-47
Tube aclis_city_001_26_12_2008
(you find here the links to the material authors' sites)
Plugins
consult, if necessary, my filter section here
Filters Unlimited 2.0 here
VM Experimental - Needles and Pins here
Mura's Meister - Cloud here
VM Stylize - Motion Trail Wild here
Filters VM Experimental and VM Stylize can be used alone or imported into Filters Unlimited.
(How do, you see here)
If a plugin supplied appears with this icon  it must necessarily be imported into Unlimited it must necessarily be imported into Unlimited

You can change Blend Modes according to your colors.
In the newest versions of PSP, you don't find the foreground/background gradient (Corel_06_029).
You can use the gradients of the older versions.
The Gradient of CorelX here
1. Open a new transparent image 850 x 600 pixels.
2. Set your foreground color to white,
and your background color to black.
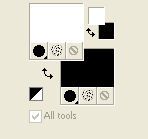
Set your foreground color to a Foreground/Background Gradient, style Linear.

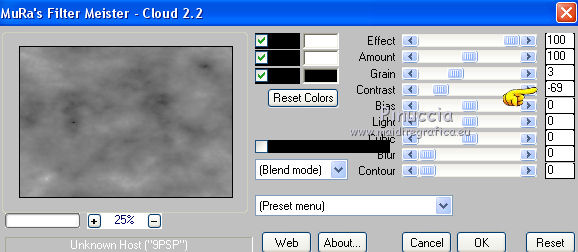
3. Effects>Plugins>Mura's Meister - Cloud.
4. Layers>New Raster Layer.
Flood Fill  the layer with your Gradient. the layer with your Gradient.
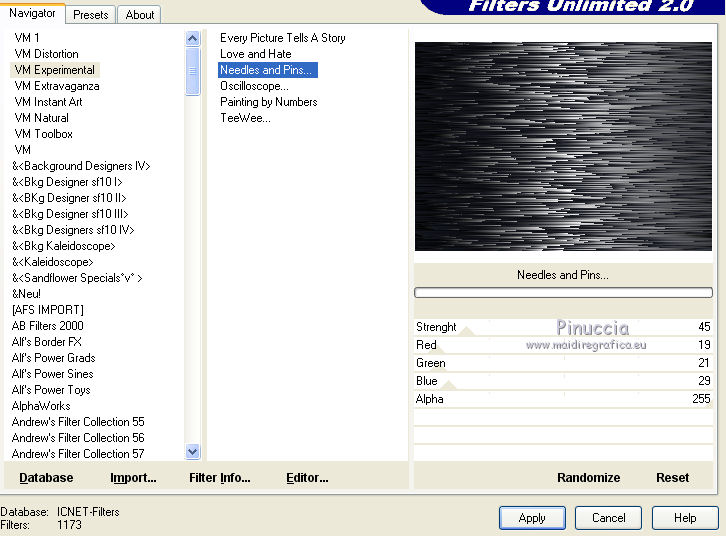
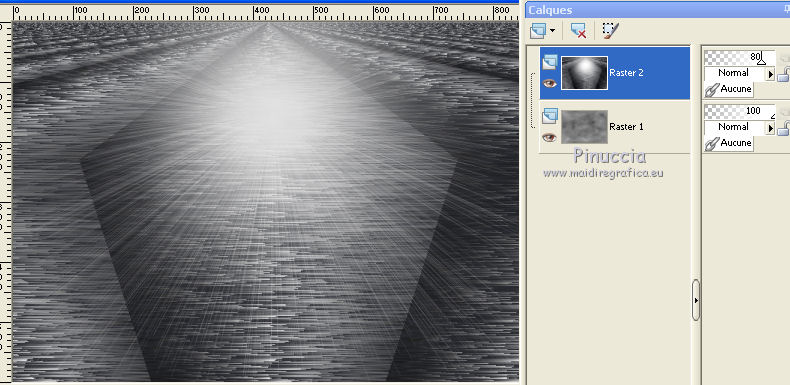
5. Effects>Plugins>VM Experimental - Needles and Pin.
6. Effects>Geometric Effects>Pentagon

7. Effects>Illuminatin Effects>Sunburst.

Reduce the opacity of this layer to 80%.
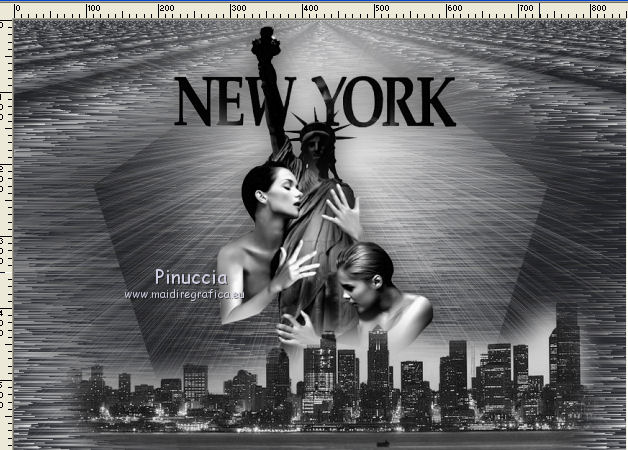
8. Open the tube calguisnewyork and go to Edit>Copy.
Go back to your work and go to Edit>Paste as new layer.
Image>Resize, to 90%, resize all layers not checked.
Move  the tube a bit higher, see my example. the tube a bit higher, see my example.
9. Adjust>Hue and Saturation>Colorize.

10. Effects>3D Effects>Drop Shadow, color black.

11. Open the tube aclis_city and go to Edit>Copy.
Go back to your work and go to Edit>Paste as new layer.
Adjust>Teinte et Saturation>Colorize, same settings.
Move  the tube down. the tube down.
12. Set your foreground Color to.
Layers>New Raster Layer.
Flood Fill  the layer with color white. the layer with color white.
13. Selections>Select All.
Selections>Modify>Contract - 2 pixels.
Press CANC on the keyboard 
14. Flood Fill  with color black. with color black.
Selections>Modify>Contract - 20 pixels.
Press CANC on the keyboard.
15. Flood Fill  with color white. with color white.
Selections>Modify>Contract - 2 pixels.
Press CANC on the keyboard.
Selections>Select None.
16. Layers>Merge>Merge All.
17. Image>Add borders, 50 pixels, symmetric, color black.
18. Activate your Magic Wand Tool 
and click in the border to select it.
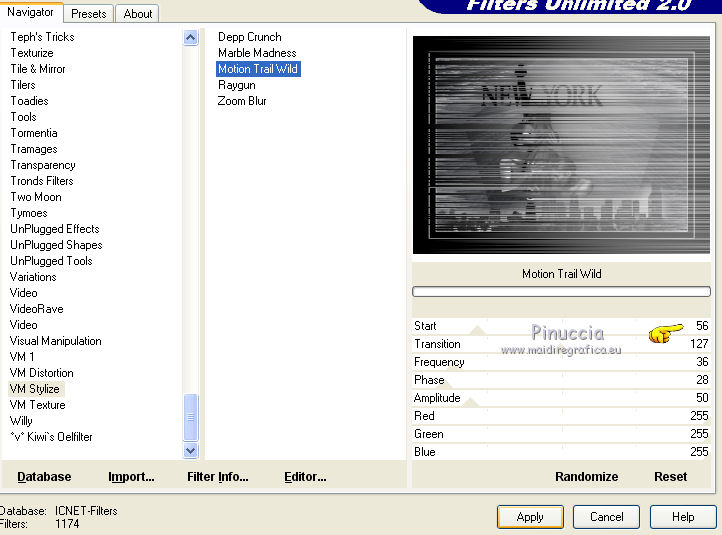
19. Effects>Plugins>Stylize - Motion Trail Wild.
20. Selections>Invert.
Effects>3D Effects>Drop Shadow, color white.

Repeat Drop Shadow, vertical and horizontal -5.
Selections>Select None.
21. Open the tube AnaRidzi-47 and go to Edit>Copy.
Go back to your work and go to Edit>Paste as new layer.
Image>Resize, to 80%, resize all layers not checked.
Move  the tube at the bottom right. the tube at the bottom right.
22. Effects>3D Effects>Drop Shadow, color black.

23 Layers>Merge>Merge All.
24. Image>Add borders, 2 pixels, symmétrique, color white.
25. Sign your work on a new layer.
 Your versions here Your versions here

If you have problems or doubts, or you find a not worked link, or only for tell me that you enjoyed this tutorial, write to me.
13 June 2021
|

