|
TAG MARIKA


This tutorial was translated with PSPX7 but it can also be made using other versions of PSP.
Since version PSP X4, Image>Mirror was replaced with Image>Flip Horizontal,
and Image>Flip with Image>Flip Vertical, there are some variables.
In versions X5 and X6, the functions have been improved by making available the Objects menu.
In the latest version X7 command Image>Mirror and Image>Flip returned, but with new differences.
See my schedule here
 French translation here French translation here
 Your versions ici Your versions ici
For this tutorial, you will need:

Thanks for the tubes Luz Cristina and Jewel.
(you find here the links to the material authors' sites)

consult, if necessary, my filter section here
Filters Unlimited 2.0 here
Mehdi - Sorting Tiles here
Simple - Top Left Mirror ici
Mura's Meister - Perspective Tiling here
Filters Simple can be used alone or imported into Filters Unlimited.
(How do, you see here)
If a plugin supplied appears with this icon  it must necessarily be imported into Unlimited it must necessarily be imported into Unlimited

You can change Blend Modes according to your colors.
In the newest versions of PSP, you don't find the foreground/background gradient (Corel_06_029).
You can use the gradients of the older versions.
The Gradient of CorelX here

Copy the selection in the Selections Folder.
Open the pattern Silver(1) in PSP and minimize it with the rest of the material.
1. Open a new transparent image 900 x 600 pixels.
2. Set your foreground color to Pattern and select the pattern Silver(1) with these settings.
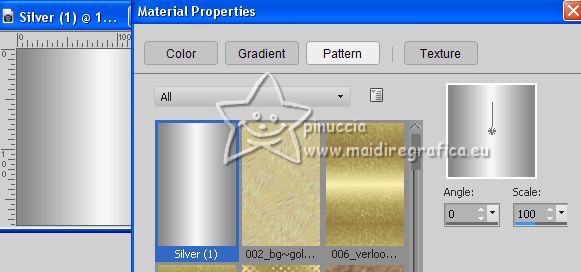
Flood Fill  the transparent image with your foreground pattern. the transparent image with your foreground pattern.
3. Effects>Plugins>Mehdi - Sorting Tiles.

4. Selections>Load/Save Selection>Load Selection from Disk.
Look for and load the selection sel52G.nines.
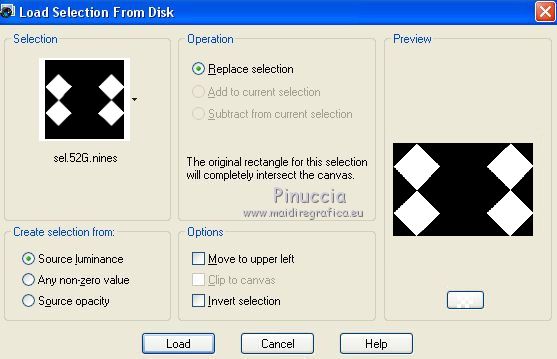
Selections>Promote Selection to Layer.
Keep selected.
5. Open the tube misted jewel 0030 
Erase the watermark and go to Edit>Copy.
Go back to your work and go to Edit>Paste as new layer.
6. Image>Resize, 2/3 times (for me 3 times) to 80%, resize all layers not checked.
Move  the tube on the selection. the tube on the selection.

7. Selections>Invert.
Press CANC on the keyboard 
Selections>Select None.
Change the Blend Mode of this layer to Luminance (legacy).
8. Effects>Plugins>Simple - Top Left Mirror.

9. Layers>Merge>Merge Down.
10. Effects>3D Effects>Drop shadow, color #000000.
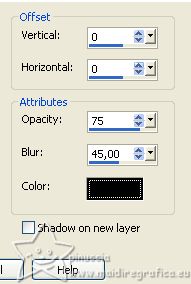
11. Layers>Duplicate.
Activate the layer below of the original.
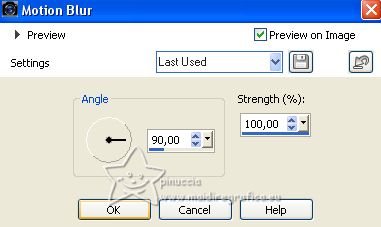
12. Adjust>Blur>Motion Blur.
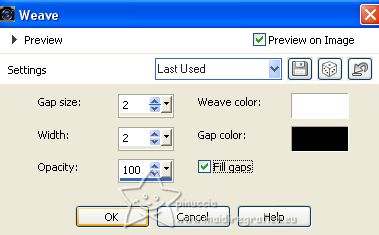
13. Effects>Texture Effects>Weave
weave color #ffffff
gap color #000000.
14. Adjust>Sharpness>Sharpen More.
15. Activate your top layer.
Open the tube 7702-Luz Cristina 
Edit>Copy.
Go back to your work and go to Edit>Paste as new layer.
Place  correctly the tube in the center. correctly the tube in the center.
16. Effects>3D Effects>Drop shadow, same settings.

17. Activate the layer Raster 1.
Edit>Copy.
18. Layers>Merge>Merge visible.
19. Edit>Paste as new layer (the background in memory).
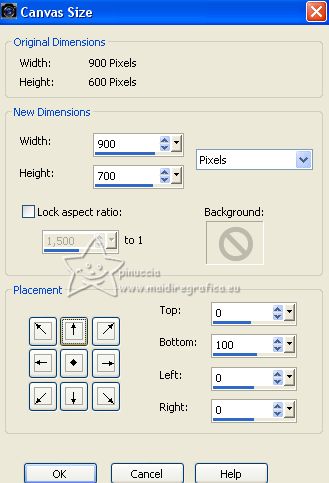
20. Image>Canvas Size - 900 x 700 pixels.
21. Effects>Plugins>Mura's Meister - Perspective Tiling.

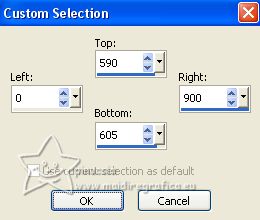
22. Selection Tool 
(no matter the type of selection, because with the custom selection your always get a rectangle)
clic on the Custom Selection 
and set the following settings.
23. Set your foreground color to #000000,
and your background color to #ffffff.
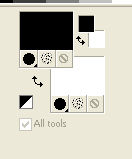
Set your foreground color to a Foreground/Background Gradient, style Linear.
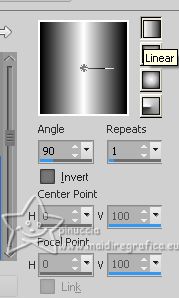
24. Layers>New Raster Layer.
Flood Fill  the selection with your Gradient. the selection with your Gradient.
25. Effects>Texture Effects>Weave, same settings.

26. Effects>3D Effects>Inner Bevel, color #ffffff.
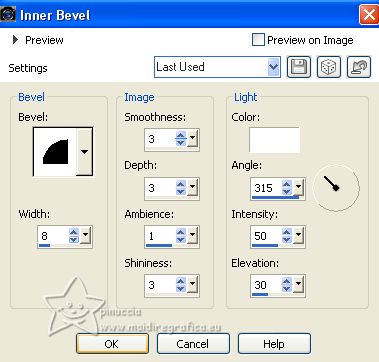
Selections>Select None.
27. Layers>Duplicate.
Effects>Geometric Effects>Skew.
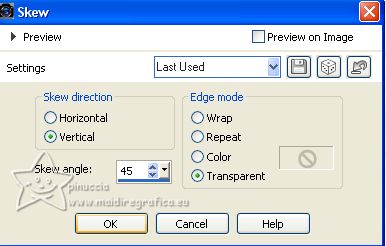
28. Layers>Duplicate.
Image>Mirror.
Layers>Merge>Merge Down.
29. Custom Selection 
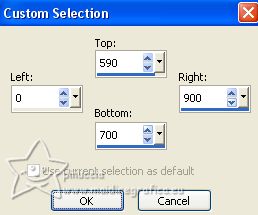
Press CANC on the keyboard 
Selections>Select None.
30. Layers>Move>Move Down (under the horizontal bar).
31. Stay on this layer.
Open the tube Adorno_408_nines 
Edit>Copy.
Go back to your work and go to Edit>Paste as new layer.
Move  the tube under the horizontal bar. the tube under the horizontal bar.

32. Sign your work on a new layer.
Add, if you want, the author and translator's watermarks.
33. Layers>Merge>Merge All.
34. Image>Add borders, 2 pixels, symmetric, color #000000.
Image>Add borders, 40 pixels, symmetric, color #ffffff.
35. Activate your Magic Wand Tool 
and click on the last border to select it.
36. Selections>Invert.
37. Edit>Copy.
Selections>Invert.
Edit>Paste into Selection.
38. Adjust>Blur>Gaussian Blur - radius 20.

39. Selections>Invert.
Effects>3D Effects>Drop Shadow, color #000000.

Selections>Select None.
40. Save as jpg.
For the tubes of this version thanks Nena Silva


If you have problems or doubts, or you find a not worked link, or only for tell me that you enjoyed this tutorial, write to me.
8 May 2023

|


