|
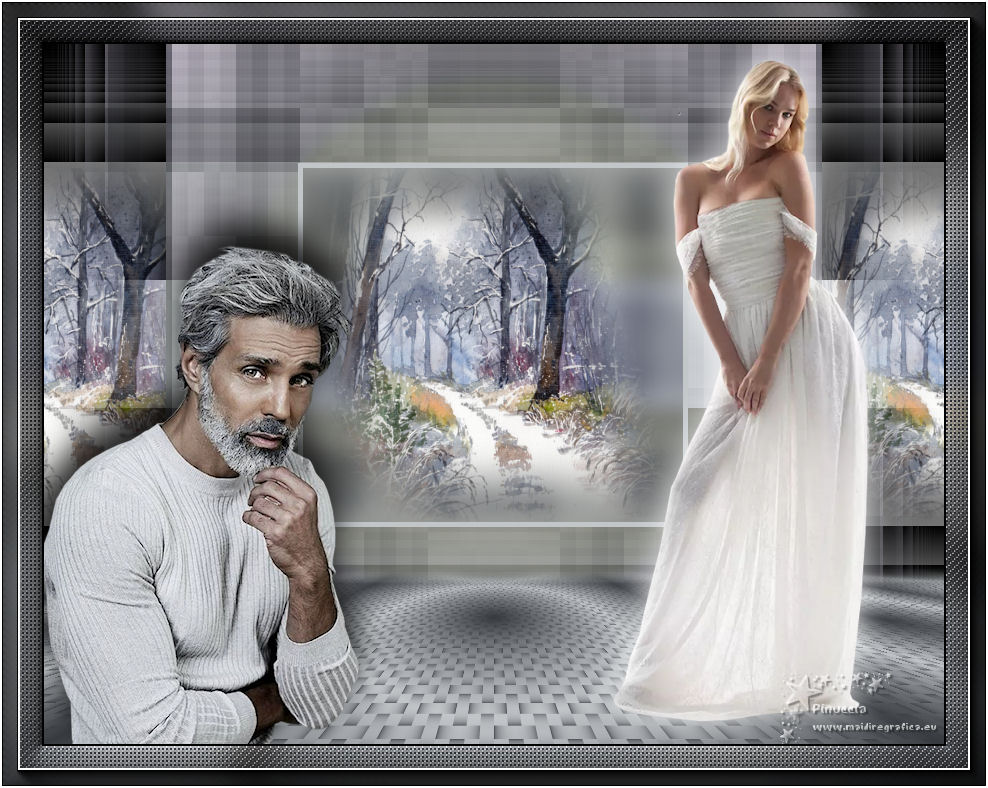
TAG MALE MODEL


This tutorial was translated with PSPX7 but it can also be made using other versions of PSP.
Since version PSP X4, Image>Mirror was replaced with Image>Flip Horizontal,
and Image>Flip with Image>Flip Vertical, there are some variables.
In versions X5 and X6, the functions have been improved by making available the Objects menu.
In the latest version X7 command Image>Mirror and Image>Flip returned, but with new differences.
See my schedule here
 French translation here French translation here
 Your versions ici Your versions ici
For this tutorial, you will need:
Material
here
Tube LD-male-model-021by Lana
Tube LD-model-315 by Lana
nicole-mist-paysage-2014
NarahsMask_1573
(you find here the links to the material authors' sites)
Plugins
consult, if necessary, my filter section here
Filters Unlimited 2.0 here
Andrew's Filter 30 - Bit of Nonsense here
Simple - Top Left Mirror here
Mura's Meister - Perspective Tiling here
AAA Frames - Foto Frame here
Filters Andrew's and Simple can be used alone or imported into Filters Unlimited.
(How do, you see here)
If a plugin supplied appears with this icon  it must necessarily be imported into Unlimited it must necessarily be imported into Unlimited

You can change Blend Modes according to your colors.
In the newest versions of PSP, you don't find the foreground/background gradient (Corel_06_029).
You can use the gradients of the older versions.
The Gradient of CorelX here
Copy the preset Emboss 3 in the Presets Folder.
Copy the Selections in the Selection Folder.
Open the mask in PSP and minimize it with the rest of the material.
1. Open a new transparent image 900 x 600 pixels.
2. Set your foreground color to #c2c6c9,
and your background color to #373a3f.

Set your foreground color to a Foreground/Background Gradient, style Sunburst.
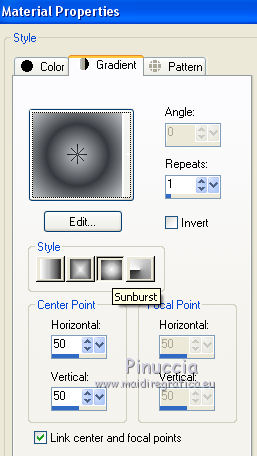
Flood Fill  the transparent image with your Gradient. the transparent image with your Gradient.
3. Effects>Plugins>Filters Unlimited 2.0 - Andrew's Filter 30 - Bit of Nonsense, default settings.

4. Effects>Plugins>Simple - Top Left Mirror.

5. Selections>Load/Save Selection>Load Selection from Disk.
Look for and load the selection sel.364.nines.
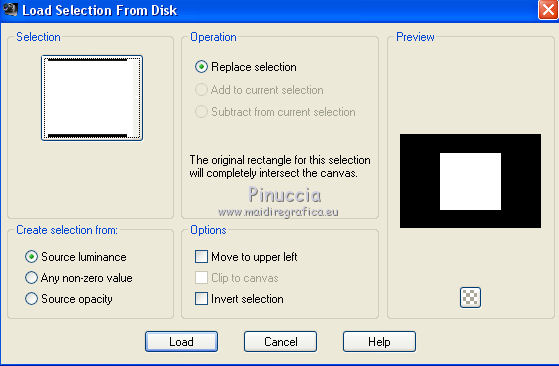
Selections>Promote Selection to Layer.
6. Adjust>Blur>Gaussian Blur - radius 10

Keep selected.
7. Layers>New Raster Layer.
Set your foreground color to Color.
Flood Fill  the layer with your foreground color. the layer with your foreground color.
8. Selections>Modify>Contract - 5 pixels.
Press CANC on the keyboard 
9. Layers>New Raster Layer.
Open the tube nicole-mist-paysage-2014 and go to Edit>Copy.
Go back to your work and go to Edit>Paste into Selection.
Keep always selected.
10. Effects>Image Effects>Seamless Tiling - side by side
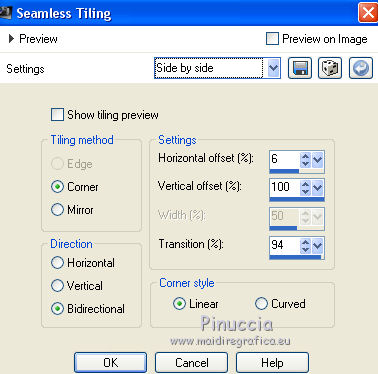
Selections>Select None.
11. Selections>Load/Save Selection>Load Selection from Disk.
Look for and load the selection sel.364.1.nines.
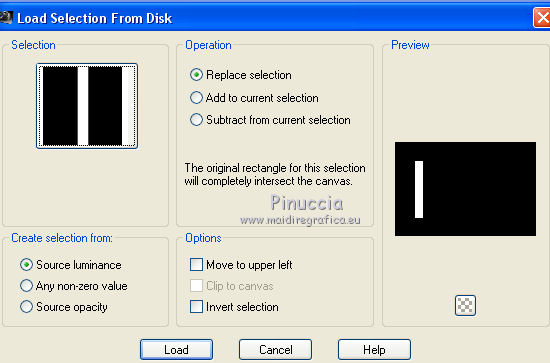
Press CANC on the keyboard.
12. Set your foreground color to white #ffffff.
Layers>New Raster Layer.
Flood Fill  the selection with color #ffffff. the selection with color #ffffff.
13. Layers>New Mask layer>From image
Open the menu under the source window and you'll see all the files open.
Select the mask Narahs_Mask_1573.
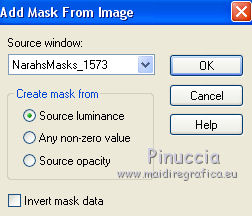
Layers>Merge>Merge Group.
14. Effects>Image Effects>Seamless Tiling, default settings.

15. Effects>User Defined Filter - select the preset Emboss 3 and ok.

Selections>Select None.
16. Close the bottom layer, Raster 1.
Layers>Merge>Merge visible.
Re-open and activate the bottom layer.
Layers>Arrange>Bring to Top.
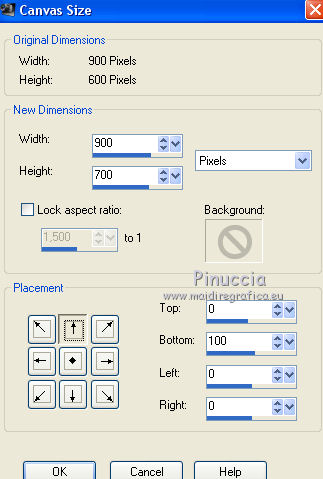
17. Image>Canvas Size - 900 x 700 pixels.
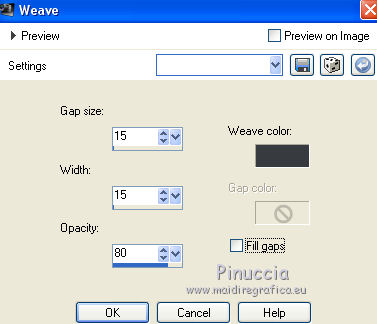
18. Effects>Texture Effects>Weave
weave color #373a3f
19. Effects>Plugins>Mura's Meister - Perspective Tiling.

20. Activate your Magic Wand Tool 

and click on the transparent part to select it.
Press 5 times CANC on the keyboard.
Selections>Select None.
21. Open the tube LD-male model-021, erase the watermark and go to Edit>Copy.
Go back to your work and go to Edit>Paste as new layer.
Image>Resize, 1 time to 80% and 1 time to 90%, resize all layers not checked.
Move  the tube to the left side. the tube to the left side.
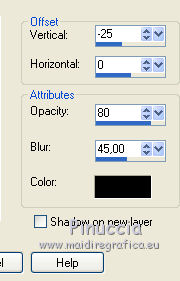
22. Effects>3D Effects>Drop Shadow, color #000000.
23. Open the tube LD-model-315 erase the watermark and go to Edit>Copy.
Go back to your work and go to Edit>Paste as new layer.
Image>Resize, to 80%, resize all layers not checked.
Move  the tube to the right side. the tube to the right side.
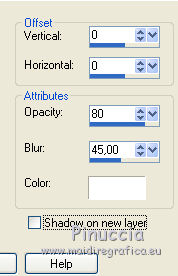
24. Effects>3D Effects>Drop Shadow, color #ffffff.
25. Layers>Merge>Merge All.
26. Image>Add borders, 2 pixels, symmetric, color #000000.
27. Edit>Copy.
Image>Add borders, 40 pixels, symmetric, color #ffffff.
Activate your Magic Wand Tool 
don't forget to set again the feather to 0,
and click on the white border to select it.
Edit>Paste into Selection.
29. Adjust>Blur>Gaussian Blur - radius 15.

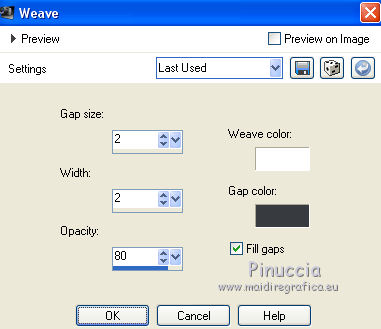
30. Effects>Texture Effects>Weave
weave color #ffffff; gap color #373a3f.
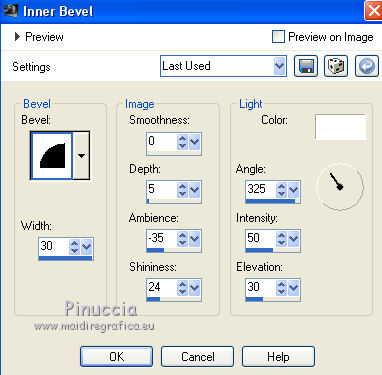
31. Effects>3D Effects>Inner Bevel.
Selections>Select None.
32. Effects>Plugins>AAA Frames - Foto Frame.

33. Image>Add borders, 2 pixels, symmetric, color #ffffff.
34. Sign your work and save as jpg.
Version with tubes by Beatriz and Jewel

 Your versions here Your versions here

If you have problems or doubts, or you find a not worked link, or only for tell me that you enjoyed this tutorial, write to me.
5 October 2020
|

