|
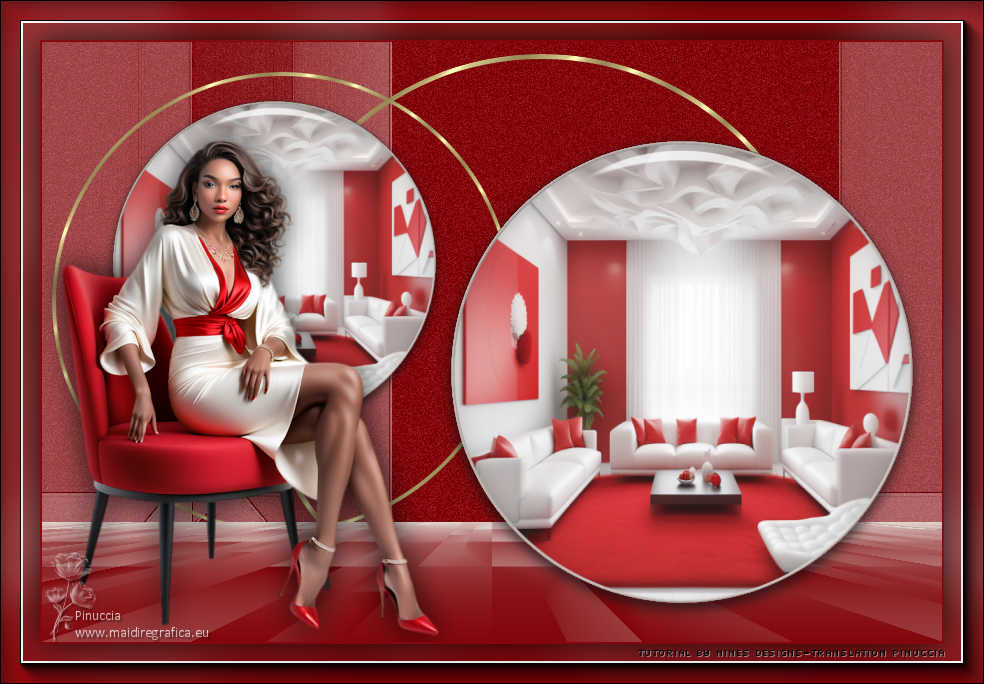
TAG INTERIOR


This tutorial was translated with PSP09 but it can also be made using other versions of PSP.
Since version PSP X4, Image>Mirror was replaced with Image>Flip Horizontal,
and Image>Flip with Image>Flip Vertical, there are some variables.
In versions X5 and X6, the functions have been improved by making available the Objects menu.
In the latest version X7 command Image>Mirror and Image>Flip returned, but with new differences.
See my schedule here
 French translation here French translation here
 Your versions here Your versions here
For this tutorial, you will need:

Thanks for the tubes Kamil and for the mask Adita.
(you find here the links to the material authors' sites)

consult, if necessary, my filter section here
Mehdi - Sorting Tiles here
Mura's Meister - Perspective Tiling here
AAA Frames - Foto Frame here
Alien Skin Eye Candy 5 Impact - Glass here

You can change Blend Modes according to your colors.
In the newest versions of PSP, you don't find the foreground/background gradient (Corel_06_029).
You can use the gradients of the older versions.
The Gradient of CorelX here

Copy the selection in the Selections Folder.
Open the mask and the golden pattern in PSP and minimize them with the rest of the material.
1. Open a new transparent image 900 x 600 pixels.
2. Set your foreground color to #82060c,
and your background color to #e3dad3.
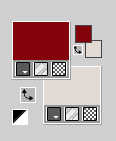
Flood Fill  the transparent image with your foreground color #82060c. the transparent image with your foreground color #82060c.
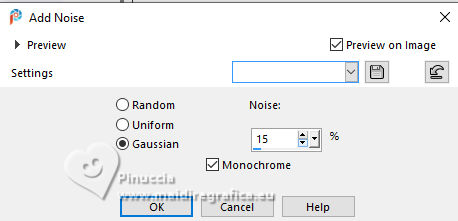
3. Adjust>Add/Remove Noise>Add Noise.
4. Selections>Load/Save Selection>Load Selection from Disk.
Look for and load the selection sel.439.nines
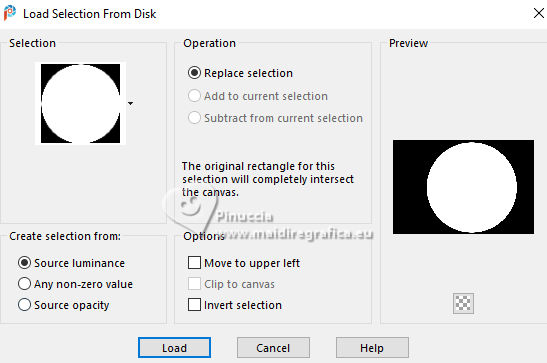
Promote Selection to layer.
5. Open the image KamilTube-2507-BG 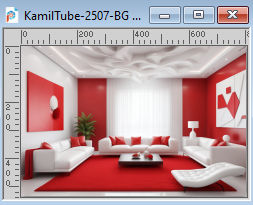
Edit>Copy.
Go back to your work and go to Edit>Paste into Selection.
6. Selections>Modify>Select Selection Borders.
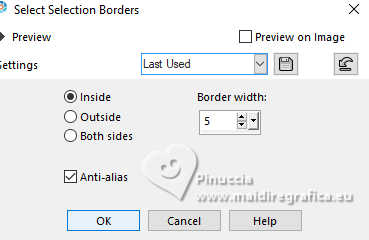
Flood Fill  the selection with your background color #e3dad3. the selection with your background color #e3dad3.
7. Effects>3D Effects>Inner Bevel, color #ffffff.
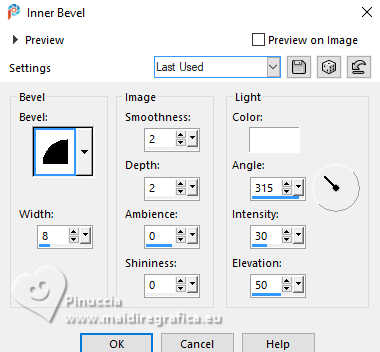
Selections>Select None.
8. Effects>3D Effects>Drop Shadow, color #000000.

9. Image>Resize, to 80%, resize all layers not checked.
10. Effects>Image Effects>Offset.
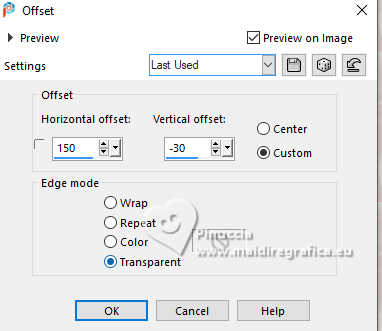
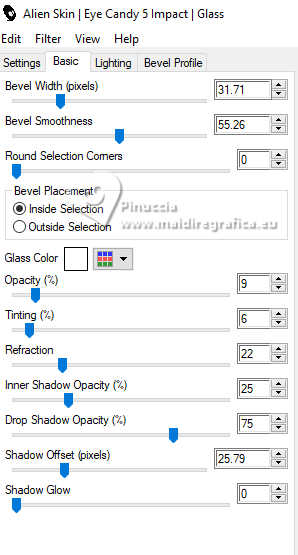
11. Effects>Modules Externes>Alien Skin Eye Candy 5 Impact - Glass.
Glass Color #ffffff.
12. Layers>Duplicate.
Image>Resize, to 70%, resize all layers not checked.
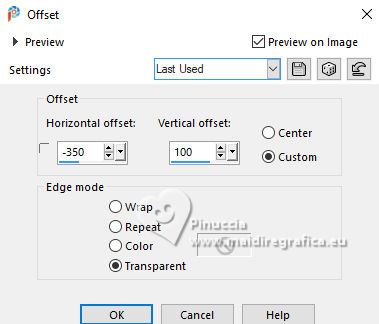
13. Effects>Image Effects>Offset.
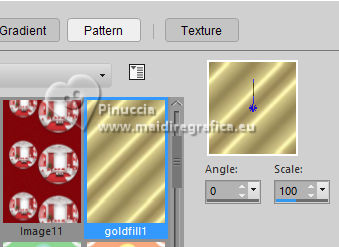
14. Set your foreground color to Pattern and select the pattern goldfill1
15. Activate your background layer, Raster 1.
Layers>New Raster Layer.
Selections>Load/Save Selection>Load Selection from Disk.
Load again the selection sel.439.nines

Flood Fill  the selection with the golden pattern. the selection with the golden pattern.
16. Selections>Modify>Contract - 5 pixels.
Press CANC on the keyboard 
Selections>Select None.
17. Layers>Duplicate.
Image>Resize, to 80%, resize all layers not checked.
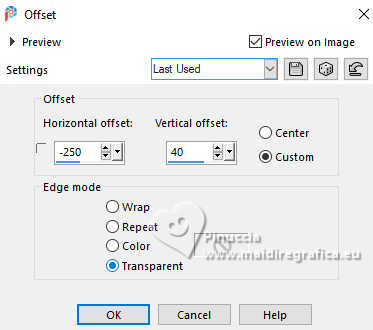
18. Effects>Image Effects>Offset.
19. Set again your foreground color to Couleur.

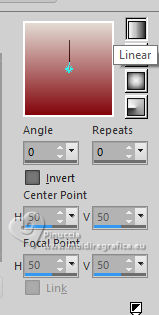
Set your foreground color to a Foreground/Background Gradient, style Linear.
20. Activate again your bottom layer, Raster 1.
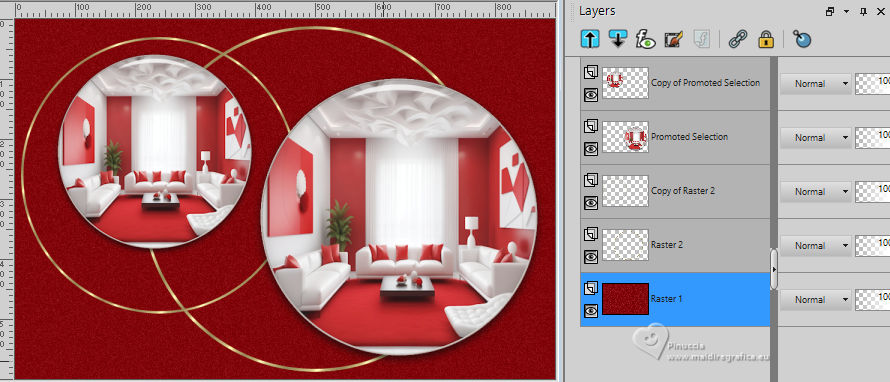
Layers>New Raster Layer.
Flood Fill  the layer with your Gradient. the layer with your Gradient.
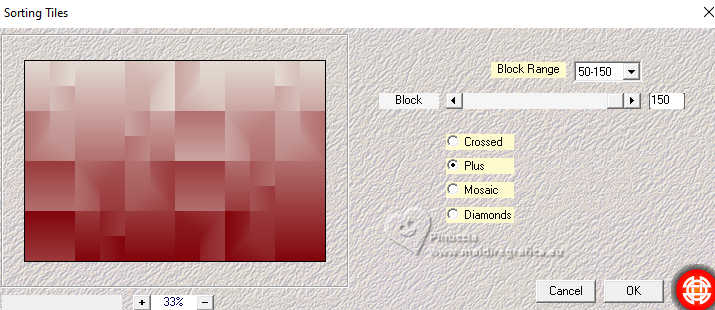
21. Effects>Plugins>Mehdi - Sorting Tiles.
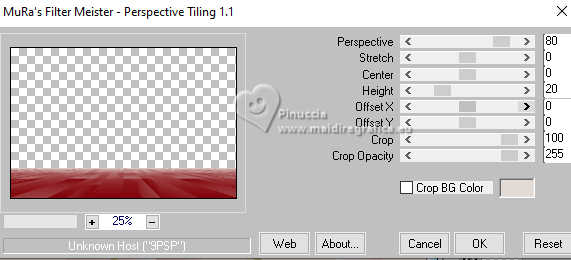
22. Effects>Plugins>Mura's Meister - Perspective Tiling.
23. Layers>Arrange>Move up - 2 times (over the golden circles).
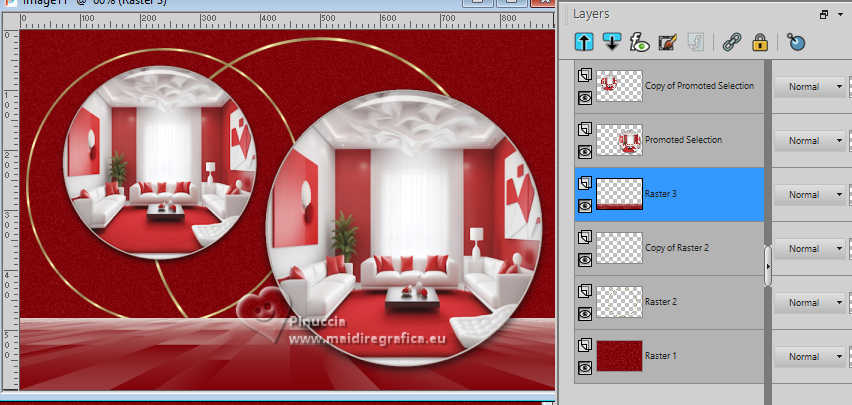
24. Again activate your bottom layer, Raster 1.
Set your foreground color to white #ffffff.
Layers>New Raster Layer.
Reduce the opacity of this layer to 50%.
Flood Fill  the layer with color white #ffffff. the layer with color white #ffffff.
don't forget to set again the opacity to 100
25. Layers>New Mask layer>From image
Open the menu under the source window and you'll see all the files open.
Select the mask aditascreations_mask49.
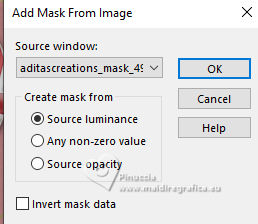
Layers>Merge>Merge Group.
Effects>Edge Effects>Enhance more.
26. Activate your top layer.
Open the tube KamilTube-2553 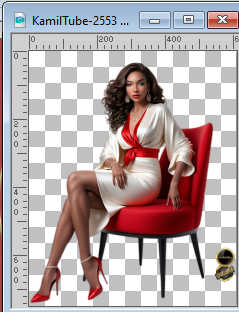
Erase the watermark and go to Edit>Copy.
Go back to your work and go to Edit>Paste as new layer.
Image>Resize, to 70%, resize all layers not checked.
Image>Mirror>Mirror horizontal.
Move  the tube to the left side. the tube to the left side.
27. Effects>3D Effects>Drop Shadow, color #000000.

28. Adjust>Brightness and Contrast>Clarify.
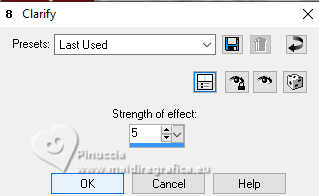
This effect is only found up to the PSPX2 versions.
Below is the image before and after applying the effect.
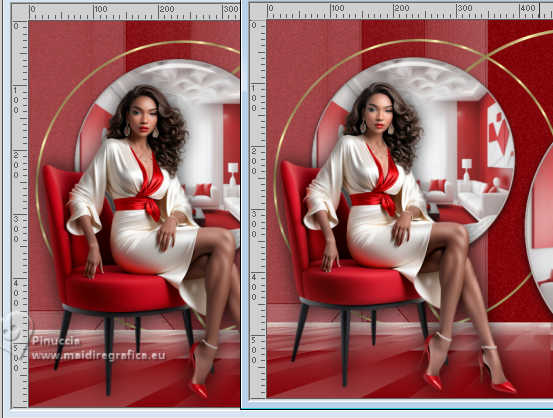
With the PSPX3 version it can be replaced with Local Tone Mapping.
From the PSPX4 version we find
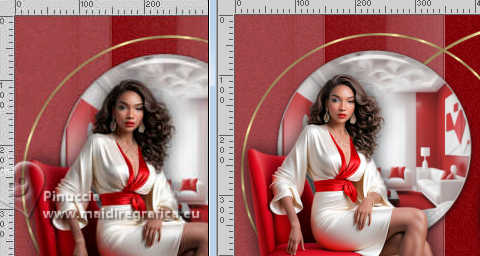
Adjust>Brightness and Contrast>Fill Light/Clarity
I also made a text with Adjust>One Step Photo Fix; here is before and after
29. Sign your work.
Add the author and translator's watermarks.
30. Image>Add borders, 2 pixels, symmetric, foreground color #82060c.
31. Edit>Copy
32. Image>Add borders, 40 pixels, symmetric, background color #e3dad3.
33. Activate your Magic Wand Tool 
and click on the last border to select it.
34. Edit>Paste into Selection.
35. Adjust>Blur>Gaussian Blur - radius 30.

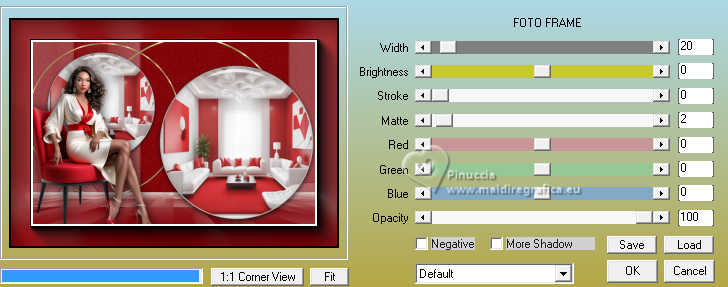
36. Effects>Plugins>AAA Frames - Foto Frame.
37. Selections>Invert.
Effects>3D Effects>Drop Shadow, color #000000.

Selections>Select None.
38. Save as jpg.
For the tubes of this version thanks Kamil
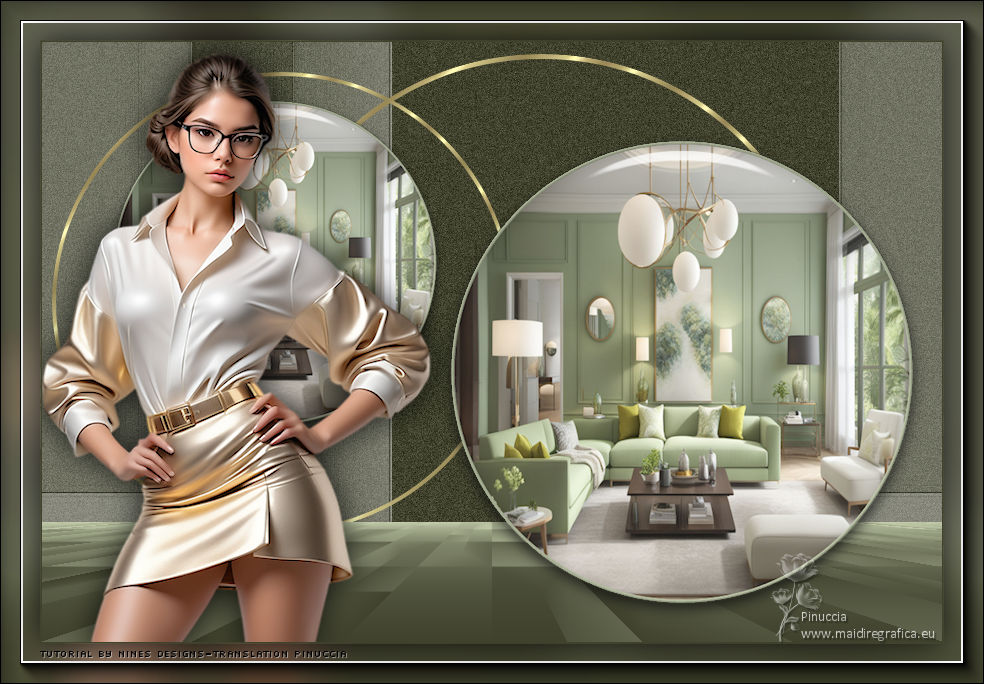

If you have problems or doubts, or you find a not worked link, or only for tell me that you enjoyed this tutorial, write to me.
28 August 2024

|

