|
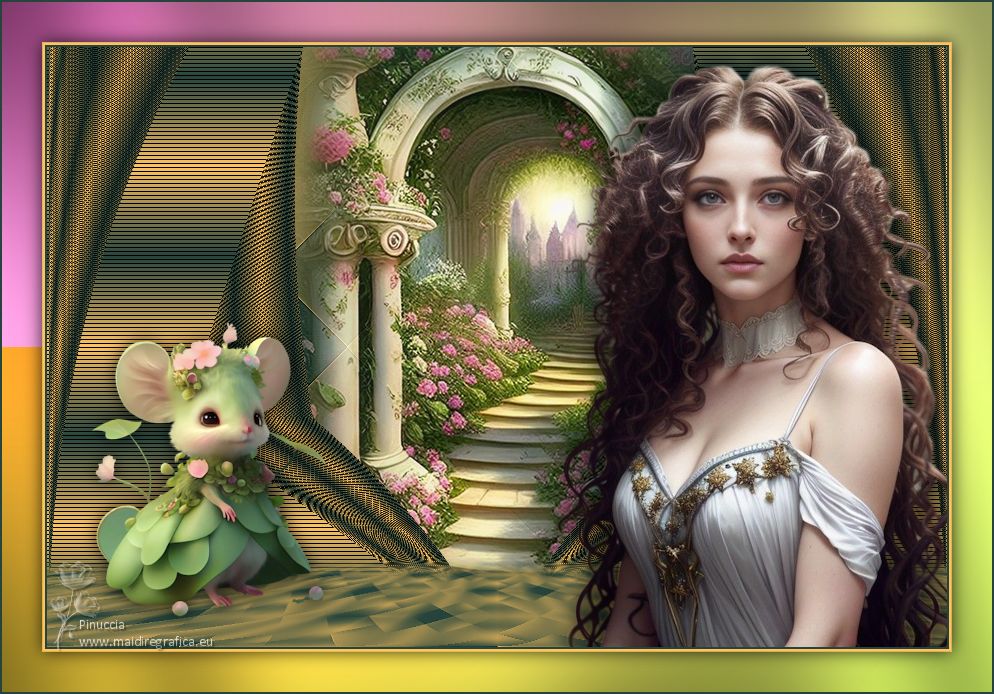
TAG ILDIKÓ JANÓSNÉ


This tutorial was translated with PSPX7 but it can also be made using other versions of PSP.
Since version PSP X4, Image>Mirror was replaced with Image>Flip Horizontal,
and Image>Flip with Image>Flip Vertical, there are some variables.
In versions X5 and X6, the functions have been improved by making available the Objects menu.
In the latest version X7 command Image>Mirror and Image>Flip returned, but with new differences.
See my schedule here
 French translation here French translation here
 Your versions ici Your versions ici
For this tutorial, you will need:

Thanks for the tubes Lana, Colybrix and Tineke.
(you find here the links to the material authors' sites)

consult, if necessary, my filter section here
Filters Unlimited 2.0 here
Mehdi - Sorting Tiles here
Cybia - Screenworks - Pin Hole here
Graphics Plus - Cross Shadow here
&<Sandflower Specials °v° - Color Cocktail (à importer dans Unlimited) here
Mura's Meister - Perspective Tiling here
Filters Cybia and Graphics Plus can be used alone or imported into Filters Unlimited.
(How do, you see here)
If a plugin supplied appears with this icon  it must necessarily be imported into Unlimited it must necessarily be imported into Unlimited

You can change Blend Modes according to your colors.
In the newest versions of PSP, you don't find the foreground/background gradient (Corel_06_029).
You can use the gradients of the older versions.
The Gradient of CorelX here

1. Set your foreground color to #fdc361,
and your background color to #26443c

Set your foreground color to a Foreground/Background Gradient, style Rectangulaire.

2. Open a new transparent image 900 x 600 pixels.
Flood Fill  the transparent image with your Gradient. the transparent image with your Gradient.
3. Layers>Duplicate.
Close this layer for a moment, and activate the layer below of the original.
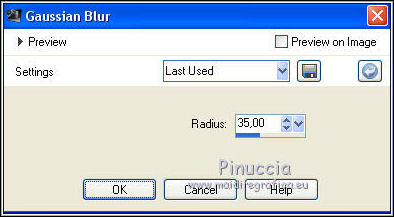
4. Adjust>Blur>Gaussian Blur - radius 35.
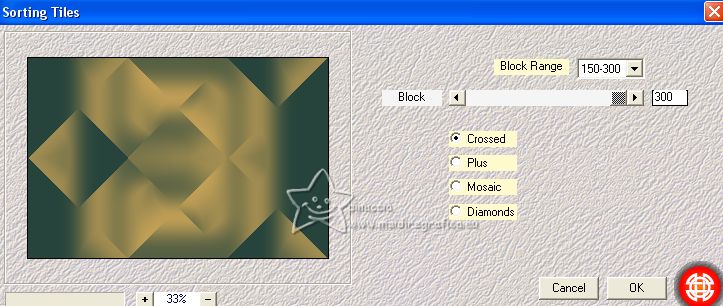
5. Effects>Plugins>Mehdi - Sorting Tiles.
6. Effects>Image Effects>Seamless Tiling.

Effects>Edge Effects>Enhance More.
7. Layers>Duplicate.
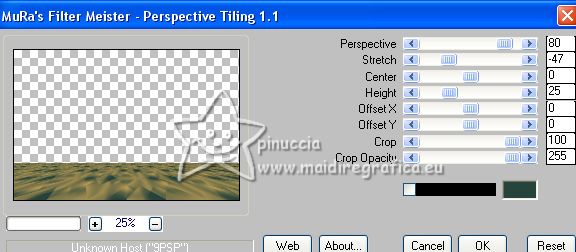
Effects>Plugins>Mura's Meister - Perspective Tiling.
8. Activate your Magic Wand Tool  , tolerance and feather 20 , tolerance and feather 20

Click in the transparent part to select it.
Press 3-4 times CANC on the keyboard 
Selections>Select None.
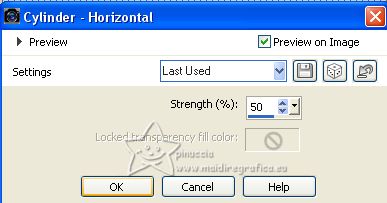
9. Effects>Geometric Effects>Cylinder Horizontal.
10. Open and activate the layer above of the copy.
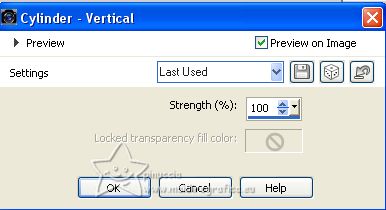
Effects>Geometric Effects>Cylinder vertical.
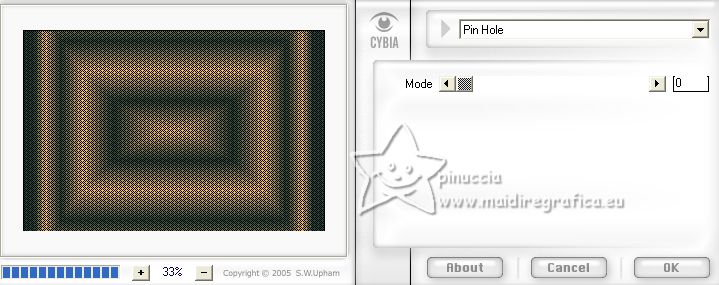
11. Effects>Plugins>Cybia - Screenwork - Pin Hole.
12. Effects>Geometric Effects>Skew.
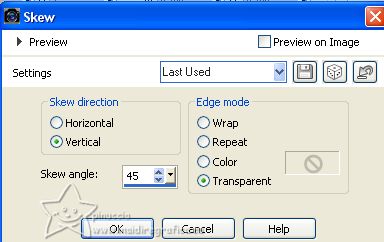
Edit>Repeat Skew.
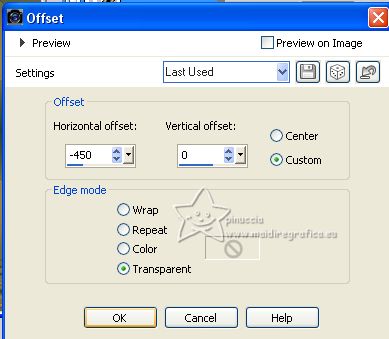
13. Effects>Image Effects>Offset.
14. Layers>Duplicate.
Image>Mirror.
Layers>Merge>Merge Down.
15. Layers>Duplicate.
Close this layer for a moment, and activate the layer below.
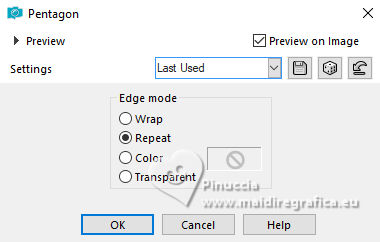
16. Effects>Geometric Effects>Pentagon.
17. Image>Flip.
18. Open and activate the layer above.
Effects>Geometric Effects>Cylinder Vertical.

19. Activate your bottom layer, Raster 1.
Open the tube chemin-escalier7-coly 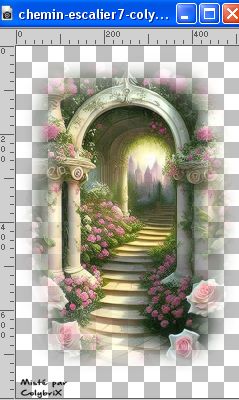
Erase the watermark and go to Edit>Copy.
Go back to your work and go to Edit>Paste as new layer.
Don't move it.
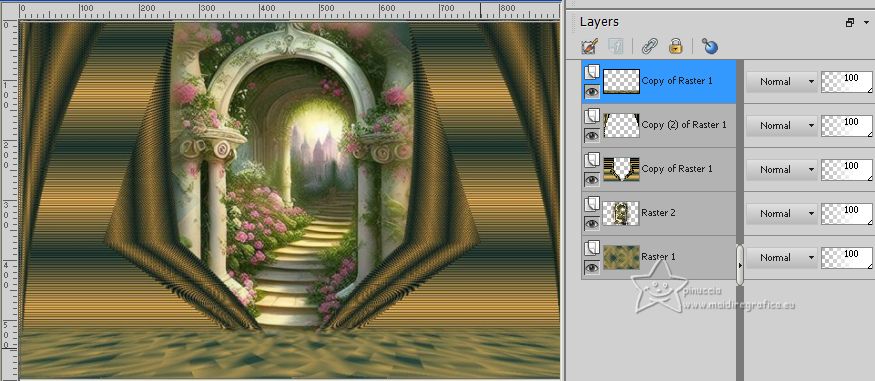
20. Activate the layer of the plugin Mura's Meister.
Layers>Arrange>Bring to Top.
21. Open the tube LD-model-1394 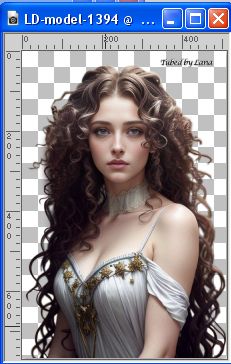
Erase the watermark and go to Edit>Copy.
Go back to your work and go to Edit>Paste as new layer.
Image>Resize, to 80%, resize all layers not checked.
Move  the tube to the right side. the tube to the right side.
22. Effects>3D Effects>Drop Shadow, color #000000.
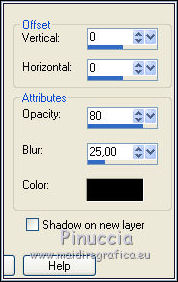
23. Open the tube Tineke'tubes-1165-fantasie 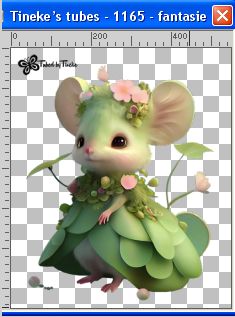
Erase the watermark and go to Edit>Copy.
Go back to your work and go to Edit>Paste as new layer.
Image>Resize, to 50%, resize all layers not checked.
Image>Mirror.
Move  the tube to the left side. the tube to the left side.
24. Effects>3D Effects>Drop Shadow, comme précédemment.

25. Layers>Merge>Merge All.
26. Image>Add borders, 2 pixels, symmetric, background color #26443c.
Image>Add borders, 3 pixels, symmetric, foreground color #fdc361.
Image>Add borders, 40 pixels, symmetric, color #ad5c6d.
27. Activate your Magic Wand Tool  , tolerance and feather 0, , tolerance and feather 0,
and click in the last border to select it.
28. Effects>Plugins>Filters Unlimited 2.0 - Sandflower special "v" - Color Cocktail, default settings.
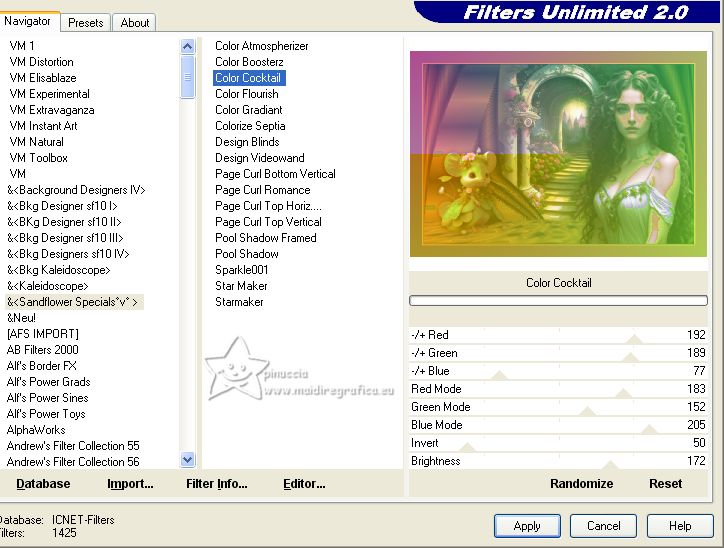
29. Effects>Plugins>Graphics Plus - Cross Shadow.
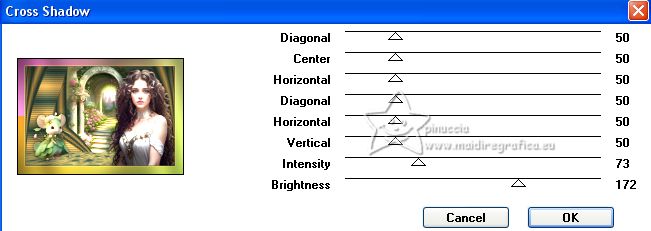
30. Selections>Invert.
Effects>3D Effects>Drop Shadow, same settings.

Selections>Select None.
31. Sign your work on a new layer.
Add, if you want, the author's watermark; in this case, please don't forget the translator's watermark.
32. Image>Add borders, 2 pixels, symmetric, background color #26443c.
33. Layers>Merge>Merge All and save as jpg.
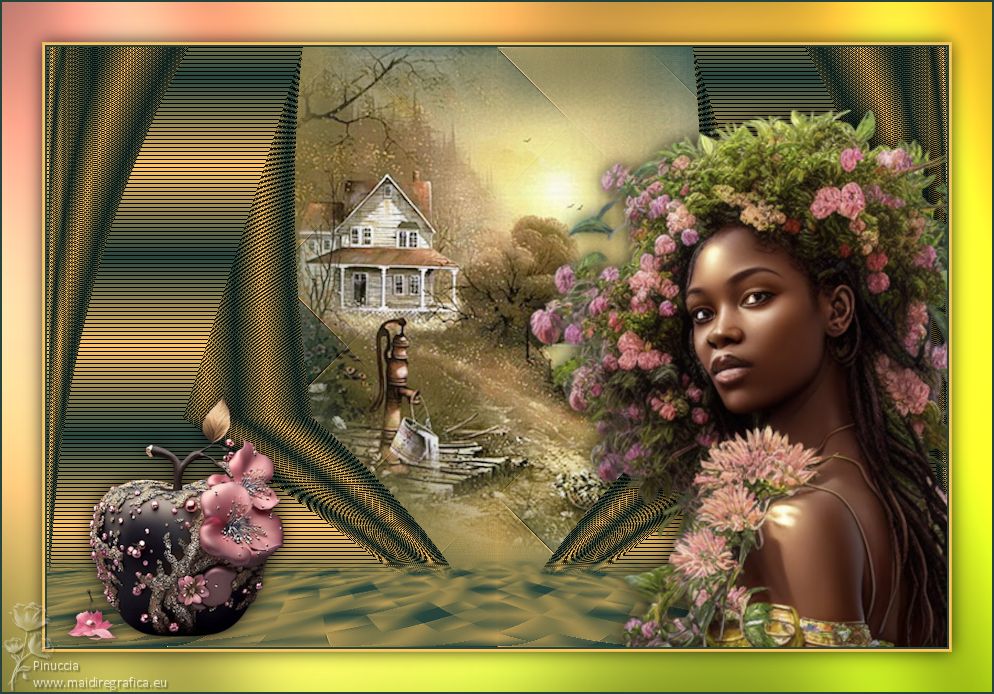
For the tubes of this version thanks Riet et Beatriz; le misted (Paysagemist-Lamaisond'Evy21) n'est pas signé

If you have problems or doubts, or you find a not worked link, or only for tell me that you enjoyed this tutorial, write to me.
9 June 2023

|

