|
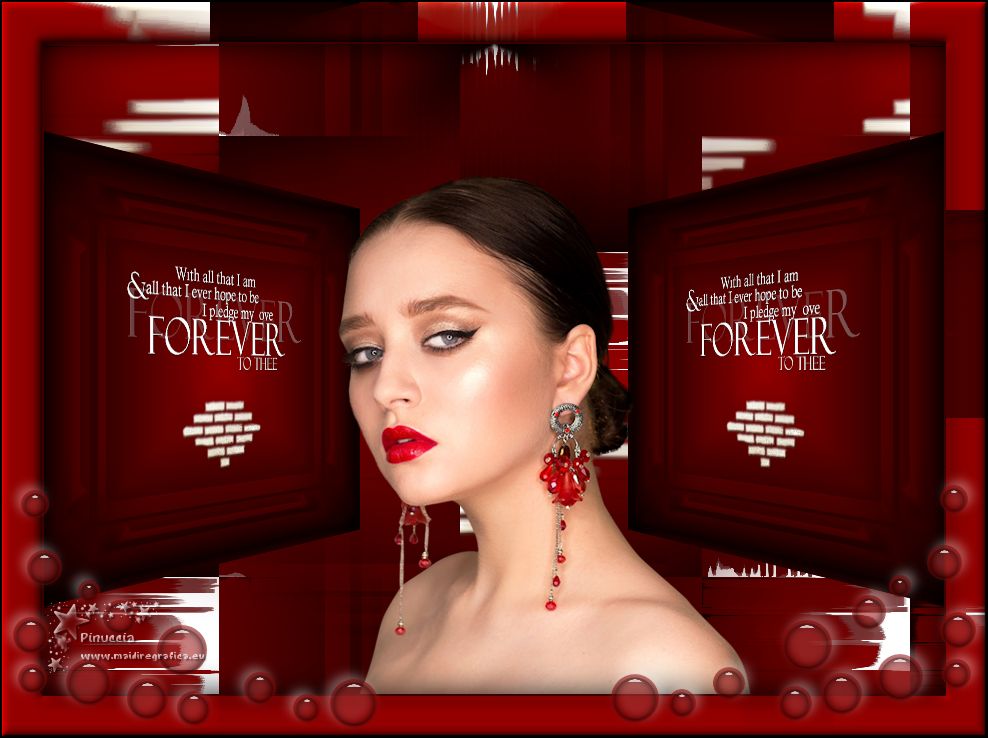
TAG FOREVER


This tutorial was translated with PSPX7 but it can also be made using other versions of PSP.
Since version PSP X4, Image>Mirror was replaced with Image>Flip Horizontal,
and Image>Flip with Image>Flip Vertical, there are some variables.
In versions X5 and X6, the functions have been improved by making available the Objects menu.
In the latest version X7 command Image>Mirror and Image>Flip returned, but with new differences.
See my schedule here
 French translation here French translation here
 Your versions ici Your versions ici
For this tutorial, you will need:
Material
here
femme792-coly tube by Colybrix
Texto Forever_To_Tree
Belscrap_spring_El 5 Free
Adorno_forever_nines
(you find here the links to the material authors' sites)
Plugins
consult, if necessary, my filter section here
Filters Unlimited 2.0 here
Alf's Border FX - Mirror Bevel here
Kang 3 - Liquid you too ici
Andromeda - Perspective here
Mehdi - Sorting Tiles here
Filters Alf's Border FX and Kang can be used alone or imported into Filters Unlimited.
(How do, you see here)
If a plugin supplied appears with this icon  it must necessarily be imported into Unlimited it must necessarily be imported into Unlimited

You can change Blend Modes according to your colors.
In the newest versions of PSP, you don't find the foreground/background gradient (Corel_06_029).
You can use the gradients of the older versions.
The Gradient of CorelX here
1. Open a new transparent image 900 x 650 pixels.
2. Set your foreground color to #000000,
and your background color to #940000.

Set your foreground color to a Foreground/Background Gradient, style Rectangular.
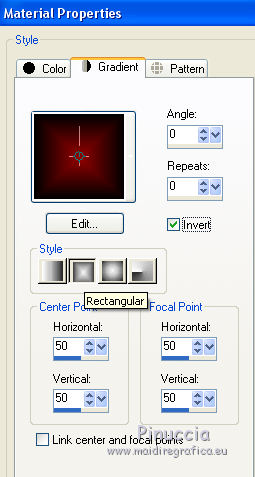
Flood Fill  the transparent image with your Gradient. the transparent image with your Gradient.
3. Effects>Plugins>Alf's Border FX - Mirror Bevel
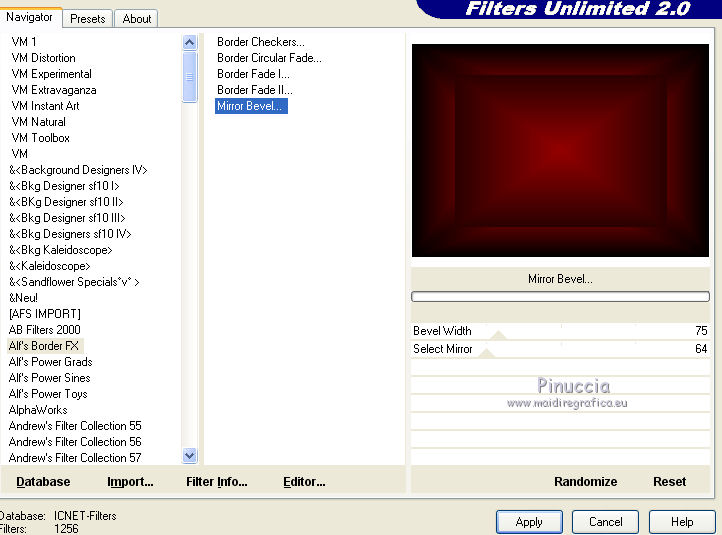
4. Effects>Plugins>Kang 3 - Liquid you too

5. Open Texto Forever_To_Tree and go to Edit>Copy.
Go back to your work and go to Edit>Paste as new layer.
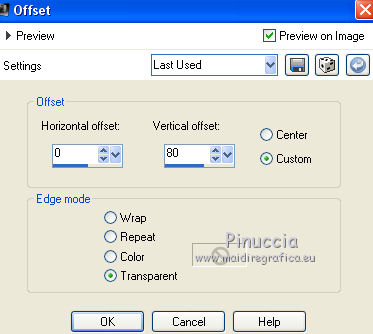
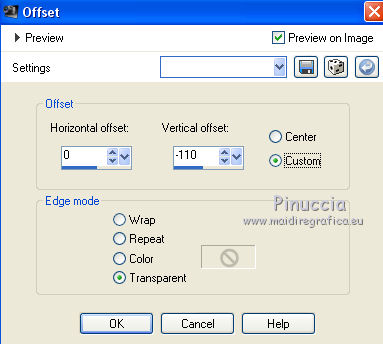
6. Effects>Image Effects>Offset.
7. Open Belscrap_spring_El 5 Free and go to Edit>Copy.
Go back to your work and go to Edit>Paste as new layer.
8. Effects>Image Effects>Offset.
9. Layers>Merge>Merge visible.
10. Layers>Duplicate.
Image>Resize, to 80%, resize all layers not checked.
before going on, see the next steps up to point 13.
I found the solution to not have the opposite text;
to you to decide if to follow this solution or not
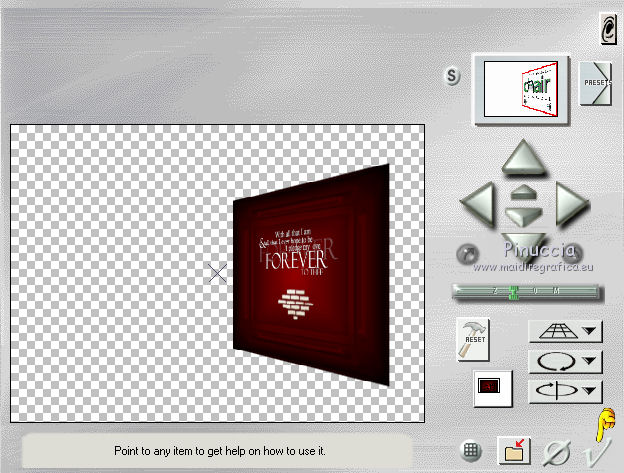
11. Effects>Plugins>Andromeda - Perspective
click on Presets
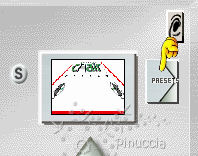
Set the settings and click on the sign at the bottom right to apply

Again click on the sign at the bottom right to close.
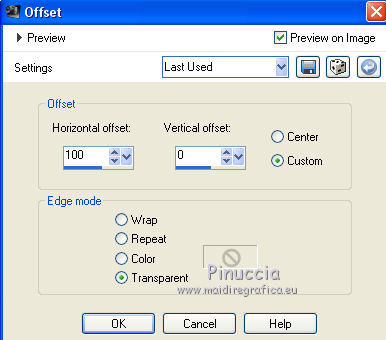
12. Effects>Image Effects>Offset
13. Layers>Duplicate.
Image>Mirror.
Result

Here is my solution to not have the opposite text.
Duplicate the image a second time, and close the second copy.
Activate the layer below of the first copy.
Effects>Plugins>Andromeda - Perspective
click on Presets

Set the settings and click on the sign at the bottom right to apply

Again click on the sign at the bottom right to close.

12. Effects>Image Effects>Offset

13. Open and activate the layer above of the second copy.
Image>Mirror.
Repeat Effects>Plugins>Andromeda - Perspective, same settings.
Effects>Image Effects>Offset, same settings.

Image>Mirror.
Resultat

14. Activate your bottom layer.
Effects>Plugins>Mehdi - Sorting Tiles.

15. Effects>Image Effects>Seamless Tiling, default settings.

16. Activate your top layer.
Open the tube femme792-coly, erase the watermark and go to Edit>Copy.
Go back to your work and go to Edit>Paste as new layer.
Image>Resize, 1 time to 80% and 1 time to 90%, resize all layers not checked.
Place  the tube in the center. the tube in the center.
17. Adjust>Color Balance
Nines works with the version PSP 9,
and this is the effect only until the version PSP 9.
Here below the settings en italian
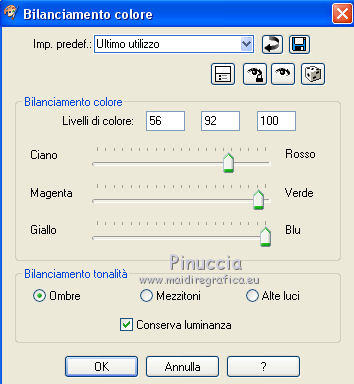
Here below the tag before and after the apply of the effect

Here below, the Color Balance of the next versions

To your to decide if skip the step or to adapt the effect to your tube
18. Layers>Merge>Merge All.
19. Image>Add borders, 2 pixels, symmetric, color #6f0000.
Image>Add borders, 40 pixels, symmetric, color #ffffff.
20. Activate your Magic Wand Tool 
and click on the white border to select it.
21. Invert the colors to change the gradient,
clicking on the arrow between the little palettes
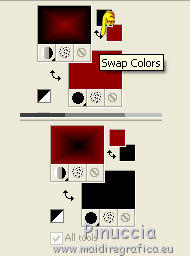
Flood Fill  the selection with your Gradient. the selection with your Gradient.
22. Effects>Modules Externes>Mehdi - Sorting Tiles, same settings

23. Effects>3D Effects>Inner Bevel, color #ffffff.
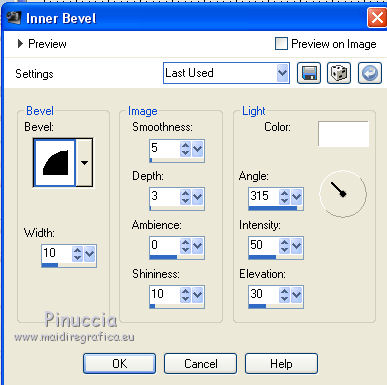
24. Selections>Invert.
Effects>3D Effects>Drop Shadow, color #000000.
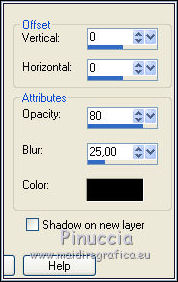
Keep selected.
25. Layers>New Raster Layer.
Effects>3D Effects>Cutout, color #ffffff.
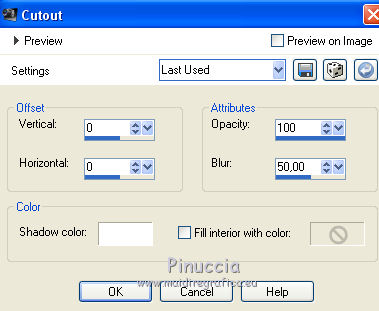
Selections>Select None.
26. Open the tube Adorno_forever_nines and go to Edit>Copy.
Go back to your work and go to Edit>Paste as new layer.
Move  the tube down, as in my example. the tube down, as in my example.
27. Layers>Merge>Merge All.
Image>Add borders, 2 pixels, symmetric, color #000000.
Sign your work and save as jpg.
Version with tube by Anna.br

 Your versions here Your versions here

If you have problems or doubts, or you find a not worked link, or only for tell me that you enjoyed this tutorial, write to me.
10 Janvier 2021
|

