|
TAG FLOURISH


This tutorial was translated with PSPX7 but it can also be made using other versions of PSP.
Since version PSP X4, Image>Mirror was replaced with Image>Flip Horizontal,
and Image>Flip with Image>Flip Vertical, there are some variables.
In versions X5 and X6, the functions have been improved by making available the Objects menu.
In the latest version X7 command Image>Mirror and Image>Flip returned, but with new differences.
See my schedule here
 French translation here French translation here
 Your versions ici Your versions ici
For this tutorial, you will need:
Material
here
Tube 3197-woman -LB TUBES
smArt_maszk_76
Corners_380_nines
(you find here the links to the material authors' sites)
Plugins
consult, if necessary, my filter section here
Filters Unlimited 2.0 here
Mehdi - Sorting Tiles here
Toadies - Picasso's Another Word here
FM Tile Tools - Saturation Emboss here
Sandflower Special "v" - Color Flourish here
AP Lines - Lines SilverLining here
Tramages - Pool Shadow here
Filters Tramages and Toadies can be used alone or imported into Filters Unlimited.
(How do, you see here)
If a plugin supplied appears with this icon  it must necessarily be imported into Unlimited it must necessarily be imported into Unlimited

You can change Blend Modes according to your colors.
In the newest versions of PSP, you don't find the foreground/background gradient (Corel_06_029).
You can use the gradients of the older versions.
The Gradient of CorelX here

Copy the Selection in the Selection Folder.
Open the mask in PSP and minimize it with the rest of the material.
1. Open a new transparent image 900 x 600 pixels.
2. Set your foreground color to #1f2034,
and your background color to #67758f.

Set your foreground color to a Foreground/Background Gradient, style Sunburst.
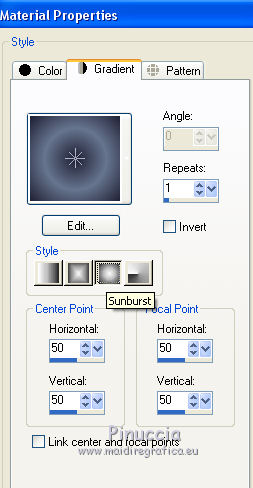
Flood Fill  the transparent image with your Gradient. the transparent image with your Gradient.
3. Effects>Plugins>Sorting Tiles.

4. Layers>Duplicate.
Effects>Plugins>Toadies - Picasso's another word.

5. Effects>Image Effects>Offset.
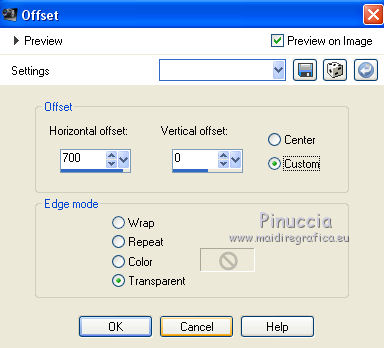
6. Layers>Duplicate.
Image>Mirror.
Layers>Merge>Merge down.
7. Effects>Geometric Effects>Perspective vertical.
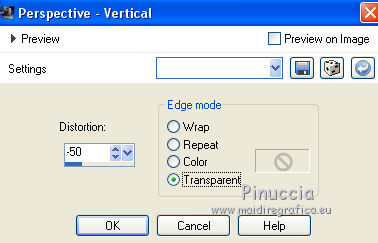
8. Effects>Distortion Effects>Pinch.

Effects>Edge Effects>Enhance.
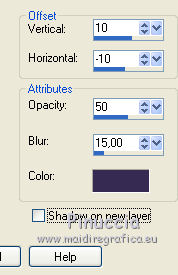
9. Effects>3D Effects>Drop Shadow, color #000000.
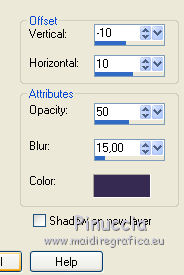
Repeat Drop Shadow, vertical and horizontal 10/-10
10. Activate your bottom layer.
Layers>New Raster Layer.
Flood Fill  the layer with your background color #67758f. the layer with your background color #67758f.
11. Layers>New Mask layer>From image
Open the menu under the source window and you'll see all the files open.
Select the mask smArt_maszk_76.
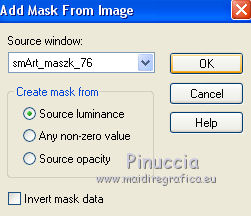
Layers>Merge>Merge Group.
12. Effects>Edge Effects>Enhance More.
Reduce the opacity of this layer to 50%.
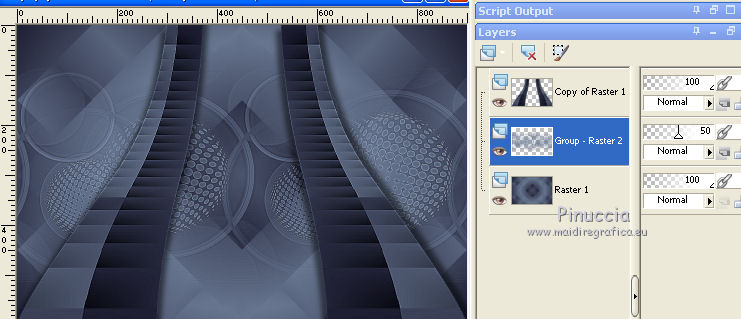
13. Layers>Merge>Merge Down.
14. Effects>Plugins>FM Tile Tools - Saturation Emboss, default settings.

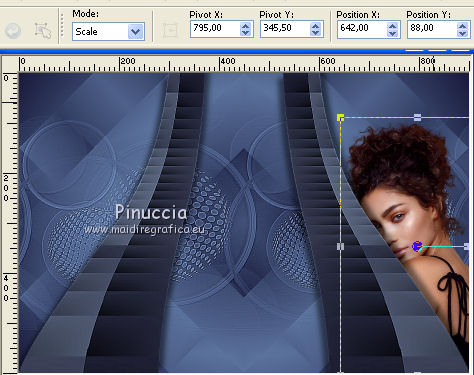
15. Open the tube 3197-woman -LB TUBES, erase the watermark and go to Edit>Copy.
Go back go your work and go to Edit>Paste as new layer.
Image>Resize, to 80%, resize all layers not checked.
K key on the keyboard to activate your Pick Tool 
and set Position X: 642,00 and Position Y.: 88,00
attention please,
if you delete the watermark after copying and resizing the tube,
to move it: Effects>Image Effects>Offset.
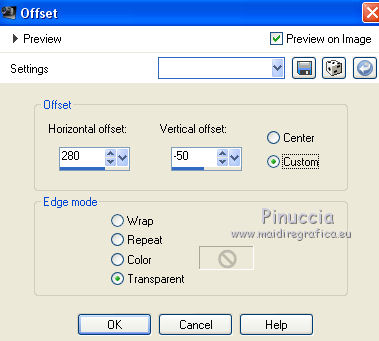
Reduce the opacity of this layer to 50%.
16. Layers>Duplicate.
Image>Mirror.
Layers>Merge>Merge Down.
Change the Blend Mode of this layer to Luminance (legacy)
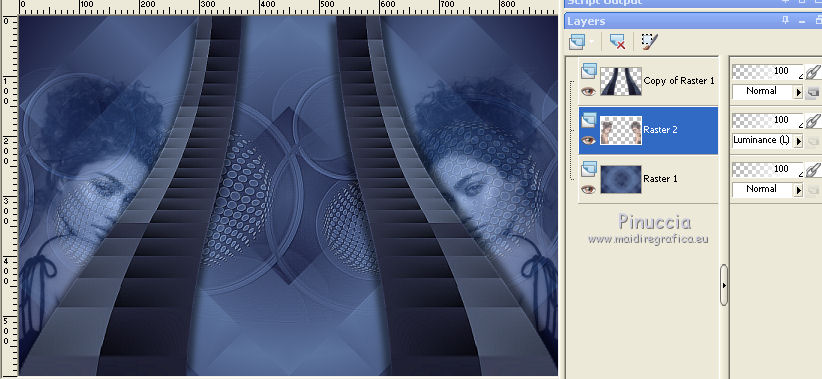
17. Layers>Merge>Merge visible.
18. Selections>Load/Save Selection>Load Selection from disk.
Look for and load the selection sel.380.nines
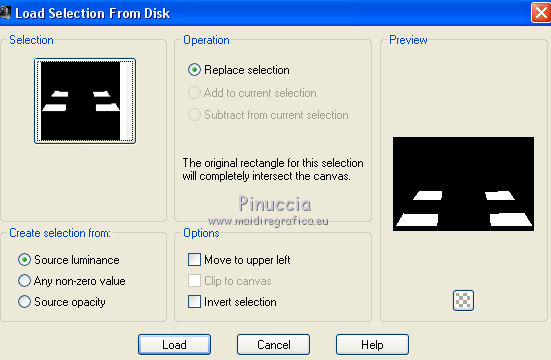
Selections>Promote Selection to layer.
Selections>Select None.
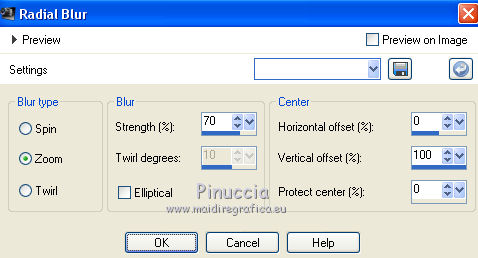
19. Adjust>Blur>Radial Blur.
20. Effects>Plugins>Filters Unlimited 2.0 - Sandflower Special "v" - Color Flourish.

21. Effects>Plugins>AP Lines - Lines SilverLining.

22. Effects>Plugins>FM Tile Tools - Saturation Emboss, default settings.

Effects>Edge Effects>Enhance.
23. Layers>Duplicate.
Edit>Paste as new layer (the tube by Beatriz is still in memory).
Image>Resize, to 90%, resize all layers not checked.
Place  the tube in the center. the tube in the center.
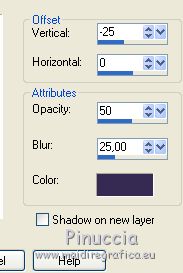
24. Effects>3D Effects>Drop Shadow, color #000000.
25. Layers>Merge>Merge All.
26. Image>Add borders, 2 pixels, symmetric, foreground color #1f2034.
Image>Add borders, 10 pixels, symmetric, background color #67758f.
27. Activate your Magic Wand Tool 
and click on the last border to select it.
28. Effects>Plugins>Tramages - Pool Shadow.

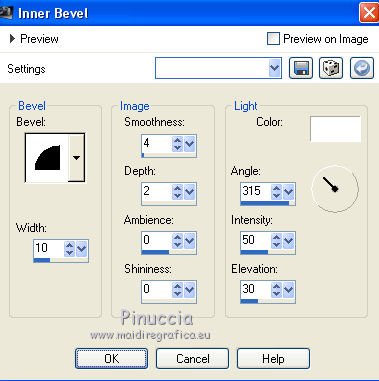
29. Effects>3D Effects>Inner Bevel.
Selections>Select None.
30. Image>Add borders, 40 pixels, symmetric, color #ffffff.
Select this border with your Magic Wand Tool 
31. Effects>Plugins>Filters Unlimited 2.0 - Sandflower Special "v" - Color Flourish.

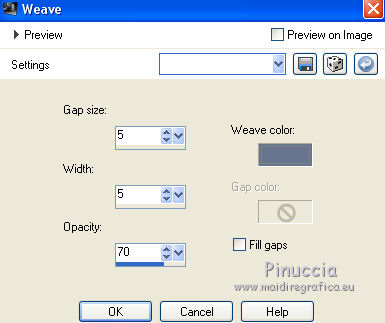
32. Effects>Texture Effects>Weave
weave color: background color #67758f
Selections>Select None.
33. Open the tube corner (or use a corner of yours), and go to Edit>Copy.
Go back to your work and go to Edit>Paste as new layer.
34. Sign your work on a new layer.
Layers>Merge>Merge All.
35. Image>Add borders, 1 pixel, symmetric, background color #67758f.
Save as jpg.
Version with tube by Maryse

 Your versions here Your versions here

If you have problems or doubts, or you find a not worked link, or only for tell me that you enjoyed this tutorial, write to me.
6 April 2021
|


