|
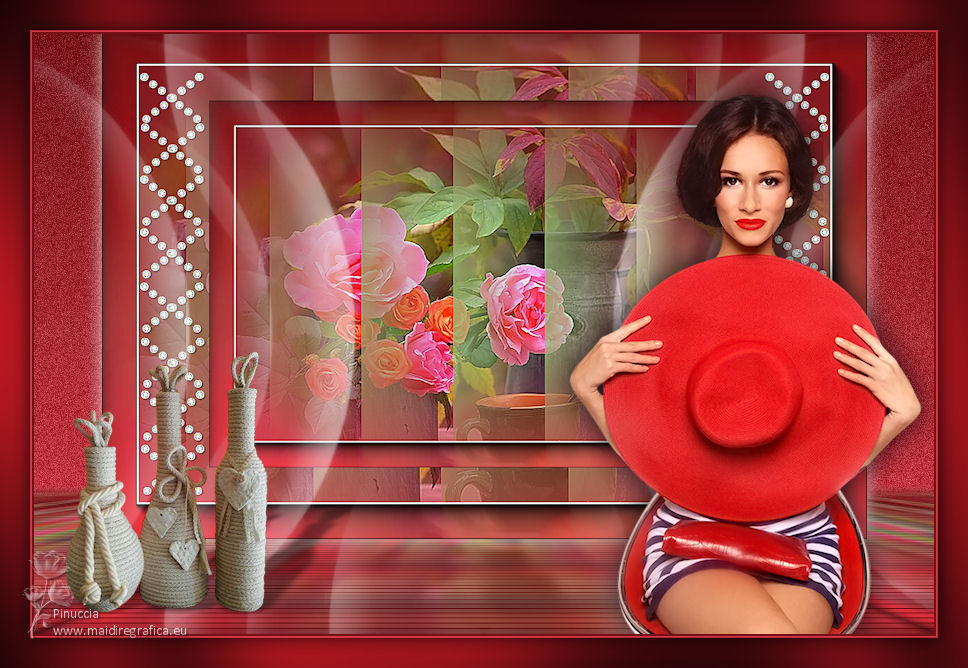
TAG EL BODEGON
 THE STILL LIFE THE STILL LIFE


This tutorial was translated with PSPX7 but it can also be made using other versions of PSP.
Since version PSP X4, Image>Mirror was replaced with Image>Flip Horizontal,
and Image>Flip with Image>Flip Vertical, there are some variables.
In versions X5 and X6, the functions have been improved by making available the Objects menu.
In the latest version X7 command Image>Mirror and Image>Flip returned, but with new differences.
See my schedule here
 French translation here French translation here
 Your versions ici Your versions ici
For this tutorial, you will need:
Material
here
Tube 2021-82-Nadege
Misted_Criss 5204 by Linda Gatita
Tube 3618-Still Life-LB TUBES
Decor_diamantes_nines_395
NarahsMasks_1653
(you find here the links to the material authors' sites)
Plugins
consult, if necessary, my filter section here
Filters Unlimited 2.0 here
Willy - Tablet Lines here
Eye Candy 3.1 - Perspective Shadow here
Tramages - Pool Shadow here
AAA Frames - Foto Frame here
Mura's Meister - Perspective Tiling here
Filters Willy and Tramages can be used alone or imported into Filters Unlimited.
(How do, you see here)
If a plugin supplied appears with this icon  it must necessarily be imported into Unlimited it must necessarily be imported into Unlimited

You can change Blend Modes according to your colors.
In the newest versions of PSP, you don't find the foreground/background gradient (Corel_06_029).
You can use the gradients of the older versions.
The Gradient of CorelX here
Open the mask in PSP and minimize it with the rest of the material.
1. Open a new transparent image 900 x 600 pixels.
2. Set your foreground color to #d83948,
and your background color to #750f15.

Set your foreground color to a Foreground/Background Gradient, style Linear.

Flood Fill  the transparent image with your Gradient. the transparent image with your Gradient.
3. Open the tube Criss 5204 and go to Edit>Copy.
Go back to your work and go to Edit>Paste as new layer.
4. Effects>Texture Effects>Blinds - color #9cb577.

5. Layers>Merge>Merge visible.
6. Adjust>Sharpness>Sharpen More.
7. Effects>Plugins>AAA Frames - Foto Frame.
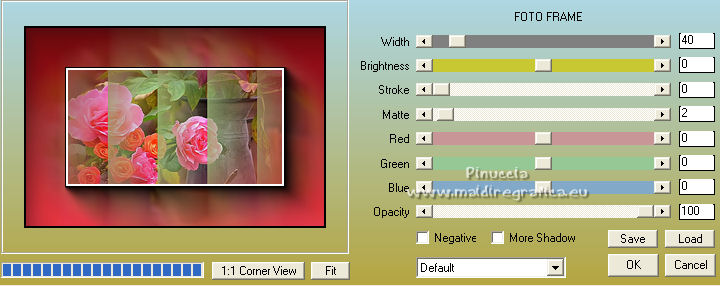
8. Edit>Copy.
9. Image>Resize, 1 time to 80% and 1 time to 90%, resize all layers not checked.
10. Layers>New Raster Layer.
Layers>Arrange>Send to Bottom.
11. Selections>Select All.
Edit>Paste into Selection.
Selections>Select None.
12. Open Decor_diamantes_nines_395 and go to Edit>Copy.
Go back to your work and go to Edit>Paste as new layer.
13. Layers>Merge>Merge visible.
14. Edit>Copy.
15. Image>Resize, to 85%, resize all layers not checked.
16. Effects>Image Effects>Offset.

17. Layers>New Raster Layer.
Layers>Arrange>Send to Bottom.
18. Selections>Select All.
Edit>Paste into Selection.
Selections>Select None.
19. Adjust>Blur>Gaussian Blur - radius 10.

20. Effects>Plugins>Willy - Tablet lines.
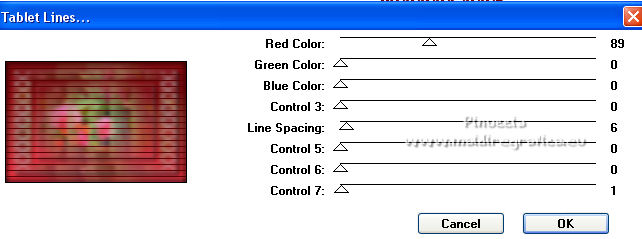
21. Effects>Plugins>Mura's Meister - Perspective Tiling.
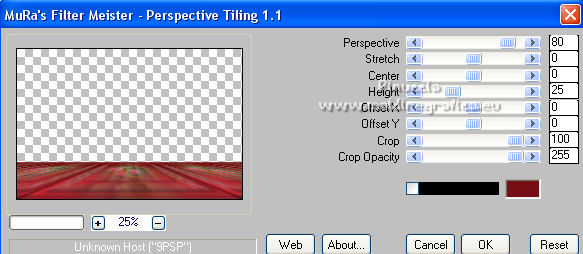
22. Activate your Magic Wand Tool 

Click on the transparent part to select it.
Press CANC on the keyboard 
Selections>Select None.
23. Layers>New Raster Layer.
Layers>Arrange>Send to Bottom.
Flood Fill  the layer with your gradient. the layer with your gradient.
24. Adjust>Add/Remove Noise>Add Noise.

25. Activate the layer Merged.
Effects>3D Effects>Drop Shadow, color #ffffff.

26. Layers>New Raster Layer.
Layers>Arrange>Bring to Top.
Set your foreground color to white #ffffff.
Flood Fill  the layer with color white. the layer with color white.
27. Layers>New Mask layer>From image
Open the menu under the source window and you'll see all the files open.
Select the mask NarahsMasks_1653.

Layers>Merge>Merge Group.
Reduce the opacity of this layer to 50%.
28. Layers>Duplicate.
Effects>Image Effects>Seamless Tiling, default settings.

29. Open the tube 2021-82-Nadege and go to Edit>Copy.
Go back to your work and go to Edit>Paste as new layer.
Image>Resize, 1 time to 80% and 1 time to 90%, resize all layers not checked.
Move  the tube to the right side. the tube to the right side.
30. Effects>3D Effects>Drop Shadow, color #000000.

31. Open the tube 3618-Still Life-LB TUBES and go to Edit>Copy.
Go back to your work and go to Edit>Paste as new layer.
Image>Resize, 2 times à 70%, resize all layers not checked.
Move  the tube to the left side. the tube to the left side.
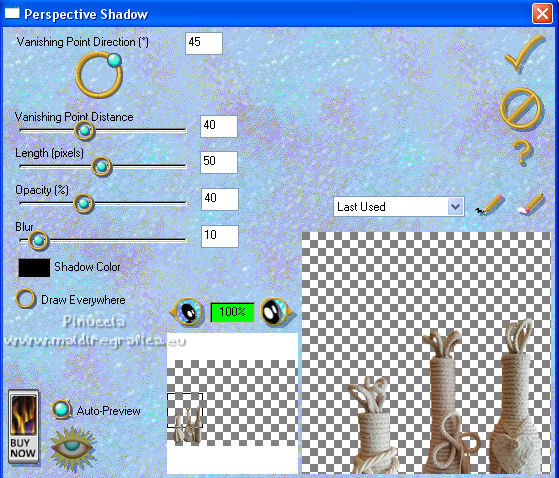
32. Effects>Plugins>Eye Candy 3.1 - Perspective Shadow, color #000000.
33. Layers>Merge>Merge All.
34. Image>Add borders, 2 pixels, symmetric, color #750f15.
Image>Add borders, 2 pixels, symmetric, color #d83948.
Image>Add borders, 30 pixels, symmetric, color #750f15.
35. Activate your Magic Wand Tool 
(don't forget to set again tolerance and feather to 0)
and click on the last border to select it.
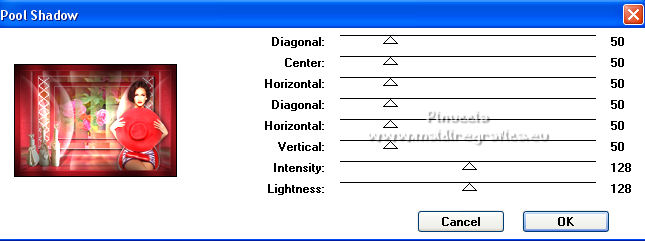
36. Effects>Plugins>Tramages - Pool Shadow, default settings.
37. Selections>Invert.
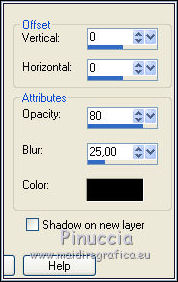
Effects>3D Effects>Drop Shadow, couleur #000000.
Selections>Select None.
38. Sign your work and save as jpg.
For the tubes of this version thanks Luz Cristina and Beatriz
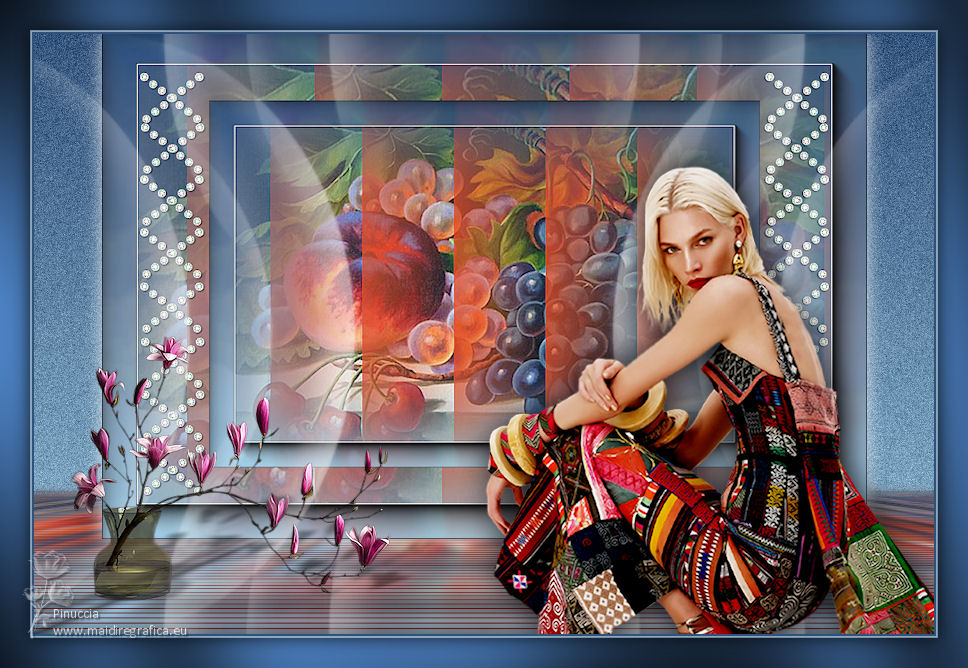
 Your versions here Your versions here

If you have problems or doubts, or you find a not worked link, or only for tell me that you enjoyed this tutorial, write to me.
12 April 2022

|
 THE STILL LIFE