|
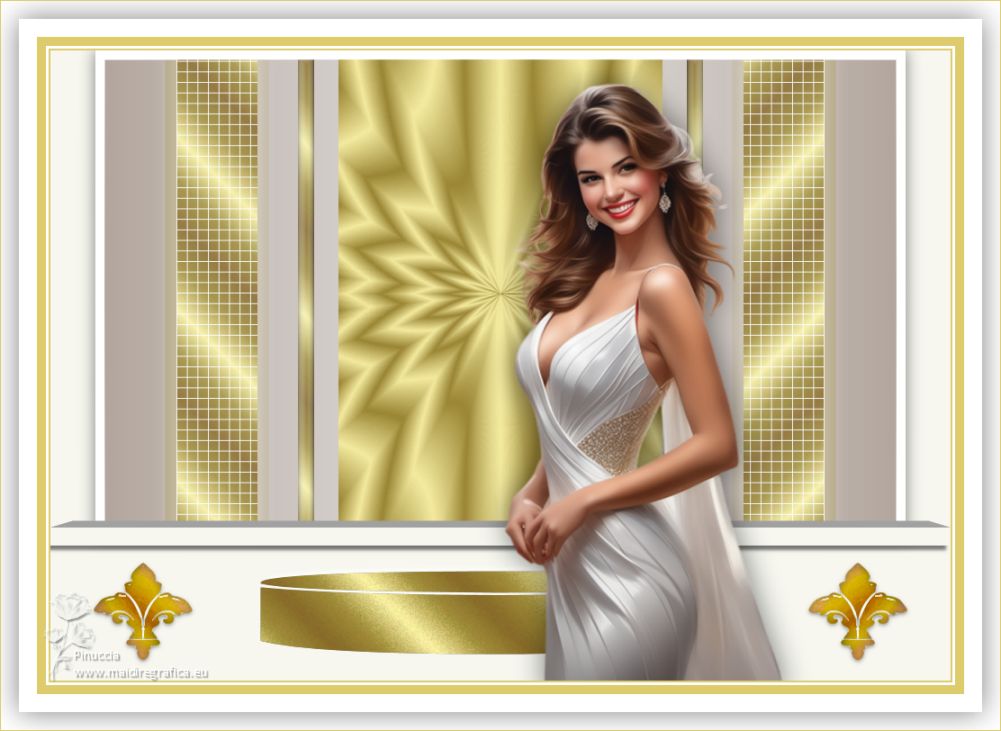
TAG DORADO 2


This tutorial was translated with PSPX7 but it can also be made using other versions of PSP.
Since version PSP X4, Image>Mirror was replaced with Image>Flip Horizontal,
and Image>Flip with Image>Flip Vertical, there are some variables.
In versions X5 and X6, the functions have been improved by making available the Objects menu.
In the latest version X7 command Image>Mirror and Image>Flip returned, but with new differences.
See my schedule here
 French translation here French translation here
 Your versions ici Your versions ici
For this tutorial, you will need:

Thanks for the tube Kamil.
The rest of the material is by Nines.
(you find here the links to the material authors' sites)

consult, if necessary, my filter section here
Filters Unlimited 2.0 here
&<Background Designers IV> - @Splish (to import in Unlimited) here
VM Toolbox - Grid here
Alien Skin Eye Candy 5 Impact - Extrude here
Filters VM Toolbox can be used alone or imported into Filters Unlimited.
(How do, you see here)
If a plugin supplied appears with this icon  it must necessarily be imported into Unlimited it must necessarily be imported into Unlimited

You can change Blend Modes according to your colors.
In the newest versions of PSP, you don't find the foreground/background gradient (Corel_06_029).
You can use the gradients of the older versions.
The Gradient of CorelX here

Open the pattern Image 008 in PSP and minimize it with the rest of the material.
1. Open a new transparent image 1000 x 600 pixels.
2. Set your foreground color to #b1a49b,
and your background color to #e9e8e8.

Set your foreground color to a Foreground/Background Gradient, style Linear.
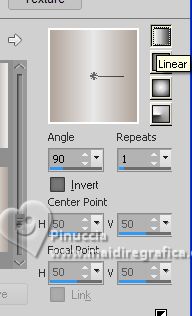
Flood Fill  the transparent image with your Gradient. the transparent image with your Gradient.
3. Selection Tool 
(no matter the type of selection, because with the custom selection your always get a rectangle)
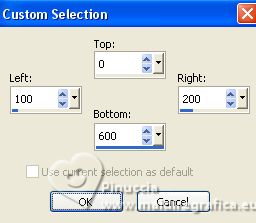
clic on the Custom Selection 
and set the following settings.
4. Set your foreground color to Pattern, and select the golden pattern Image 008 with these settings.
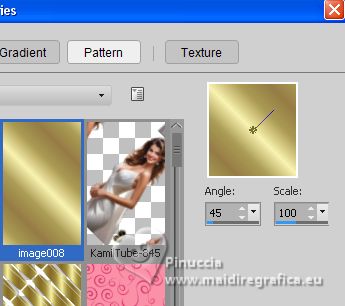
Layers>New Raster Layer.
Flood Fill  the selection with your golden pattern. the selection with your golden pattern.
5. Effects>Plugins>VM Toolbox - Grid.
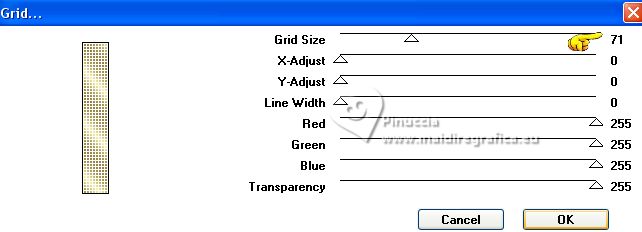
Selections>Select None.
6. Effects>3D Effects>Chisel - color #ad9c57.
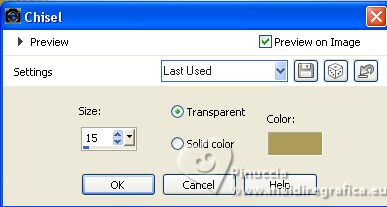
7. Effects>3D Effects>Drop Shadow, color #ffffff.
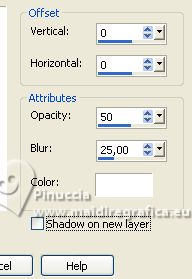
8. Layers>Duplicate.
Image>Mirror.
9. Custom Selection 
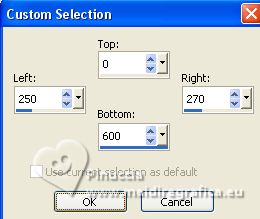
10. Layers>New Raster Layer.
Flood Fill  the selection with your golden pattern. the selection with your golden pattern.
11. Effects>3D Effects>Buttonize, color #ffffff.
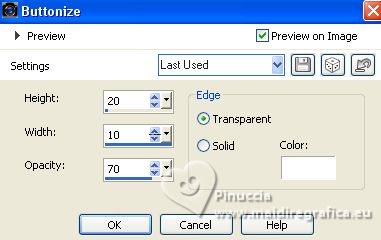
Selections>Select None.
12. Layers>Duplicate.
Image>Mirror.
13. Custom Selection 
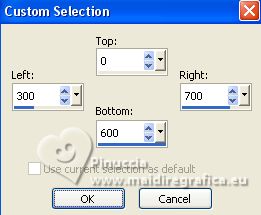
14. Set your foreground color to #a4934e,
and your background color to #f1e9a9.

Set your foreground color to a Foreground/Background Gradient, style Linear.
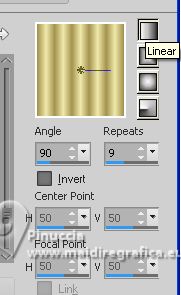
15. Layers>New Raster Layer.
Flood Fill  the layer with your Gradient. the layer with your Gradient.
16. Effects>Plugins>Filters Unlimited 2.0 - &<Background Designers IV> - @Splish.
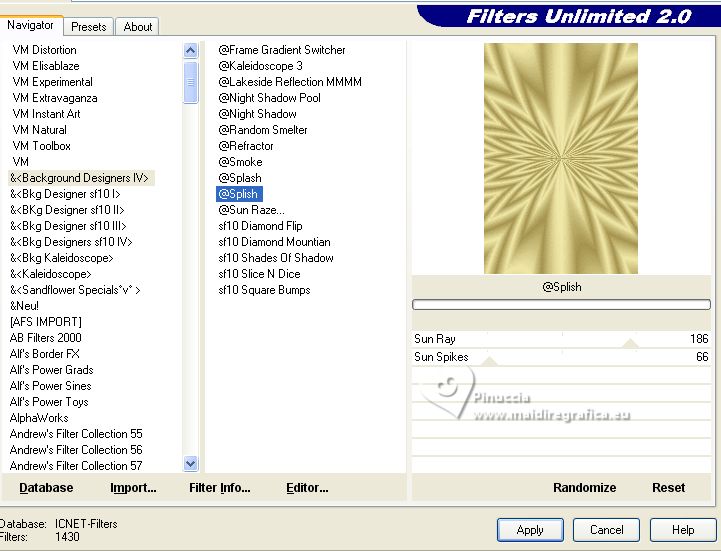
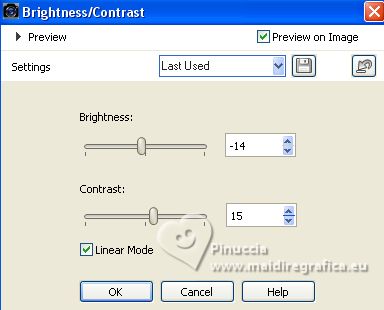
17. Adjust>Brightness and Contrast>Brightness and Contrast.
18. Layers>Merge>Merge visible.
19. Image>Resize, to 90%, resize all layers not checked.
20. Selections>Select All.
Selections>Float.
Selections>Defloat.
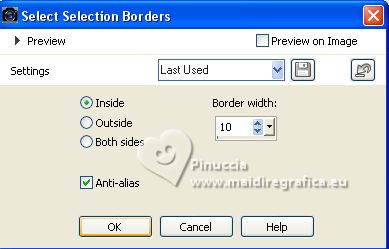
21. Selections>Modify>Select Selection Borders.
22. Set your foreground color to #ffffff.
Layers>New Raster Layer.
Flood Fill  the selection with color #ffffff. the selection with color #ffffff.
Selections>Select None.
23. Layers>Merge>Merge Down.
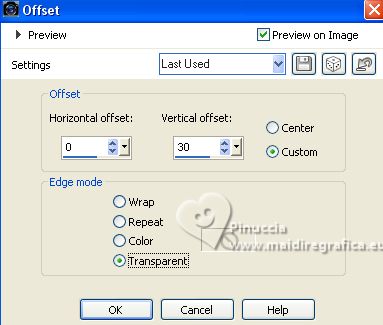
24. Effects>Image Effects>Offset.
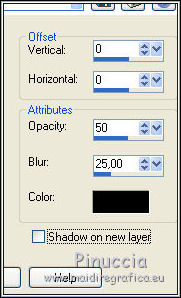
25. Effects>3D Effects>Drop Shadow, color #000000.
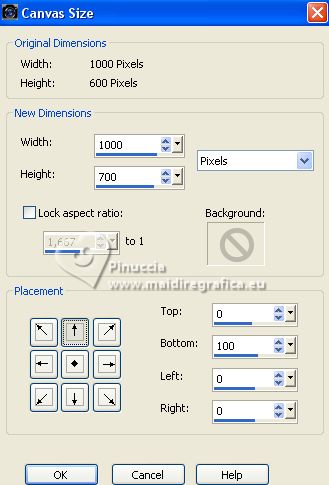
25. Image>Canvas Size - 1000 x 700 pixels.
26. Set your foreground color to #f7f8f0.
Layers>New Raster layer.
Layers>Arrange>Send to Bottom.
Flood Fill  the layer with your foreground color #f7f8c0. the layer with your foreground color #f7f8c0.
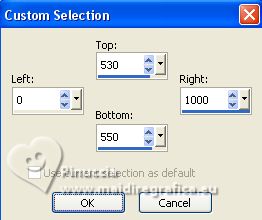
27. Custom Selection 
28. Selections>Promote Selection to Layer.
Layers>Arrange>Bring to Top.
Keep selected.
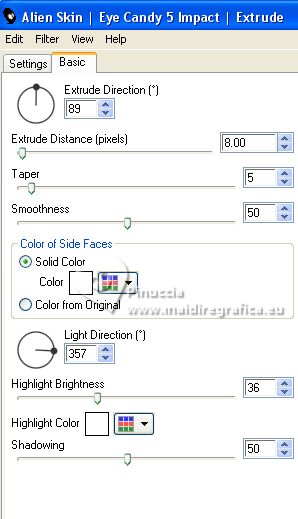
29. Effects>Plugins>Alien Skin Eye Candy 5 Impact - Extrude
color #ffffff.
Selections>Select None.
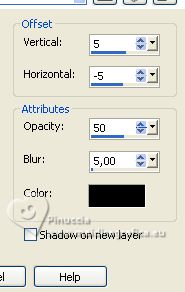
30. Effects>3D Effects>Drop shadow, color #000000.
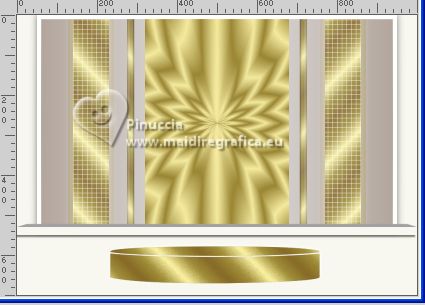
31. Open SK_Randon_nines 
Edit>Copy.
Go back to your work and go to Edit>Paste as new layer.
Move  the tube down the tube down
32. Open SK_dorado_nines 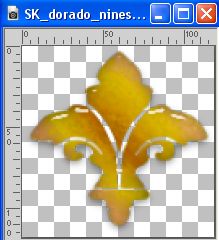
Edit>Copy.
Go back to your work and go to Edit>Paste as new layer.
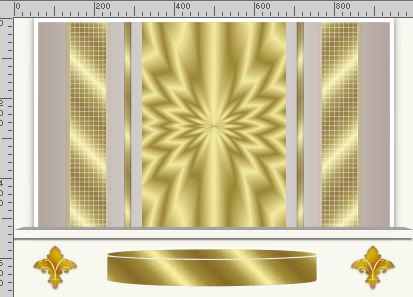
Move  the tube at the bottom left. the tube at the bottom left.
33. Layers>Duplicate.
Image>Mirror.
34. Open the tube Kamil-Tube-845 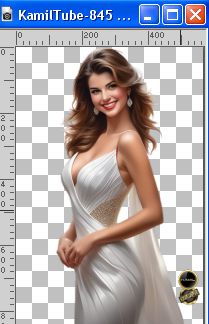
Erase the watermark and go to Edit>Copy.
Go back to your work and go to Edit>Paste as new layer.
Image>Resize, to 80%, resize all layers not checked.
Place  correctly the tube correctly the tube
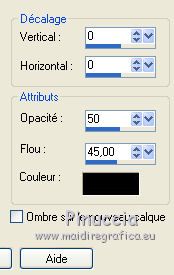
35. Effects>3D Effects>Drop Shadow, color #000000.
36. Sign your work on a new layer.
If you want and decide to add the author's watermark, please don't forget the translator's watermark.
37. Layers>Merge>Merge All.
38. For the borders, set your foreground color to #ddcb6c.
Image>Add borders, 2 pixels, symmetric, foreground color #ddcb6c.
Image>Add border, 3 pixels, symmetric, color #ffffff.
Image>Add borders, 10 pixels, symmetric, foreground color #ddcb6c.
Image>Add border, 40 pixels, symmetric, color #ffffff.
39. Selections>Select All.
Selections>Modify>Contract - 20 pixels.
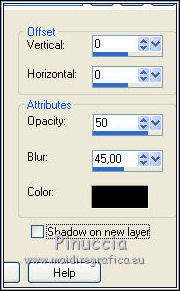
40. Effects>3D Effects>Drop Shadow, color #000000.
Selections>Select None.
41. Image>Add borders, 1 pixel, symmetric, foreground color #ddcb6c.
42. Image>Resize, 90%, resize all layers checked.
43. Save as jpg.
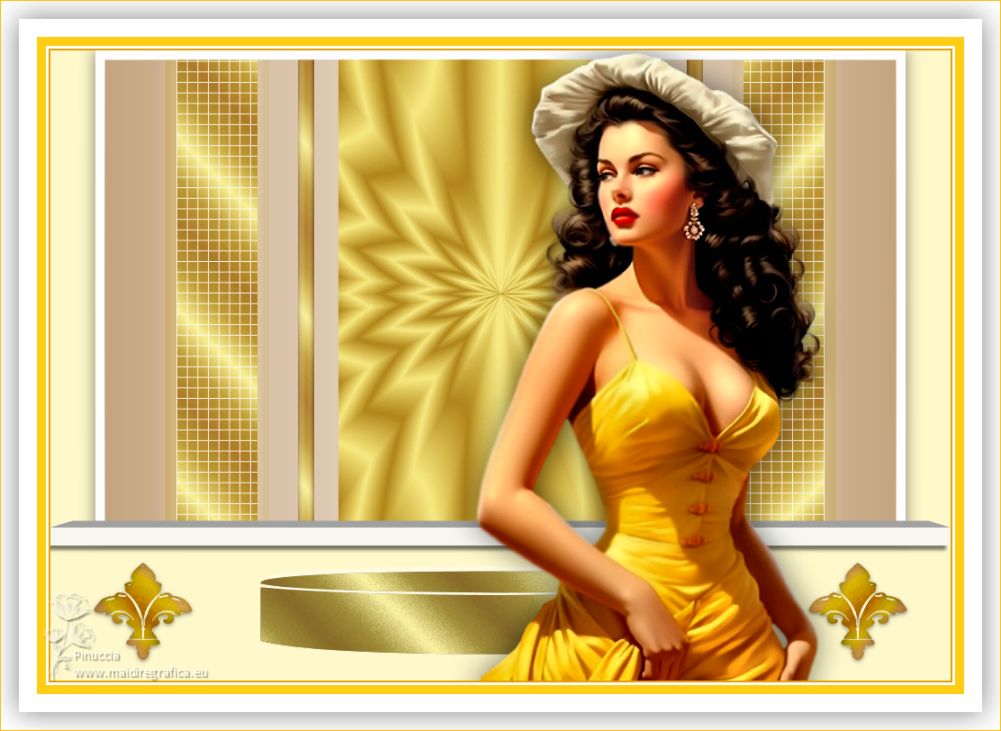
For the tube of this version thanks Luz Cristina

If you have problems or doubts, or you find a not worked link, or only for tell me that you enjoyed this tutorial, write to me.
10 September 2023

|

