|
TAG DECO-ETE

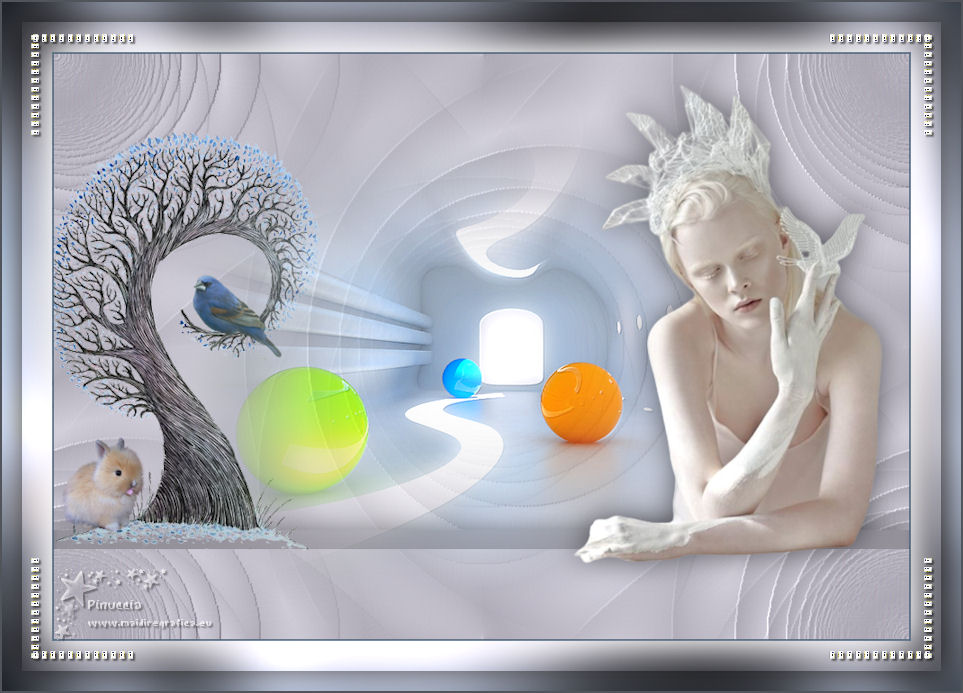

This tutorial was translated with PSPX7 but it can also be made using other versions of PSP.
Since version PSP X4, Image>Mirror was replaced with Image>Flip Horizontal,
and Image>Flip with Image>Flip Vertical, there are some variables.
In versions X5 and X6, the functions have been improved by making available the Objects menu.
In the latest version X7 command Image>Mirror and Image>Flip returned, but with new differences.
See my schedule here
 French translation here French translation here
 Your versions ici Your versions ici
For this tutorial, you will need:
Material
here
Renee_TUBES_Fev.59
Renee_tube_ete
Kamil-deco-37
Corner_diamantes_nines
(you find here the links to the material authors' sites)
Plugins
consult, if necessary, my filter section here
Filters Unlimited 2.0 here
Graphics Plus - Cross Shadow here
AFS IMPORT - QUANTUMT here
FM Tile Tools - Saturation Emboss here
Alien Skin Eye Candy 5 Impact - Extrude here
Filters Graphics Plus and AFS IMPORT can be used alone or imported into Filters Unlimited.
(How do, you see here)
If a plugin supplied appears with this icon  it must necessarily be imported into Unlimited it must necessarily be imported into Unlimited

You can change Blend Modes according to your colors.
In the newest versions of PSP, you don't find the foreground/background gradient (Corel_06_029).
You can use the gradients of the older versions.
The Gradient of CorelX here
Copy the Preset Emboss 3 in the Presets Folder.
1. Open a new transparent image 926 x 650 pixels.
2. Set your foreground color to #d4d1dd,
and your background color to #aca8b4.

Set your foreground color to a Foreground/Background Gradiente, style Sunburst.
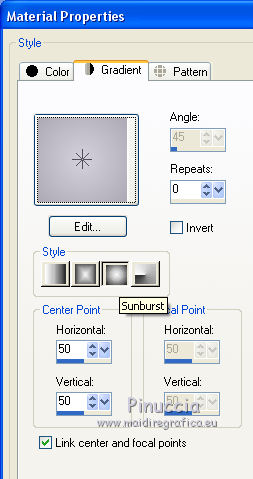
Flood Fill  the transparent image with your Gradient. the transparent image with your Gradient.
3. Effects>Plugins>Filters Unlimited 2.0 - AFS IMPORT - QUANTUMT, default settings.
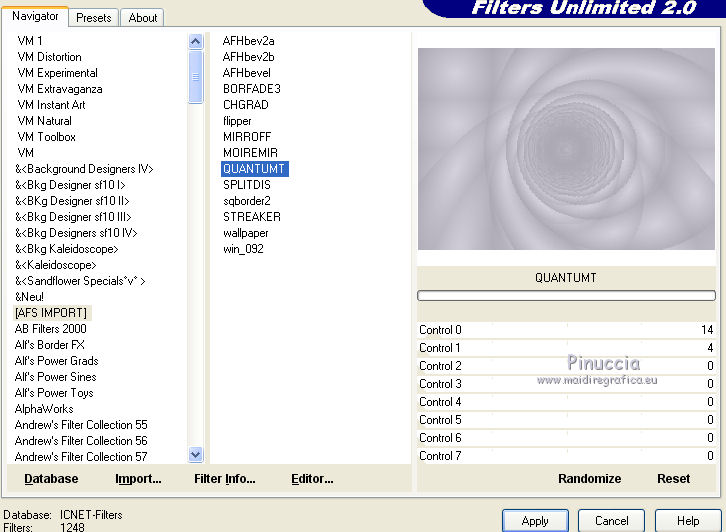
4. Effects>Image Effects>Seamless Tiling.

5. Effects>User Defined Filter - select the preset Emboss 3 and ok.

6. Activate your Selection Tool 
(no matter the type of selection, because with the custom selection your always get a rectangle)
clic on the Custom Selection 
and set the following settings.
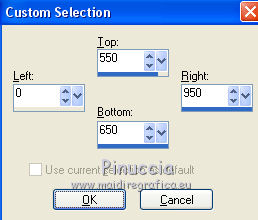
Selections>Promote Selection to Layer.
Selections>Select None.
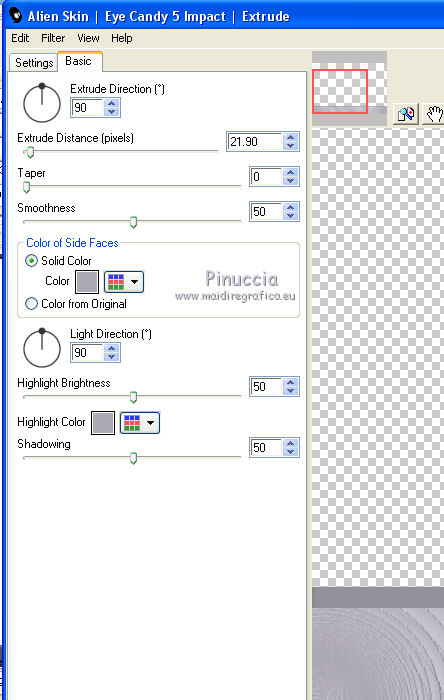
7. Effects>Plugins>Alien Skin Eye Candy 5 Impact - Extrude.
Solid Color and Highlight Color: your background color #aca8b4.
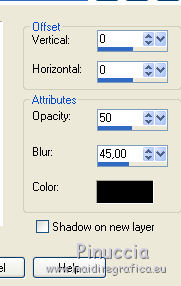
8. Effects>3D Effects>Drop Shadow, color #000000.
9. Open the tube Renee_tube_ete and go to Edit>Copy.
Go back to your work and go to Edit>Paste as new layer.
Image>Resize, to 80%, resize all layers not checked.
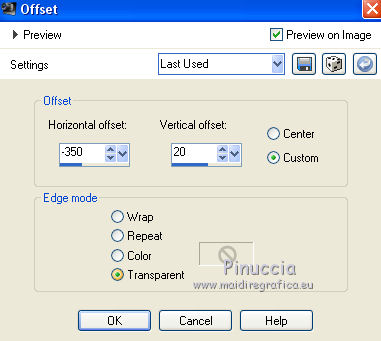
10. Effects>Image Effects>Offset.
Reduce the opacity of this layer to 90%.
11. Open the tube Kamil-deco-37 and go to Edit>Copy.
Go back to your work and go to Edit>Paste as new layer.
Don't move it.
12. Effects>Plugins>FM Tile Tools - Saturation Emboss, default settings.

13. Open the tube Renee_TUBES_Fev.59 and go to Edit>Copy.
Go back to your work and go to Edit>Paste as new layer.
Image>Resize, to 90%, resize all layers not checked.
Move  the tube to the right side. the tube to the right side.
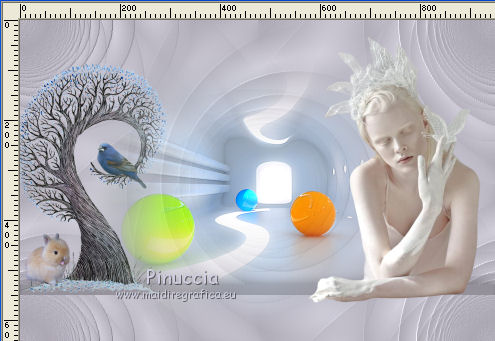
14. Effects>3D Effects>Drop Shadow, same settings.

15. Layers>Merge>Merge All.
16. Image>Add borders, 2 pixels, symmetric, color #4d667d.
17. Image>Resize, to 90%, resize all layers checked.
18. Edit>Copy.
19. Image>Add borders, 50 pixels, symmetric, color #ffffff.
Activate your Magic Wand Tool 
and click on this border to select it.
Edit>Paste into Selection.
20. Adjust>Blur>Gaussian Blur - radius 20.

21. Effects>Plugins>Graphics Plus - Cross Shadow, default settings.

22. Selections>Invert.
Effects>3D Effects>Drop Shadow, color #ffffff.
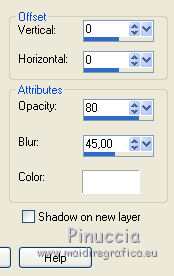
Edit>Repeat Drop Shadow.
Selections>Select None.
23. Selections>Select All.
Selections>Modify>Contract - 20 pixels.
24. Effects>3D Effects>Drop Shadow, same settings, but color #000000.

25. Open Corner_diamantes_nines and go to Edit>Copy.
Go back to your work and go to Edit>Paste as new layer.
26. Effects>3D Effects>Drop Shadow, color #000000.
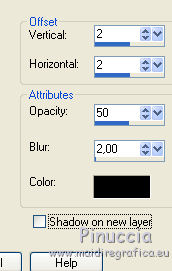
27. Sign your work on a new layer.
28. Layers>Merge>Merge All.
29. Image>Add borders, 2 pixels, symmetric, color #52545b.
Save as jpg.
Version with tubes by Luz Cristina and Markoffee
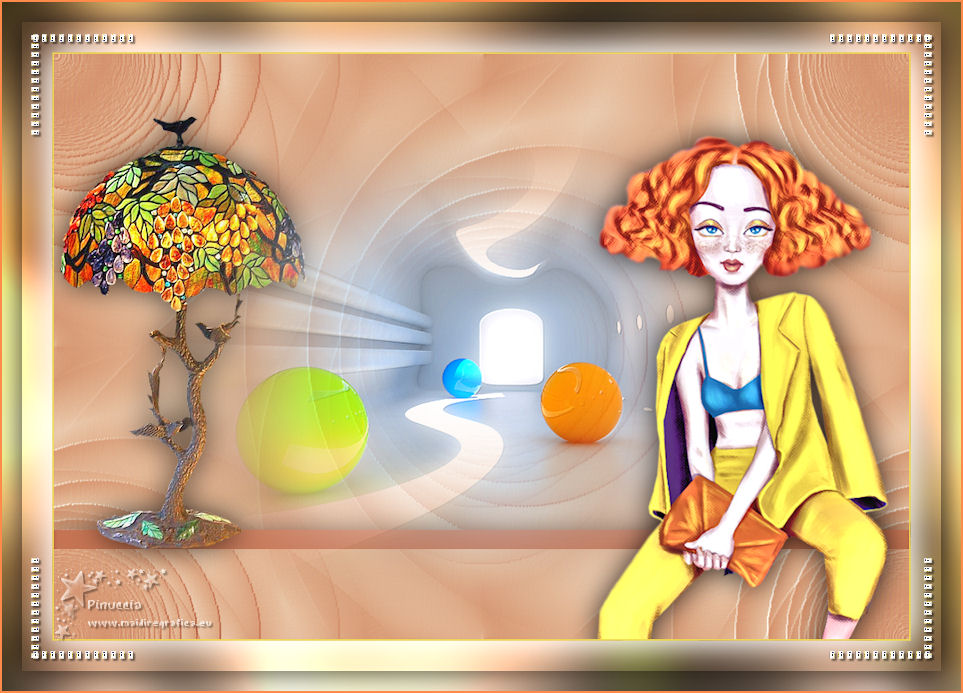
 Your versions here Your versions here

If you have problems or doubts, or you find a not worked link, or only for tell me that you enjoyed this tutorial, write to me.
29 June 2020
|


