|
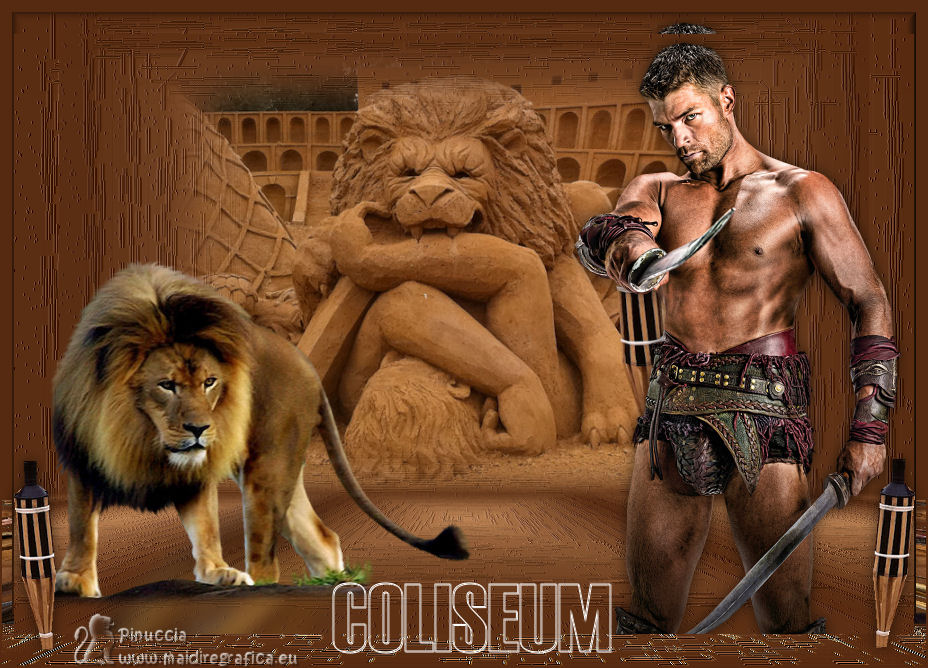
TAG COLISEUM


This tutorial was translated with PSPX7 but it can also be made using other versions of PSP.
Since version PSP X4, Image>Mirror was replaced with Image>Flip Horizontal,
and Image>Flip with Image>Flip Vertical, there are some variables.
In versions X5 and X6, the functions have been improved by making available the Objects menu.
In the latest version X7 command Image>Mirror and Image>Flip returned, but with new differences.
See my schedule here
 French translation here French translation here
 Your versions ici Your versions ici
For this tutorial, you will need:
Material
Sepia Tube-Spartacus (Spartacus-Liam Mclntyre)
Imagen marita-w-foto-sand2-bd-28-1-13
Tube 12286689990_animaux by Nikita
Adorno_391_nines
Texto_Coliseum_nines
(you find here the links to the material authors' sites)
Plugins
consult, if necessary, my filter section here
Alien Skin Eye Candy 5 Impact - Perspective Shadow here
Mura's Meister - Perspective Tiling here

You can change Blend Modes according to your colors.
In the newest versions of PSP, you don't find the foreground/background gradient (Corel_06_029).
You can use the gradients of the older versions.
The Gradient of CorelX here
1. Open a new transparent image 900 x 600 pixels.
2. Set your foreground color to #c18757,
and your background color to #562a10.

Set your foreground color to a Foreground/Background Gradient, style Rectangular.
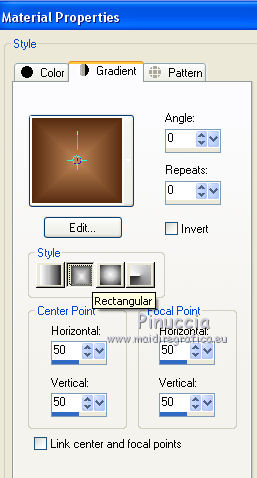
Flood Fill  the transparent image with your Gradient. the transparent image with your Gradient.
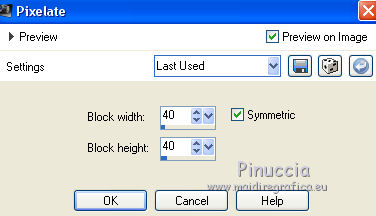
3. Effects>Distortion Effects>Pixelate.
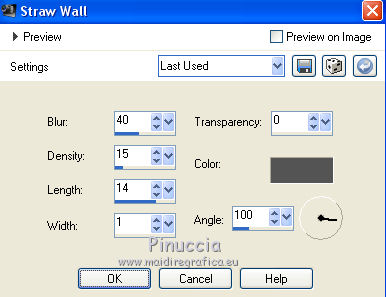
4. Effects>Texture Effects>Straw Wall, default settings (default color #555555).
5. Layers>Duplicate - 2 times.
Close the layer of the first copy and stay on the layer of the second copy.
6. Open the tube marita-w-foto-sand2-bd-28-1-13 and go to Edit>Copy.
Go back to your work and go to Edit>Paste as new layer.
7. Layers>Merge>Merge Down.
8. Image>Resize, to 90%, resize all layers not checked.
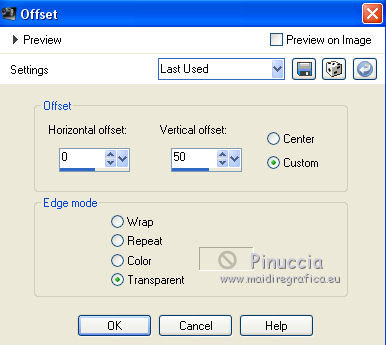
9. Effects>Image Effects>Offset.
10. Open and activate the closed layer.
Layers>Arrange>Bring to Top.
11. Effects>Plugins>Mura's Meister - Perspective Tiling.

12. Activate your Magic Wand Tool  with these settings with these settings

and clic on the transparent part to select it.
Press 5 times CANC on the keyboard 
Selctions>Select None.
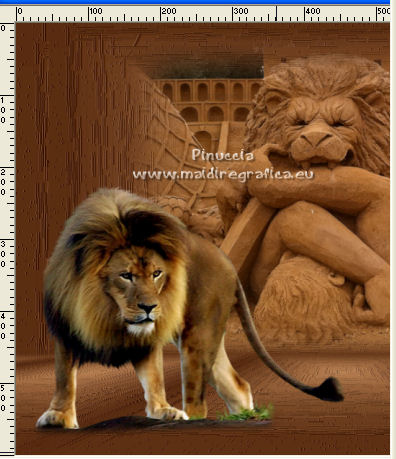
13. Open the tube 12286689990_animaux by Nikita and go to Edit>Copy.
Go back to your work and go to Edit>Paste as new layer.
Image>Resize, to 80%, resize all layers not checked.
Move  the tube to the left side. the tube to the left side.
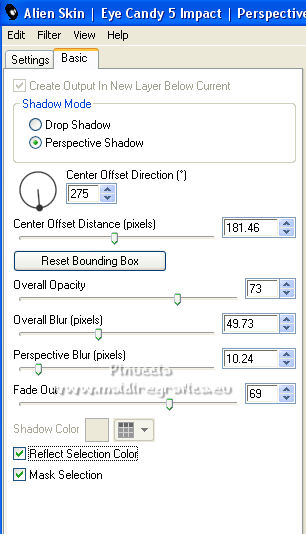
14. Effects>Plugins>Alien Skin Eye Candy 5 Impact - Perspective Shadow.
15. Open the tube Sepia Tube-Spartacus and go to Edit>Copy.
Go back to your work and go to Edit>Paste as new layer.
Image>Resize, to 50%, resize all layers not checked.
Move  the tube to the right side. the tube to the right side.
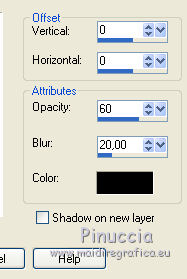
16. Effects>3D Effects>Drop Shadow, color #000000.
17. Layers>Merge>Merge All.
18. Image>Add borders, 2 pixels, symmetric, background color #562a10.
Image>Add borders, symmetric not checked, foreground color #c18757.
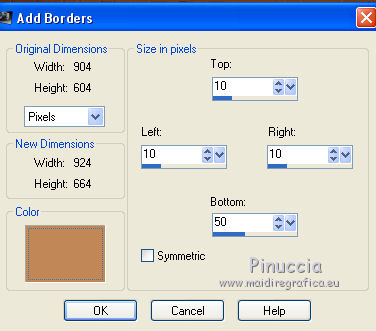
19. Activate your Magic Wand Tool  , feather and tolerance 0, , feather and tolerance 0,
and click on the last border to select it.
Flood Fill  the selection with your Gradient. the selection with your Gradient.
20. Effects>Distortion Effects>Pixelate
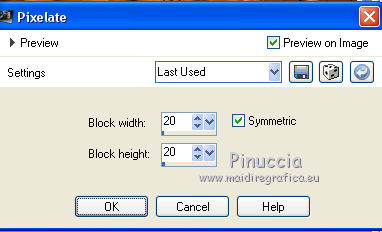
21. Effects>Distortion Effects>Straw Wall, same settings.

Effects>Edge Effects>Enhance More.
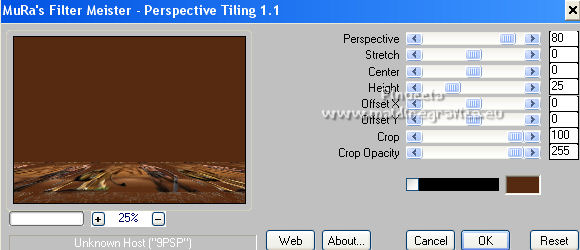
22. Effets>Modules Externes>Mura's Meister - Perspective Tiling.
23. Selections>Invert.
Effects>3D Effects>Buttonize, background color #562a10.
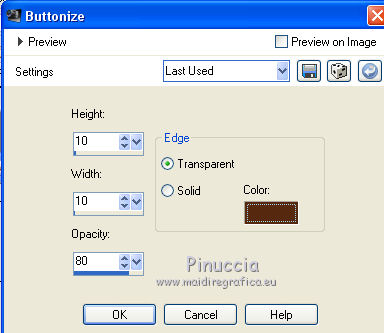
Selections>Select None.
24. Open the tube Adorno_391_nines and go to Edit>Copy.
Go back to your work and go to Edit>Paste as new layer.
25. Effects>Image Effects>Offset.
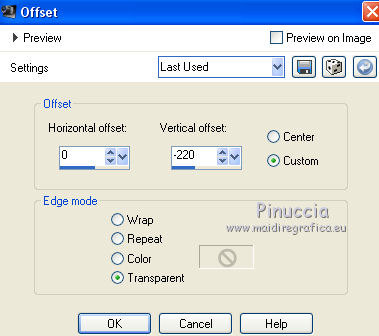
26. Open the tube Texto_Coliseum_nines and go to Edit>Copy.
Go back to your work and go to Edit>Paste as new layer.
Move  the tube down the tube down
or activate your Pick Tool 
and set Position X: 330,00 and Position Y: 580,00

27. Layers>Merge>Merge All.
28. Image>Add borders, 2 pixels, symmetric, color background color #562a10.
29. Sign your work and save as jpg.
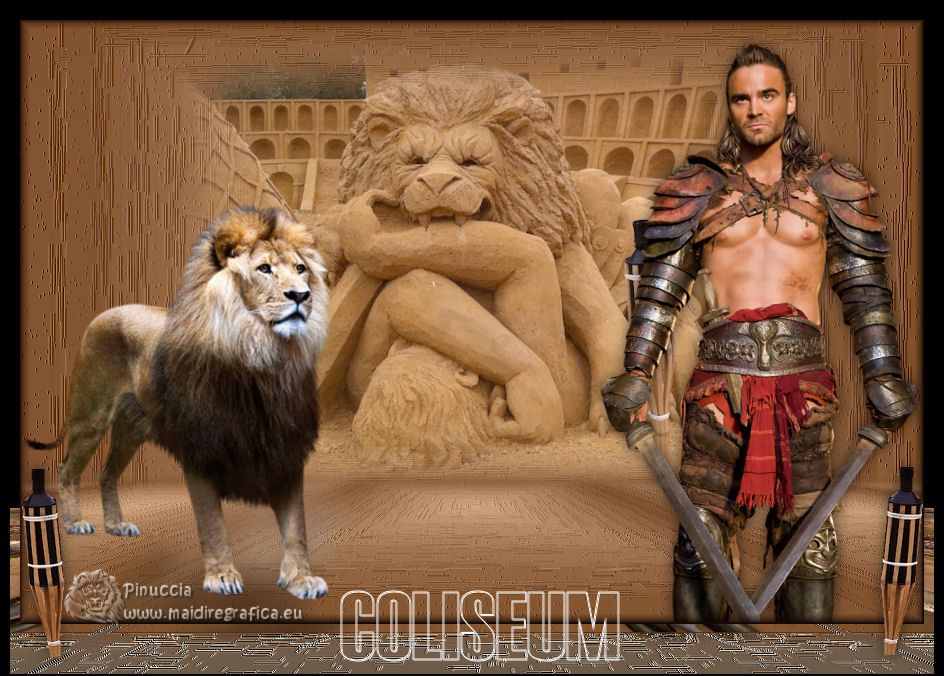
 Your versions here Your versions here

If you have problems or doubts, or you find a not worked link, or only for tell me that you enjoyed this tutorial, write to me.
18 January 2022

|

