|
TAG ARTISTIC


This tutorial was translated with PSPX7 but it can also be made using other versions of PSP.
Since version PSP X4, Image>Mirror was replaced with Image>Flip Horizontal,
and Image>Flip with Image>Flip Vertical, there are some variables.
In versions X5 and X6, the functions have been improved by making available the Objects menu.
In the latest version X7 command Image>Mirror and Image>Flip returned, but with new differences.
See my schedule here
 French translation here French translation here
 Your versions ici Your versions ici
For this tutorial, you will need:
Material
here
Artistic321_beas_misted
DBK AA Male-Model-740
Tube 4-tbedith
Texture Brick wall
seleccion sel.365.nines
(you find here the links to the material authors' sites)
Plugins
consult, if necessary, my filter section here
Filters Unlimited 2.0 here
Simple - Top Left Mirror here
Mura's Meister - Perspective Tiling here
Tramages - Pool Shadow here
Krusty's FX vol.1.1.0 - Radial Texturizer - dans le matériel
Filters Tramages, Krusty and Simple can be used alone or imported into Filters Unlimited.
(How do, you see here)
If a plugin supplied appears with this icon  it must necessarily be imported into Unlimited it must necessarily be imported into Unlimited

You can change Blend Modes according to your colors.
In the newest versions of PSP, you don't find the foreground/background gradient (Corel_06_029).
You can use the gradients of the older versions.
The Gradient of CorelX here
Copy the texture in the Textures Folder.
Copy the Selection in the Selection Folder.
1. Open a new transparent image 900 x 500 pixels.
2. Set your foreground color to #722102,
and your background color to #f4edab.

Set your foreground color to a Foreground/Background Gradient, style Linear.
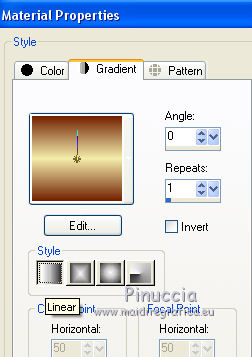
Flood Fill  the transparent image with your Gradient. the transparent image with your Gradient.
3. Effects>Plugins>Filters Unlimited 2.0 - Tile & Mirror - Kaleidoscope 2.

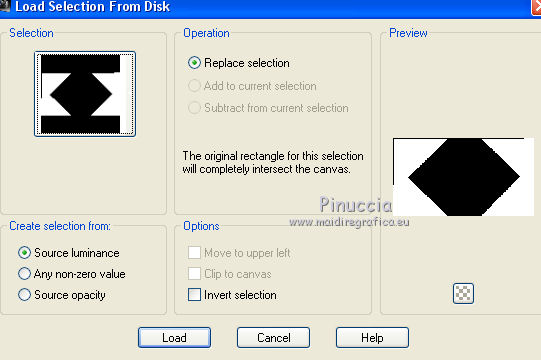
4. Selections>Load/Save Selection>Load Selection from Disk.
Look for and load the selection sel.365.nines.
5. Effects>Texture Effects>Texture - select the texture Bakstenen muur, color #ffffff.

Selections>Select None.
6. Layers>Duplicate.
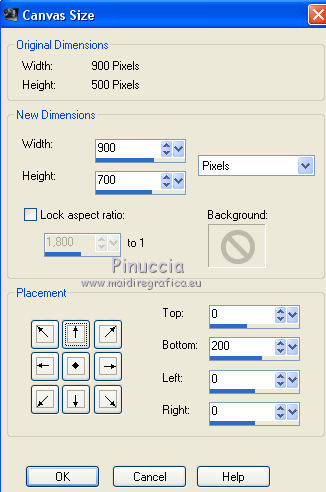
7. Image>Canvas Size - 900 x 700 pixels.
8. Effects>Plugins>Mura's Meister - Perspective Tiling.

9. Activate the bottom layer.
Selections>Load/Save Selection>Load Selection from Disk.
Load again the selection sel.365.nines.

Selections>Promote Selection to Layer.
Selections>Select None.
10. Effects>Plugins>Filters Unlimited 2.0 - Simple - Top Left Mirror.

11. Effects>3D Effects>Drop Shadow, color #000000.

12. Effects>Distortion Effects>Polar Coordinates

13. Layers>Duplicate.
Image>Flip.
14. Layers>Merge>Merge Down.
15. Effects>Geometric Effects>Circle

16. Image>Free Rotate - 90 degrees to right.

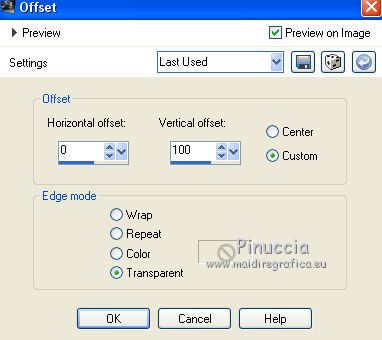
17. Effects>Image Effects>Offset.
18. Activate your bottom layer.
Selections>Load/Save Selection>Load Selection from Disk.
Load again the selection sel.365.nines.

19. Open Artistic321_beas_misted and go to Edit>Copy.
Go back to your work and go to Edit>Paste as new layer.
Image>Resize, to 80%, resize all layers not checked.
Place  rightly the tube on the selection rightly the tube on the selection

Press CANC on the keyboard 
Selections>Select None.
22. Activate your top layer.
Open the tube DBK AA Male-Model-740 and go to Edit>Copy.
Go back to your work and go to Edit>Paste as new layer.
Image>Resize, 2 times to 80% and 1 time to 90%, resize all layers not checked.
Move  the tube at the bottom right. the tube at the bottom right.
23. Effects>3D Effects>Drop Shadow, color #000000.

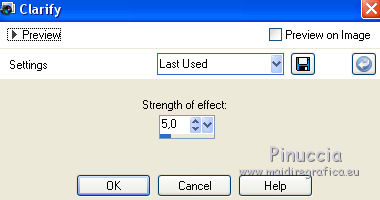
24. Adjust>Brightness and Contrast>Clarify.
25. Open the tube 4-tbedith and go to Edit>Copy.
Go back to your work and go to Edit>Paste as new layer.
Image>Resize, 2 times to 80% and 1 time to 90%, resize all layers not checked.
Move  the tube at the bottom left. the tube at the bottom left.
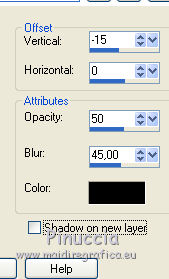
26. Effects>3D Effects>Drop Shadow, color #000000.
27. Layers>Merge>Merge visible.
28. Effect>Plugins>AAA Frames - Foto Frame.

29. Image>Add borders, 30 pixels, symmetric, foreground color #722102.
Activate your Magic Wand Tool 
and click on the transparent image to select it.
30. Effects>Plugins>Tramages - Pool Shadow

31. Effects>Plugins>Filters Unlimited 2.0 - Krusty's FX vol.I 1.0 - Radial Texturizer.

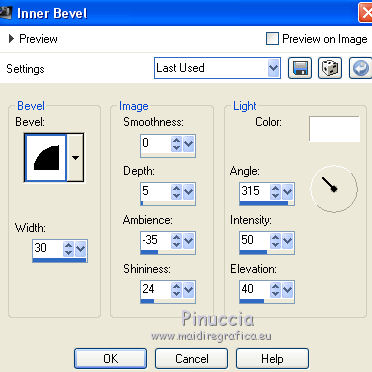
32. Effects>3D Effects>Inner Bevel, color #ffffff.
Selections>Select None.
33. Image>Add borders, 1 pixel, symmetric, foreground color #722102.
34. Sign your work and save as jpg.
Version with tubes by Luz Cristina and Beatriz

 Your versions here Your versions here

If you have problems or doubts, or you find a not worked link, or only for tell me that you enjoyed this tutorial, write to me.
11 October 2020
|


