|
TOP ZENYRA
 ENGLISH VERSION ENGLISH VERSION
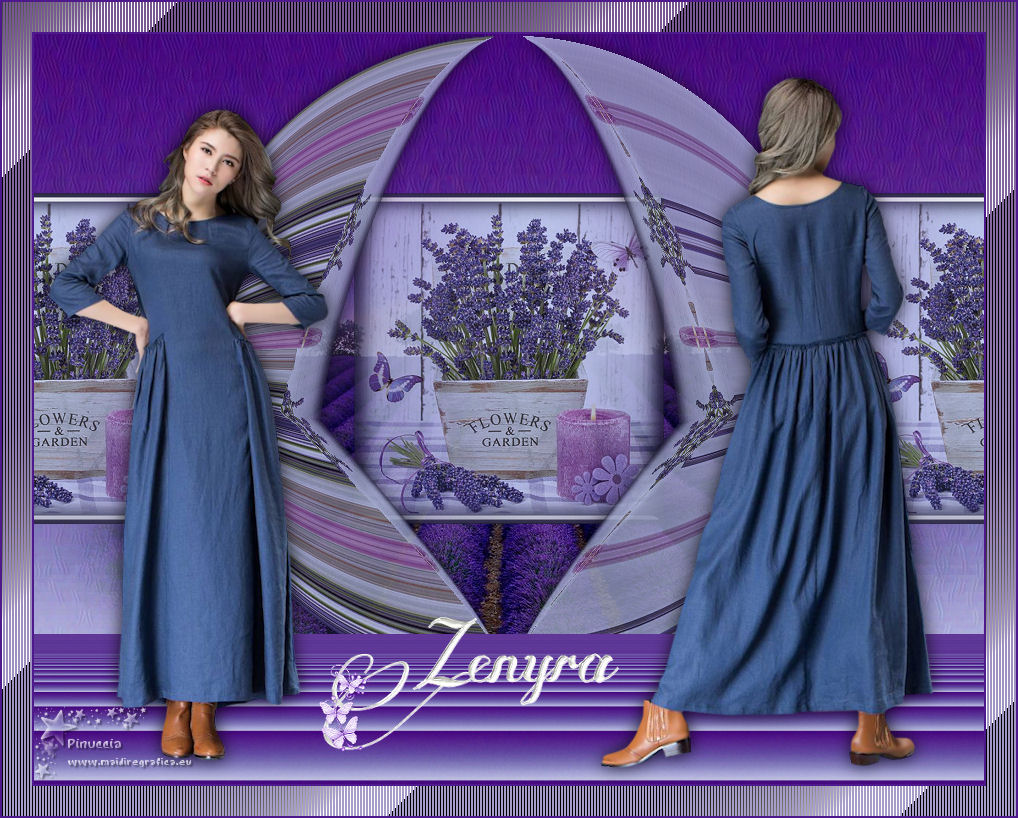
Here you find the original of this tutorial:

This tutorial was translated with PSPX7 but it can also be made using other versions of PSP.
Since version PSP X4, Image>Mirror was replaced with Image>Flip Horizontal,
and Image>Flip with Image>Flip Vertical, there are some variables.
In versions X5 and X6, the functions have been improved by making available the Objects menu.
In the latest version X7 command Image>Mirror and Image>Flip returned, but with new differences.
See my schedule here
French translation here
Your versions ici
For this tutorial, you will need:
Material here
Tube Criss 2661-1 by Linda Gatita
198_paysage_p2_animabelle
(you find here the links to the material authors' sites)
Plugins
consult, if necessary, my filter section here
Filters Unlimited 2.0 here
VM Toolbox - Tiler here
Virtual Painter 4 here
Tramages - Tow the line here
Filters VM Toolbox and Tramages can be used alone or imported into Filters Unlimited.
(How do, you see here)
If a plugin supplied appears with this icon  it must necessarily be imported into Unlimited it must necessarily be imported into Unlimited

You can change Blend Modes according to your colors.
In the newest versions of PSP, you don't find the foreground/background gradient (Corel_06_029).
You can use the gradients of the older versions.
The Gradient of CorelX here
1. Open a new transparent image 950 x 650 pixels.
2. Open the tube Criss 2661, activate the layer n.1 and go to Edit>Copy.
Go back to your work and go to Edit>Paste as new layer.
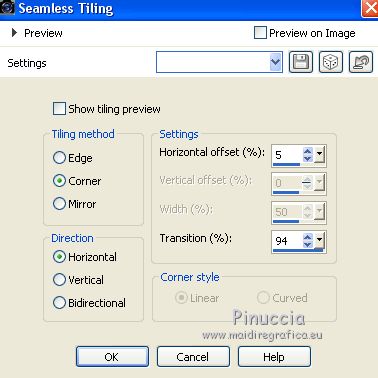
3. Effects>Image Effects>Seamless Tiling.
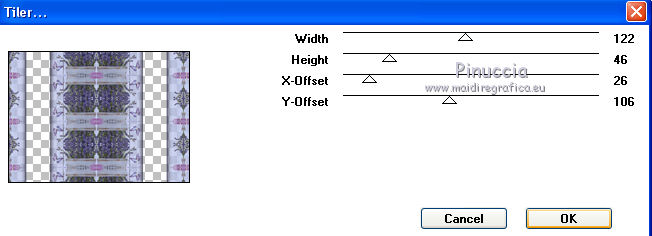
4. Effects>Plugins>VM Toolbox - Tiler.
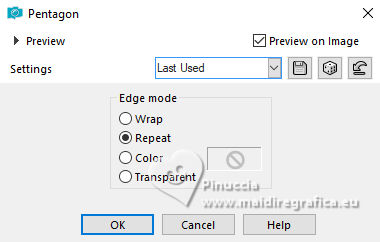
5. Effects>Geometric Effects>Pentagon.
6. Image>Flip.
7. Effects>Geometric Effects>Circle.

8. Activate the Freehand selection 
and select the central part.
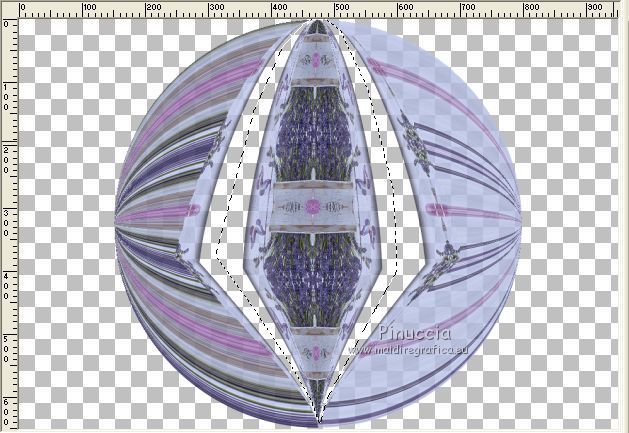
Press CANC on the keyboard 
Selections>Select None.
9. Effects>3D Effects>Drop Shadow, color black.

10. Edit>Paste as new layer (the layer n.1 of the tube Criss 2661 is still in memory).
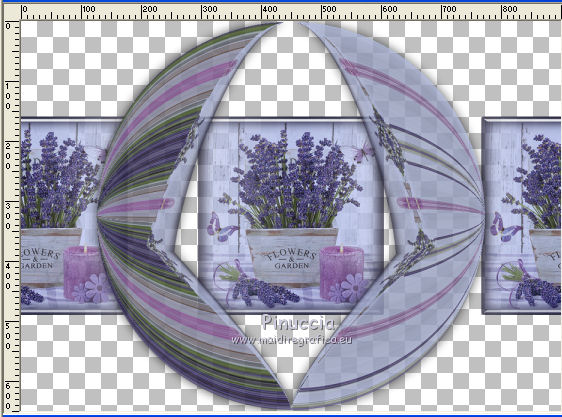
11. Effects>Image Effects>Seamless Tiling, same settings.

Layers>Arrange>Move Down (under the circle)
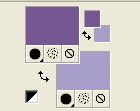
12. Set your foreground color to #775792,
and your background color to #a79ec9.
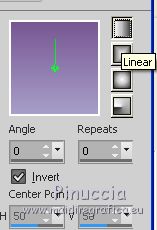
Set your foreground color to a Foreground/Background Gradient, style Linear.
Layers>New Raster Layer.
Layers>Arrange>Send to Bottom.
Flood Fill  the layer with your gradient. the layer with your gradient.
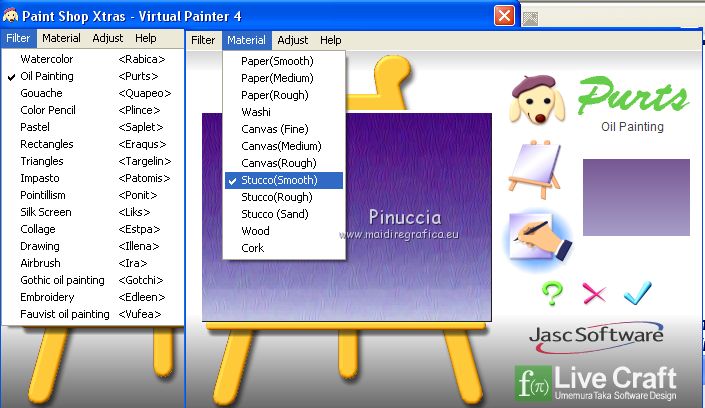
13. Effects>Plugins>Virtual Painter
Filter Oil Painting - Material: Stucco (Smooth)
14. Open the tube 198_paysage_p2_animabelle and go to Edit>Copy.
Go back to your work and go to Edit>Paste as new layer.
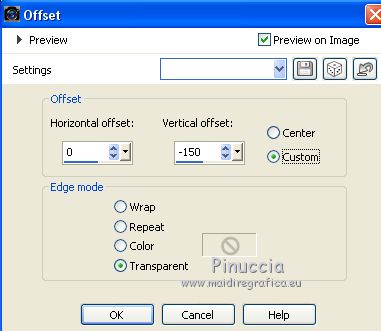
15. Effects>Image Effects>Offset
16. Activate the bottom layer.
Layers>Duplicate.
Layers>Arrange>Bring to Top.
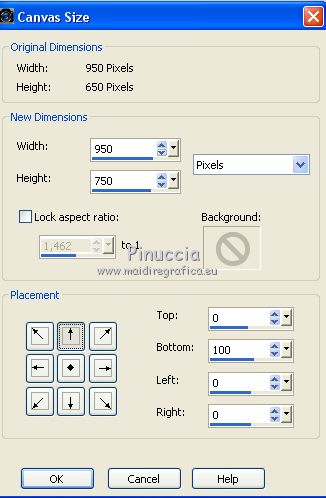
17. Image>Canvas Size - 950 x 750 pixels.
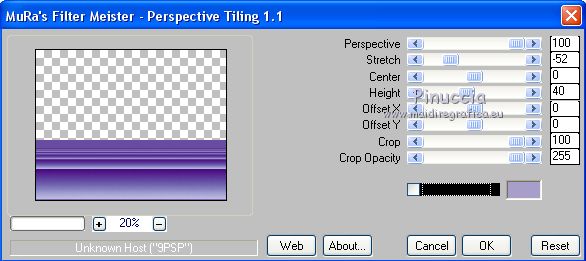
18. Effects>Plugins>Mura's Meister - Perspective Tiling.
19. Effects>Image Effects>Offset, same settings

20. Open the tube Criss 2751 and go to Edit>Copy.
Go back to your work and go to Edit>Paste as new layer.
Image>Resize, 1 time to 80% and 1 time to 90%,resize all layers not checked.
Move  the tube to the left side. the tube to the left side.
21. Effects>3D Effects>Drop Shadow, color black.

22. Open the tube Criss 2747 - Edit>Copy.
Go back to your work and go to Edit>Paste as new layer.
Image>Resize, 1 time to 80% and 1 time to 95%, resize all layers not checked.
Move  the tube to the right side. the tube to the right side.
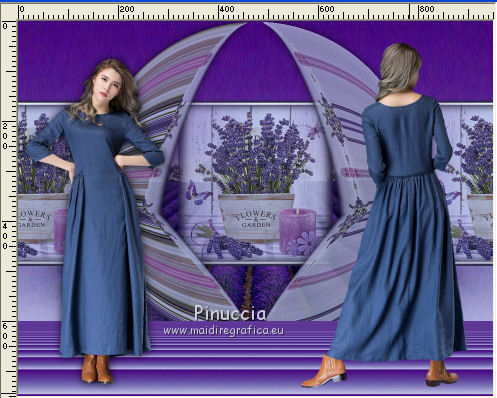
Effects>3D Effects>Drop Shadow, same settings.
23. Open Texto Zenyra and go to Edit>Copy.
Go back to your work and go to Edit>Paste as new layer.
Move  the text where you like or see my example. the text where you like or see my example.
24. Layers>Merge>Merge All.
25. Image>Add borders, 2 pixels, symmetric, color #4d198c.
Image>Add borders, 30 pixels, symmetric, color #ffffff.
26. Activate the Magic Wand Tool 
and clic on the white border to select it.
27. Flood Fill  the selection with your Gradient. the selection with your Gradient.
28. Effects>Plugins>Tramages - Tow the line.
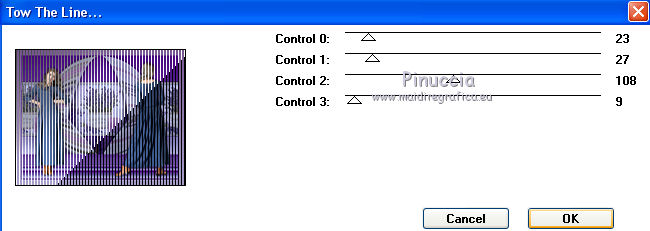
Selections>Select None.
29. Image>Add borders, 2 pixels, symmetric, color #4d198c.
30. Sign your work and save as jpg.
Vos versions here

If you have problems or doubts, or you find a not worked link, or only for tell me that you enjoyed this tutorial, write to me.
14 Octobre 2018
|
 ENGLISH VERSION
