This tutorial was translated with PSPX3 but it can also be made using other versions of PSP.
Since version PSP X4, Image>Mirror was replaced with Image>Flip Horizontal,
and Image>Flip with Image>Flip Vertical, there are some variables.
In versions X5 and X6, the functions have been improved by making available the Objects menu.
In the latest version X7 command Image>Mirror and Image>Flip returned, but with new differences.
See my schedule here
French translation here
For this tutorial, you will need:
Material here
Tube radi_varios_009
Tube radi_varios_007
Tube Criss-198
Texto-ac
Plugins
consult, if necessary, my filter section here
Flaming Pear - Flood here

You can change Blend Modes according to your colors.
Copy the mask 20-20 in the Masks Folder.
Open the mask masck fade suave in PSP and minimize it with the rest of the material.
1. Open a new transparent image 1000 x 650 pixels.
Set your foreground color to black.
Flood Fill  the transparent image with black.
3. Open the tube radi_varios_009 - Edit>Copy.
Go back to your work and go to Edit>Paste as new layer.
4. Layer>Duplicate.
Image>Mirror.
5. Open the tube radi_varios_007 - Edit>Copy.
Go back to your work and go to Edit>Paste as new layer.
6. Image>Resize, to 80%, resize all layer not checked.
Place  the tube in the middle.
Change your Blend Mode to Luminance (legacy).
7. Calques>Duplicate.
8. Effects>Image Effects>Seamless Tiling, default settings.

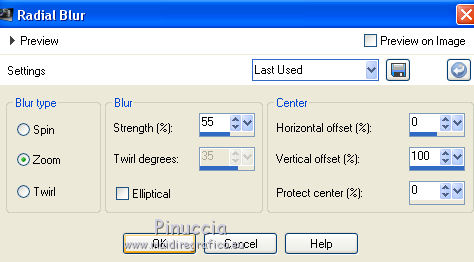
9. Adjust>Blur>Radial Blur.
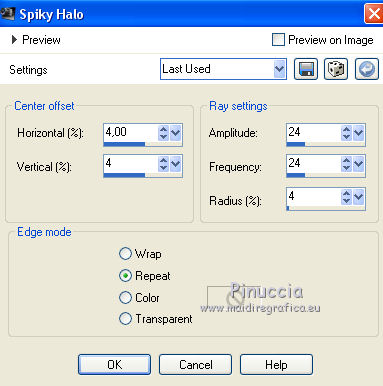
10. Effects>Distortion Effects>Spiky Halo.
11. Adjust>Sharpness>Sharpen more.
12. Layers>Arrange>Move down (under the Christo layer).
13. Layers>Merge>Merge visible.
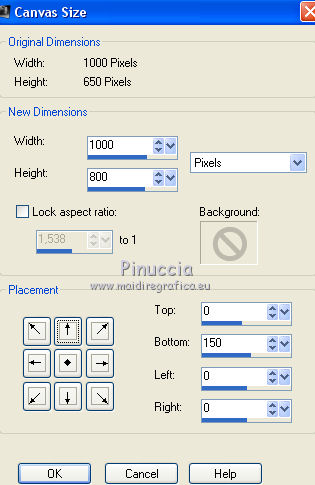
14. Image>Canvas size - 1000 x 800 pixels.
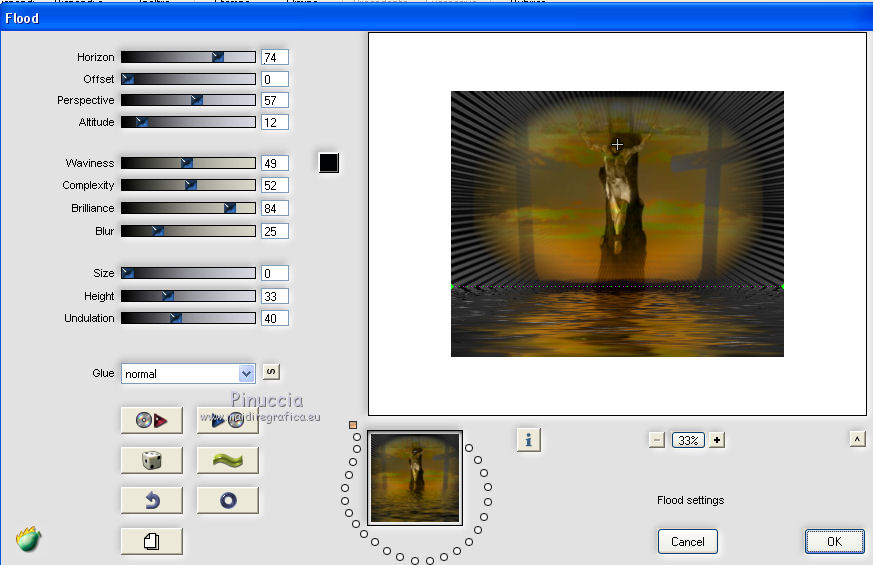
15. Effects>Plugins>Flaming Pear - Flood.
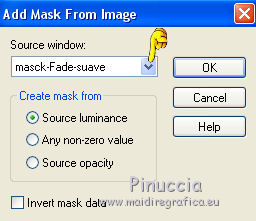
16. Layers>New Mask layer>From image
Open the menu under the source window and you'll see all the files open.
Select the mask masck fade suave:
Layers>Duplicate.
Layers>Merge>Merge group.
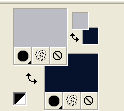
17. Set your foreground color to #bcbcc4,
and your background color to #08122d.
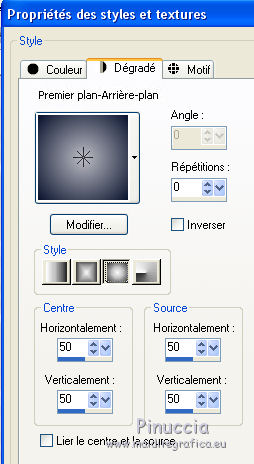
Set your foreground color to a Foreground/Background Gradient, style Sunburst.
Layers>New Raster Layer.
Layers>Arrange>Send to Bottom.
Flood Fill  the layer with your Gradient.
18. Activate the top layer.
Open the tube Criss-198 - Edit>Copy.
Go back to your work and go to Edit>Paste as new layer.
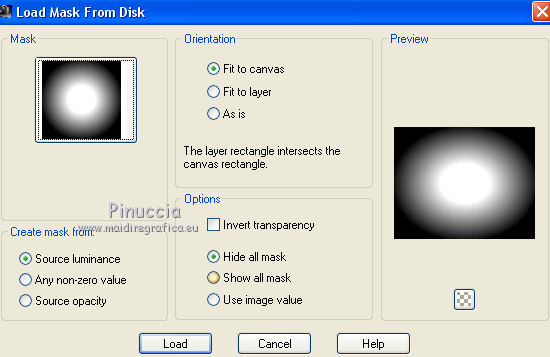
19. Layers>Load/Save Mask>Load Mask from Disk.
Look for and load the mask 20-20.
Layers>Duplicate.
Layers>Merge>Merge group.
Layers>New Mask layer>From image
Open the menu under the source window
and select again the mask masck fade suave:

Layers>Merge>Merge group.
20. Image>Resize, 2 times to 80%, resize all layers not checked.
Move  the tube to the bottom left.
21.
Selection Tool 
(no matter the type of selection, because with the custom selection your always get a rectangle)
clic on the Custom Selection 
and set the following settings.
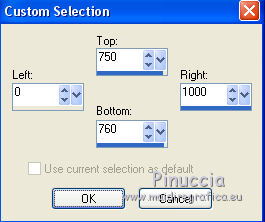
22. Layers>New Raster Layer.
Flood Fill  with your Gradient.
23. Effects>3D Effects>Inner Bevel.
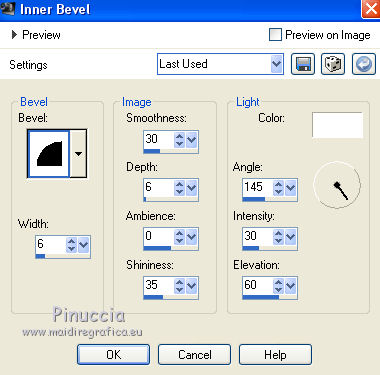
Selections>Select None.
24. Effects>Reflections Effects>Feedback.
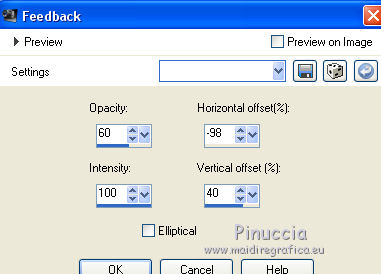
25. Effects>3D Effects>Drop Shadow, color black.
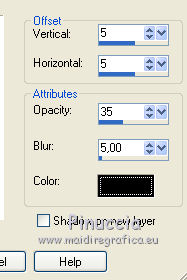
26. Move  the image down on the bord.
27. Layers>Duplicate.
Image>Mirror.
28. Layers>Merge>Merge All.
29. Image>Add borders, 2 pixels, symmetric, color #08122d.
30. Open the texte Via Crucis - Edit>Copy.
Go back to your work and go to Edit>Paste as new layer.
Move  the texte to the bottom right.
31. Sign your work.
Layers>Merge>Merge All and save as jpg.

If you have problems or doubt, or you find a not worked link, or only for tell me that you enjoyed this tutorial, write to me.
25 March 2016

