|
TOP ST.VALENTIN
 ENGLISH VERSION ENGLISH VERSION
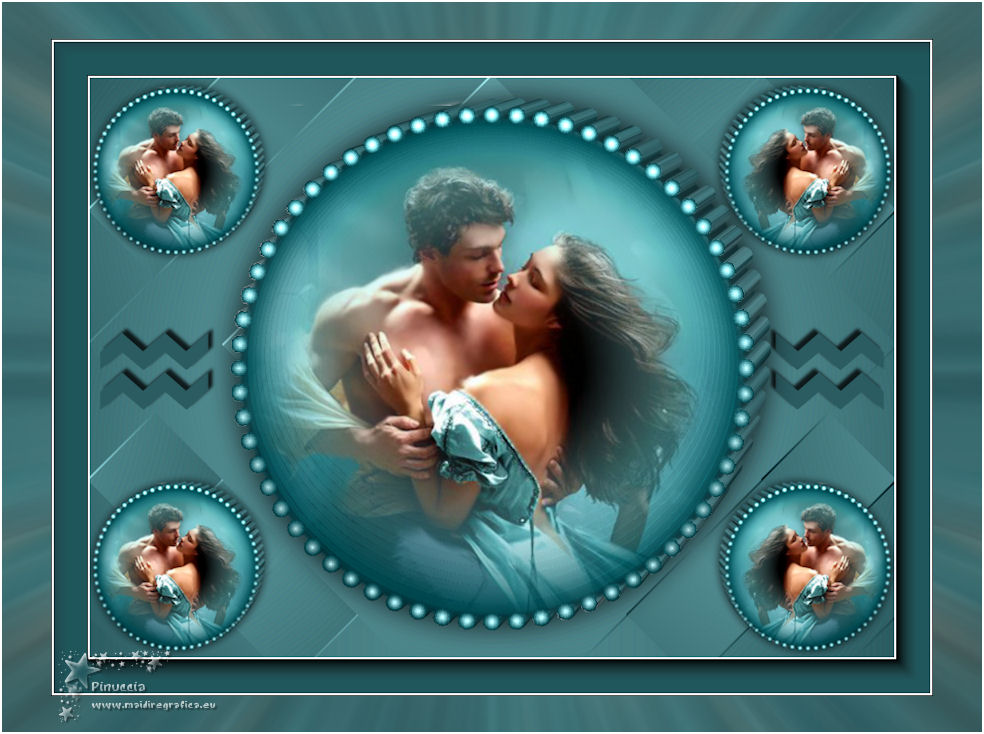
Here you find the original of this tutorial:

This tutorial was translated with PSPX7 but it can also be made using other versions of PSP.
Since version PSP X4, Image>Mirror was replaced with Image>Flip Horizontal,
and Image>Flip with Image>Flip Vertical, there are some variables.
In versions X5 and X6, the functions have been improved by making available the Objects menu.
In the latest version X7 command Image>Mirror and Image>Flip returned, but with new differences.
See my schedule here
French translation here
Your versions ici
For this tutorial, you will need:
Material here
Mist_Criss 1791 by Linda Gatita
Adorno SK Rando_nines
(here the links of the authors' sites)
Plugins
consult, if necessary, my filter section here
Filters Unlimited 2.0 here
VM Natural - Plastic Starfish here
Mehdi - Sorting Tiles here
AAA Frames - Foto Frame here
Alien Skin Eye Candy 5 Impact - Extrude here
Filters VM Natural can be used alone or imported into Filters Unlimited.
(How do, you see here)
If a plugin supplied appears with this icon  it must necessarily be imported into Unlimited it must necessarily be imported into Unlimited

You can change Blend Modes according to your colors.
In the newest versions of PSP, you don't find the foreground/background gradient (Corel_06_029).
You can use the gradients of the older versions.
The Gradient of CorelX here
Copy the preset Emboss 6 in the Presets Folder.
1. Open a new transparent image 900 x 650 pixels.
2. Set your foreground color to #2b5c61,
and your background color to #7cc1c7.
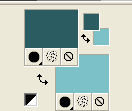
Set your foreground color to a Foreground/Background Gradient, style Sunburst.
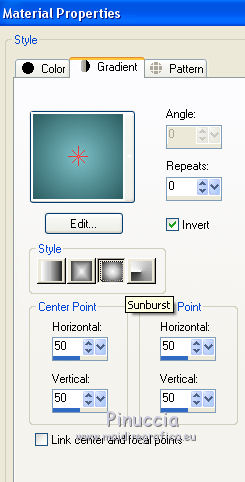
Flood Fill  the transparent image with your Gradient. the transparent image with your Gradient.
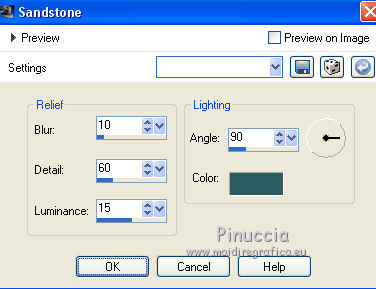
3. Effects>Textures Effects>Sandstone, foreground color #2b5c61
4. Effests>Plugins>Filters Unlimited 2.0 - VM Natural - Plastic Starfish.
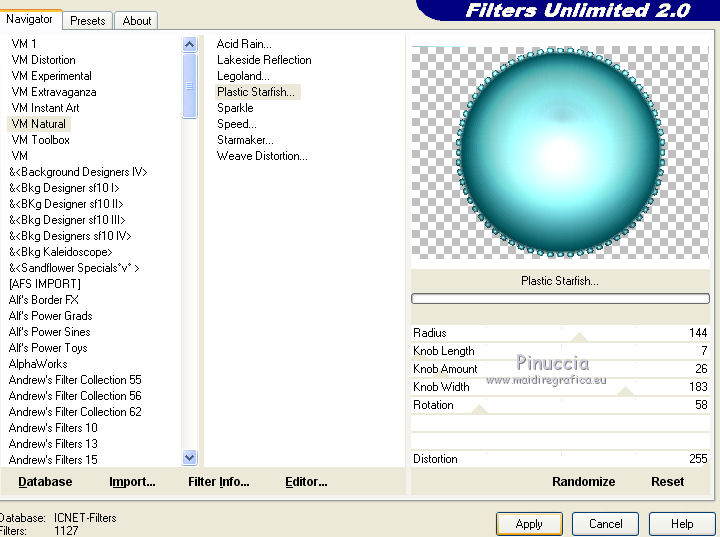
the plugin leaves a thin line on the border.
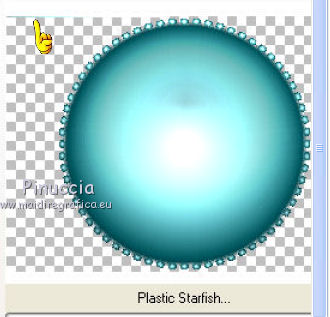
To delete it: Selections>Select All.
Selections>Modify>Contract - 1 pixel.
Selections>Invert.
Press CANC on the keyboard.
Selections>Select None.
5. Open the tube Criss 1791 and go to Edit>Copy.
Go back to your work and go to Edit>Paste as new layer.
6. Layers>Merge>Merge visible.
7. Image>Resize, to 90%, resize all layers not checked.
8. Effects>Plugins>Alien Skin Eye Candy 5 Impact - Extrude, background color #7cc1c7.
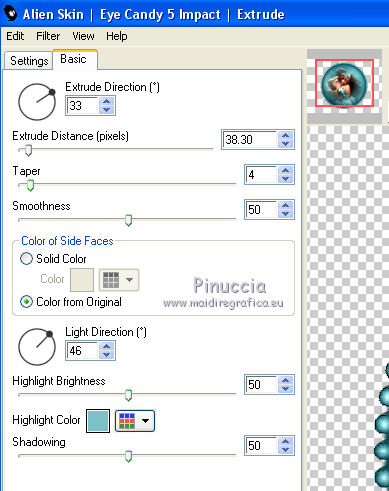
If you have not deleted the line in step 4, you'll have this
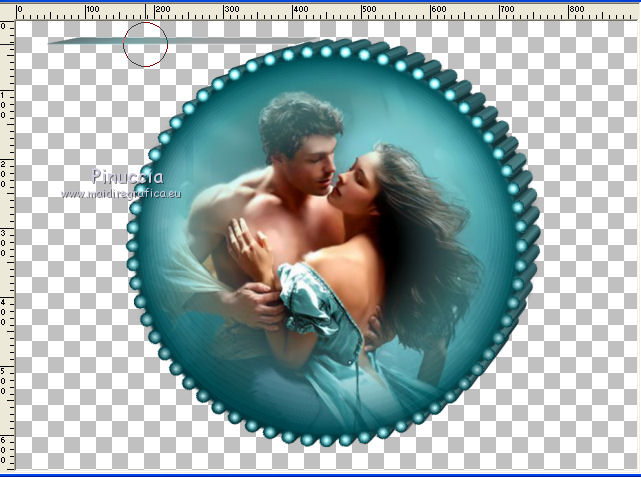
Erase the line with your Eraser Tool 
9. Effects>3D Effects>Drop Shadow, color black.

10. Layers>Duplicate.
Image>Resize, 1 time to 50% and 2 times to 80%, resize all layers not checked.
11. Move  the image at the upper left. the image at the upper left.
Layers>Duplicate.
Image>Mirror.
12. Layers>Merge>Merge Down.
13. Layers>Duplicate.
Move  the image down. the image down.
14. Layers>New Raster Layer.
Layers>Arrange>Send to Bottom.
Flood Fill  the layer with your gradient. the layer with your gradient.
15. Effects>Plugins>Mehdi - Sorting Tiles.
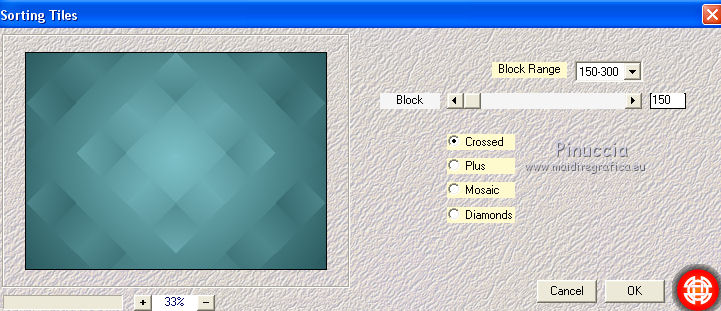
16. Effects>User Defined Filter - select the preset Emboss 6 and ok.
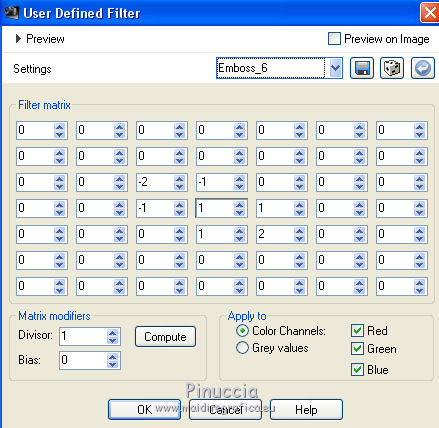
17. Open Adorno SK Rando_nines, erase the watermark and go to Edit>Copy.
Go back to your work and go to Edit>Paste as new layer.
18. Layers>Merge>Merge All.
19. Image>Add borders, 40 pixels, symmetric, foreground color #2b5c61.
20. Effects>Plugins>AAA Frames - Foto Frame.
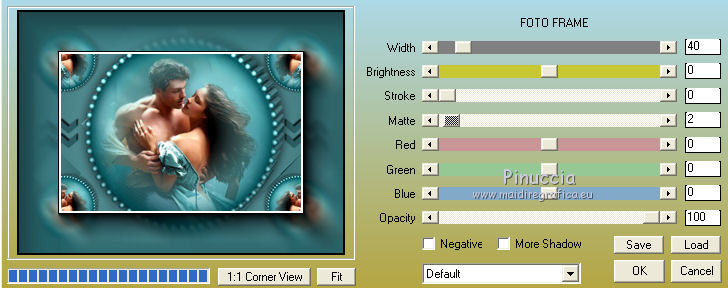
21. Repeat Effets>Modules Externes>AAA Frames - Foto Frame.
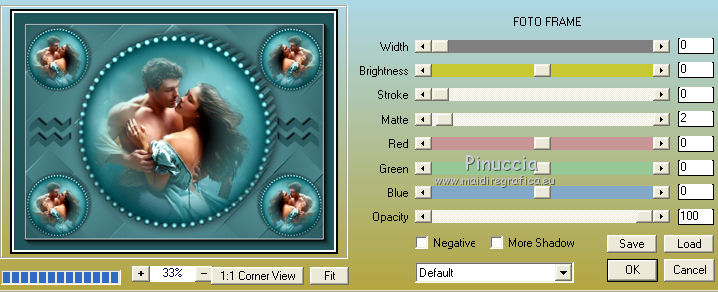
22. Layers>Promote Background Layer.
Image>Resize, to 90%, resize all layers not checked.
23. Edit>Copy.
24. Layers>New Raster Layer.
Layers>Arrange>Send to Bottom.
Selections>Select All.
Edit>Paste into Selection.
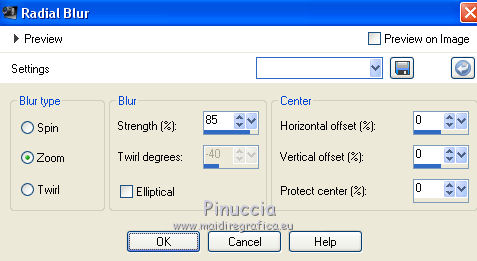
25. Adjust>Blur>Radial Blur.
Selections>Select None.
26. Layers>Merge>Merge All.
Image>Add borders, 2 pixels, symmetric, color white #ffffff.
Sign your work and save as jpg.
Your versions here

If you have problems or doubts, or you find a not worked link, or only for tell me that you enjoyed this tutorial, write to me.
24 Janvier 2019
|
 ENGLISH VERSION

 ENGLISH VERSION
