Here you find the original of this tutorial:

This tutorial was created with PSP X2 but it can also be made using other versions of PSP.
Since version PSP X4, Image>Mirror was replaced with Image>Flip Horizontal,
and Image>Flip with Image>Flip Vertical, there are some variables.
In versions X5 and X6, the functions have been improved by making available the Objects menu.
In the latest version X7 command Image>Mirror and Image>Flip returned, but with new differences.
See my schedule here
French translation here
Your versions here
For this tutorial, you will need:
Material here
For the tubes thanks Ket and Guismo
Effects>Plugins
consult, if necessary, my filter section here
Flaming Pear - Flood here
Mura's Meister - Perspective Tiling here
Mura's Meister - Copies here

You can change Blend Modes according to your colors.
In the newest versions of PSP, you don't find the foreground/background gradient (Corel_06_029).
You can use the gradients of the older versions.
The Gradient of CorelX here
Copy the selection in the Selections Folder.
Open the mask in PSP and minimize it with the rest of the material.
1. Open a new transparent image 1000 x 600 pixels.
2. Set your foreground color to #0f476a,
and your background color to #8db1bf.

Set your foreground color to a Foreground/Background Gradient, style Linear

Flood Fill  the transparent image with your Gradient.
3. Open the tube calguisplaneteL19012015 and go to Edit>Copy.
Go back to your work and go to Edit>Paste as new layer.
4. Effects>Art Media Effects>Pencil - foreground color #0f476a.

5. Edit>Paste as new layer (the tube by Guismo is still in memory).
Move  the tube a bit higher.
6. Layers>Merge>Merge visible.
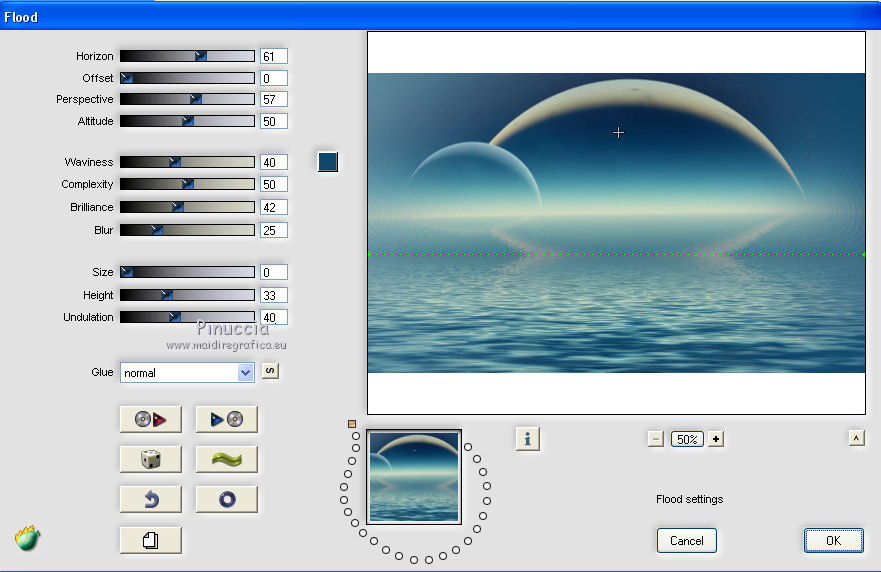
7. Effects>Plugins>Flaming Pear - Flood - foreground color #0f476a.
8. Open the tube ketwomen2015001 and go to Edit>Copy.
Go back to your work and go to Edit>Paste as new layer.
Image>Resize, 2 times to 80% and 1 time to 95%, resize all layers not checked.
Move  the tube in the centre, see my example.
9. Image>Canvas Size 1000 x 800 pixels.

10. Selection Tool 
(no matter the type of selection, because with the custom selection your always get a rectangle)
clic on the Custom Selection 
and set the following settings.

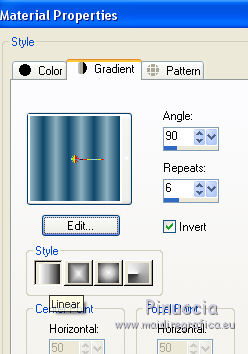
11. Change the settings of your Gradient.
Layers>New Raster Layer.
Flood Fill  the selection with your Gradient.
12. Effects>3D Effects>Inner Bevel, color white.

Selections>Select None.
13. Layers>Duplicate and close this layer for a moment.
Activate the layer below.
Layers>Merge>Merge visible.
14. Keep the layer Merge selected.
Layers>Duplicate.
15. Adjust>Blur>Gaussian Blur - radius 25.

16. Effects>Texture Effects>Mosaic - Glass

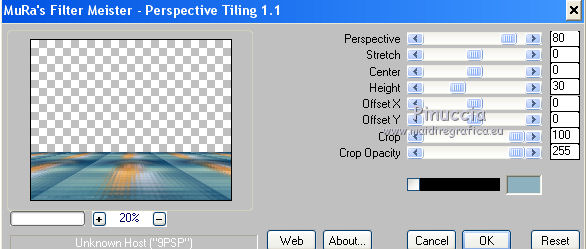
17. Effects>Plugins>Mura's Meister - Perspecting Tiling.
Layers>Arrange>Send to Bottom.
18. Open and activate the closed layer.
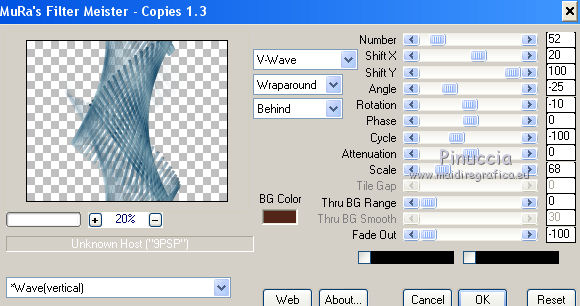
Effects>Plugins>Mura's Meister - Copies.
19. Effects>3D Effects>Drop Shadow, color black.

20. Effects>Image Effects>Offset.

21. Layers>Duplicate.
Image>Mirror.
Layers>Merge>Merge Down.
22. Layers>New Mask layer>From image
Open the menu under the source window and you'll see all the files open.
Select the mask mask.ket-fadeIntenso.
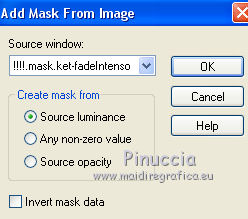
Layers>Merge>Merge Group.
23. Open the tube calguisDouceur20012015 and go to Edit>Copy.
Go back to your work and go to Edit>Paste as new layer.
Image>Resize, 2 times to 80% and 1 time to 95%, resize all layers not checked.
Move  the tube down.
24. Effects>3D Effects>Drop Shadow, color #1b3960.
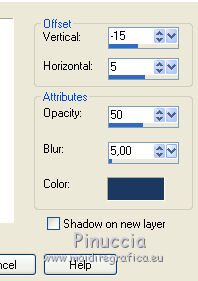
25. Layers>Merge>Merge All.
26. Image>Add borders, 10 pixels, symmetric, foreground color #0f476a.
27. Signer your work and save as jpg.

If you have problems or doubt, or you find a not worked link, or only for tell me that you enjoyed this tutorial, write to me.
20 December 2019
 english version
