|
TOP NOËL

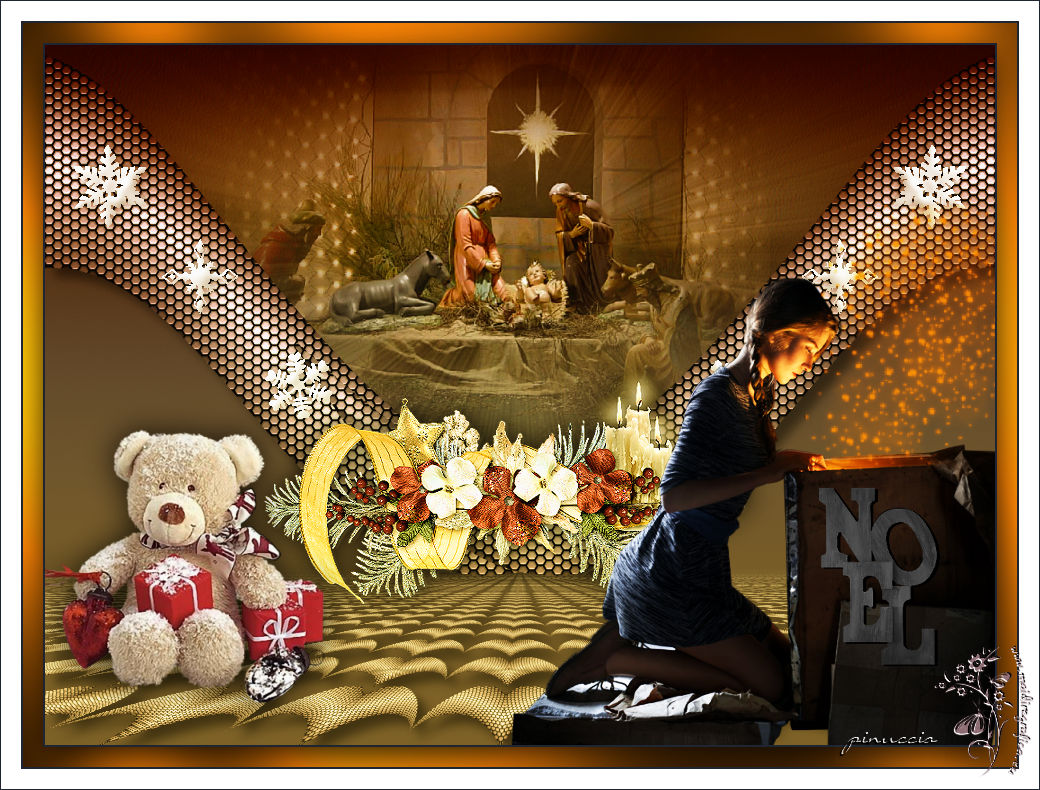
Here you find the original of this tutorial:

This tutorial was translated with PSPX3 but it can also be made using other versions of PSP.
Since version PSP X4, Image>Mirror was replaced with Image>Flip Horizontal,
and Image>Flip with Image>Flip Vertical, there are some variables.
In versions X5 and X6, the functions have been improved by making available the Objects menu.
In the latest version X7 command Image>Mirror and Image>Flip returned, but with new differences.
See my schedule here
French translation here
Your versions here

For this tutorial, you will need:
Material here
Tube calguismagie12102017 by Guismo
Mist_lunanatal008
Tube Cluter1
Tube Jen_Kerstbeer 536_14-11-2011
Tube Grace's_TLC_Noel
Tube snoeflaake_ac
Plugins
consult, if necessary, my filter section here
Filters Unlimited 2.0 here
Mura's Meister - Perspective Tiling here
Mura's Meister - Pole Transform here
Graphics Plus - Cross Shadow here
Nik Software - Color Efex here
Filters Graphics Plus can be used alone or imported into Filters Unlimited.
(How do, you see here)
If a plugin supplied appears with this icon  it must necessarily be imported into Unlimited it must necessarily be imported into Unlimited

You can change Blend Modes according to your colors.
In the newest versions of PSP, you don't find the foreground/background gradient (Corel_06_029).
You can use the gradients of the older versions.
The Gradient of CorelX here
Copy the preset Emboss 3 in the Presets Folder.
1. Open a new transparent image 950 x 600 pixels.
2. Set your foreground color to white #ffffff,
set your background color to463559.
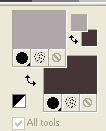
Set your foreground color to a Foreground/Background Gradient, style Linear.

Flood Fill  the transparent image with your Gradient. the transparent image with your Gradient.
3. Effects>Geometric Effects>Perspective Horizontal.

4. Image>Mirror.
5. Effects>Geometric Effects>Perspective Horizontal.

6. Effects>Distortion Effects>Wave

7. Effects>Texture Effects>Tiles - foreground color #b1a7aa.

8. Effects>Image Effects>Offset.

9. Layers>Duplicate.
Image>Mirror.
Layers>Merge>Merge down.
10. Layers>Duplicate and close this layer.
11. Activate again the layer below.
Activate the Magic Wand Tool 
and click on the upper zone to select it.
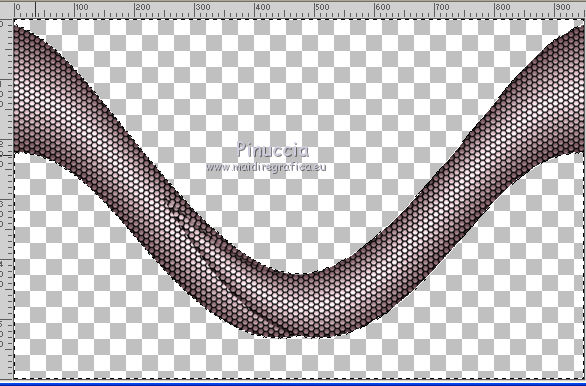
12. Selections>Modify>Expand - 5 pixels.
13. Layers>New Raster Layer.
Layers>Arrange>Send to Bottom.
14. Open the tube lunanatal008 - Edit>Copy.
Go back to your work and go to Edit>Paste into Selection.
15. Adjust>Blur>Radial Blur.

16. Effects>User Defined Filter - select the preset Emboss 3 and ok.

Edit>Repeat User Defined Filter.
Keep selected
17. Edit>Paste as new layer (the tube lunanatal008 is still in memory).
Image>Resize, 2 times to 80%, resize all layers not checked.
Place  rightly the tube as below. rightly the tube as below.
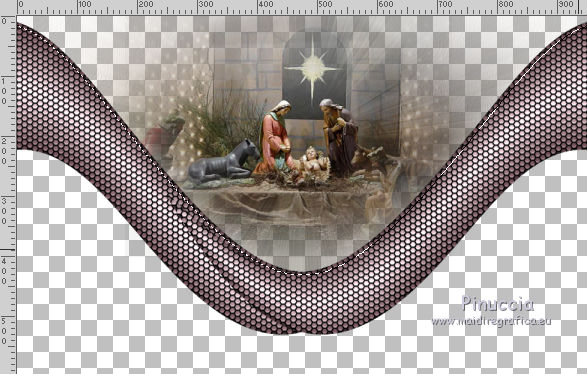
18. Sélections>Inverser.
Press CANC on the keyboard 
Keep always selected.
19. Selections>Invert.
Layers>New Raster Layer.
Layers>Arrange>Send to bottom.
Flood Fill  the layer with your background color #463539. the layer with your background color #463539.
Selections>Select None.
20. Layers>Merge>Merge visibles.
The top layer is still closed.

21. Effects>3D Effects>Drop Shadow, color black

22. Image>Canvas Size - 950 x 700 pixels.

23. Open again and activate the top layer.
24. Effects>Geometric Effects>Perspective Vertical.

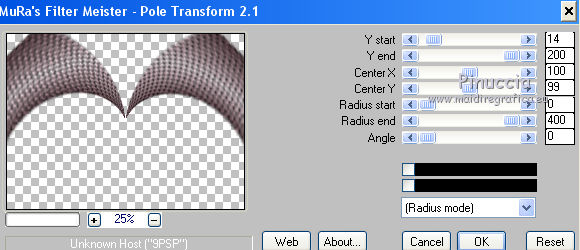
25. Effects>Plugins>Mura's Meister - Pole Transform.
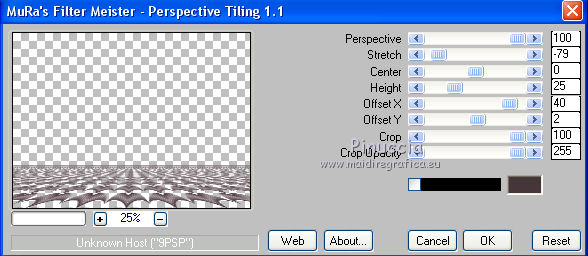
26. Effects>Plugins>Mura's Meister - Perspective Tiling.
27. Activate the Magic Wand tool  with these settings. with these settings.

Press 4 times CANC on the keyboard 
Selections>Select None.
28. Effects>3D Effects>Drop Shadow, same settings.

29. Layers>New Raster Layer.
Layers>Arrange>Send to Bottom.
Flood Fill  with your Background color #463539. with your Background color #463539.
30. Activate the top layer.
Open Cluster1 - Edit>Copy.
Go back to your work and go to Edit>Paste as new layer.
Place  the tube in the middle, see my example. the tube in the middle, see my example.
31. Open the tube snowflaake_ac - Edit>Copy.
Go back to your work and go to Edit>Paste as new layer.
Place  rightly the tube rightly the tube
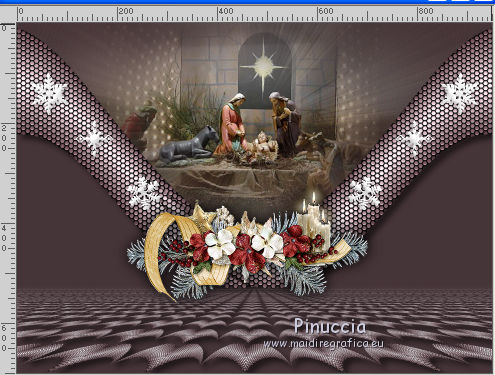
32. Layers>Merge>Merge visible.
33. Effects>Plugins>Nik Software - Color Efex Pro
Bi-Color Filters - Color Set Brown 1.
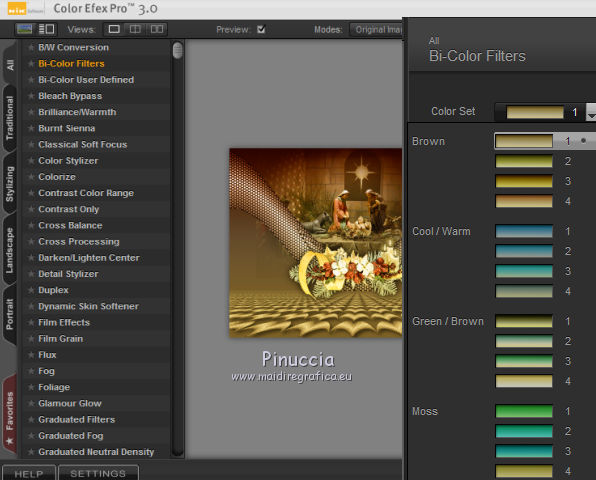
34. Open the tube Jen_Kerstbeer 536_14-11-2011 - Edit>Copy.
Go back to your work and go to Edit>Paste as new layer.
Image>Resize, 2 times to 80%, resize all layers not checked.
Move  the tube in the lower left. the tube in the lower left.
35. Effects>3D Effects>Drop Shadow, color black.

36. Open the tube calguismagie12102017 - Edit>Copy.
Go back to your work and go to Edit>Paste as new layer.
Image>Resize, 1 time to 80% and 1 time to 90%, resize all layers not checked.
Image>Mirror.
Move  the tube in the lower right. the tube in the lower right.
37. Layers>Duplicate.
Change the Blend Mode of this layer to Hard Light.
38. Open Grace's_TLC_Noel - Edit>Copy.
Go back to your work and go to Edit>Paste as new layer.
Move  the texte in the lower right. the texte in the lower right.
39. Layers>Merge>Merge All.
40. Image>Add borders, 2 pixels, symmetric, color #1f2531.
Image>Add borders, 20 pixels, symmetric, color #e87a05.
41. Activate the Magic Wand Tool 
(don't forget to set again Feather to 0)
click on the 20 pixels bord to select it.
42. Effects>Modules Externer>Graphics Plus - Cross Shadow, default settings.

43. Selections>Invert.
Effects>3D Effects>Drop Shadow, color black.

Selections>Select None.
Image>Add borders, 2 pixels, symmetric, color #1f2531.
Image>Add borders, 20 pixels, symmetric, color white #ffffff.
Image>Add borders, 1 pixel, symmetric, color #1f2531.
44.
Sign your work and save as jpg.

If you have problems or doubts, or you find a not worked link, or only for tell me that you enjoyed this tutorial, write to me.
30 Novembre 2017
|

