|
TOP NOCHE DE BRUJAS
 WITCHES NIGHT WITCHES NIGHT
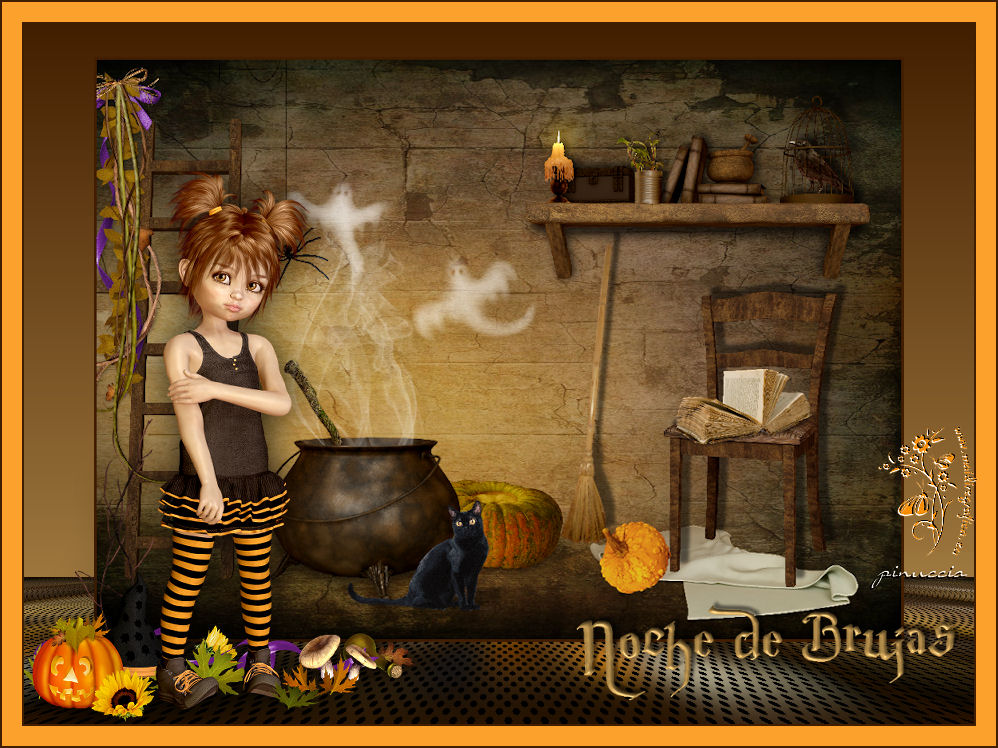
Here you find the original of this tutorial:

This tutorial was translated with PSPX3 but it can also be made using other versions of PSP.
Since version PSP X4, Image>Mirror was replaced with Image>Flip Horizontal,
and Image>Flip with Image>Flip Vertical, there are some variables.
In versions X5 and X6, the functions have been improved by making available the Objects menu.
In the latest version X7 command Image>Mirror and Image>Flip returned, but with new differences.
See my schedule here
French translation here
Your versions here
For this tutorial, you will need:
Material here
All the images are a gift of Isabel-Belscrap. Thanks Isabel.
Plugins
consult, if necessary, my filter section here
Mura's Meister - Perspective Tiling here
Mura's Meister - Tone here

You can change Blend Modes according to your colors.
In the newest versions of PSP, you don't find the foreground/background gradient (Corel_06_029).
You can use the gradients of the older versions.
The Gradient of CorelX here
1. Open a new transparent image 900 x 650 pixels.
Selections>Select All.
Open the image BS15z-Fondos6 - Edit>Copy.
Go back to your work and go to Edit>Paste into Selection.
Sélections>Désélectionner tout.
2. Open the tube BS15-Estante-2 - Edit>Copy.
Go back to your work and go to Edit>Paste as new layer.
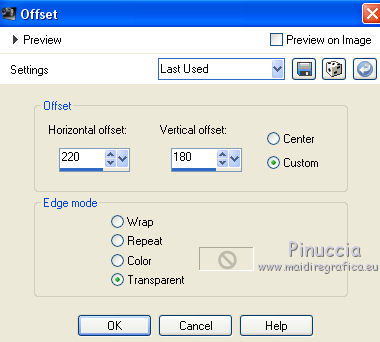
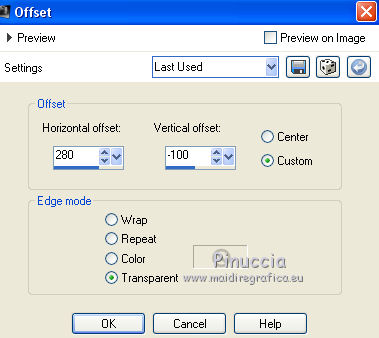
Effects>Image Effects>Offset.
3. Open the tube BS15-Araña - Edit>Copy.
Go back to your work and go to Edit>Paste as new layer.
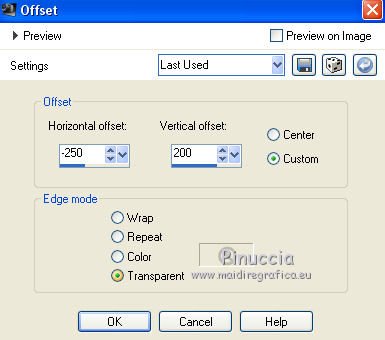
Effects>Image Effects>Offset.
4. Open the tube BS15-Escalera - Edit>Copy.
Go back to your work and go to Edit>Paste as new layer.
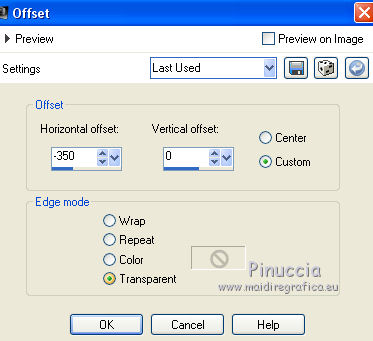
Effects>Image Effects>Offset.
5. Open the tube BS15-Ramas - Edit>Copy.
Go back to your work and go to Edit>Paste as new layer.
Effects>Image Effects>Offset.
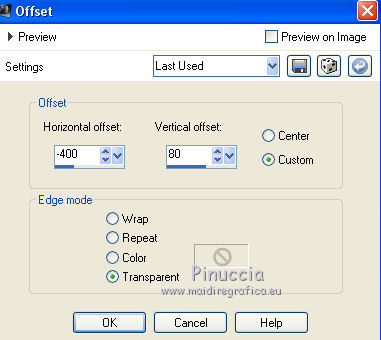
6. Open the tube BS15-0lla-s - Edit>Copy.
Go back to your work and go to Edit>Paste as new layer.
Effects>Image Effects>Offset.
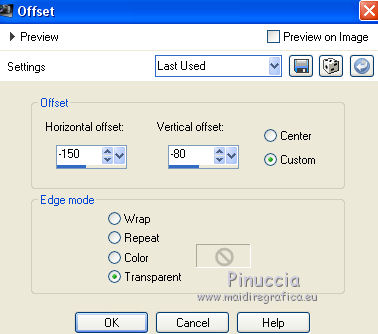
7. Open the tube BS15-Fantasmas - Edit>Copy.
Go back to your work and go to Edit>Paste as new layer.
Effects>Image Effects>Offset.
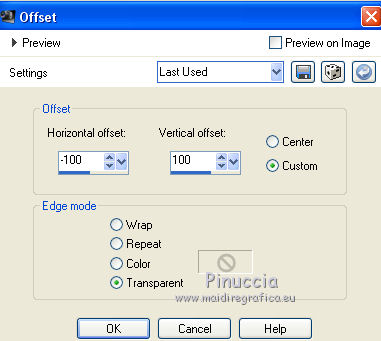
8. Open the tube BS15-Calabaza-s - Edit>Copy.
Go back to your work and go to Edit>Paste as new layer.
Effects>Image Effects>Offset.
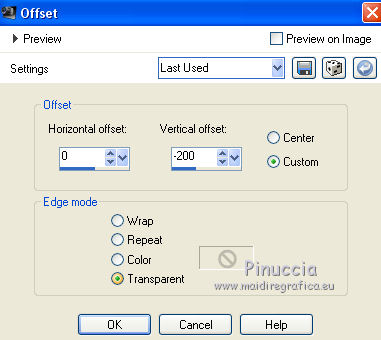
Déplacer le calque au dessous du calque du chaudron.

9. Open the tube BS15.Manta - Edit>Copy.
Go back to your work and go to Edit>Paste as new layer.
Effects>Image Effects>Offset.
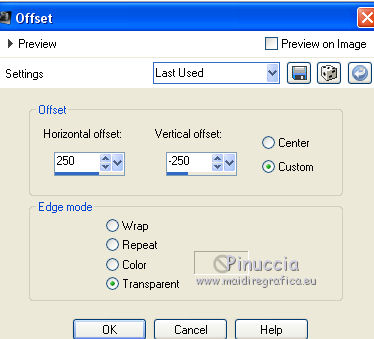
10. Open the tube BS15-Silla - Edit>Copy.
Go back to your work and go to Edit>Paste as new layer.
Effects>Image Effects>Offset.
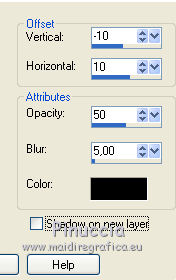
11. Effects>3D Effects>Drop Shadow, color black.
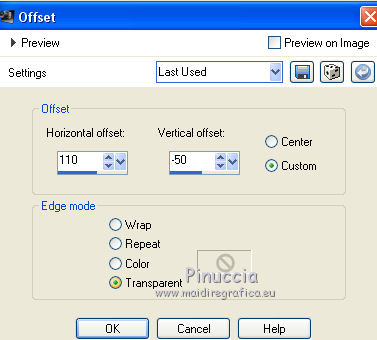
12. Open the tube BS15-Escoba - Edit>Copy.
Go back to your work and go to Edit>Paste as new layer.
Effects>Image Effects>Offset.
13. Activate the Pick Tool 
or the Deformation Tool 
and rotate lightly the tube
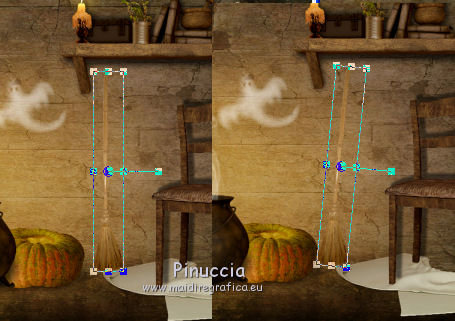
14. Effects>3D Effects>Drop Shadow, color black.
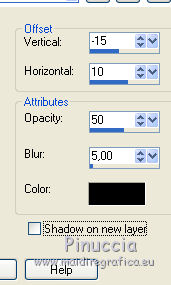
15. Open the tube BS15-Gato-s - Edit>Copy.
Go back to your work and go to Edit>Paste as new layer.
Place  the tube in fron of the cauldron. the tube in fron of the cauldron.
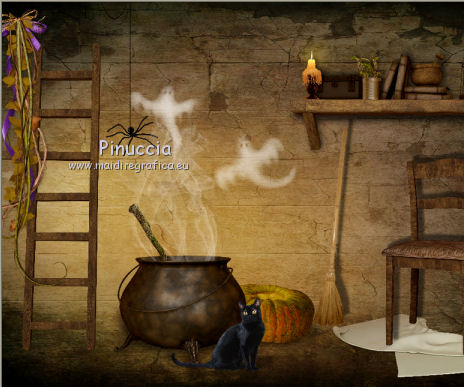
16. Open the tube BS15-Calabaza3 - Edit>Copy.
Go back to your work and go to Edit>Paste as new layer.
Move  the tube to the left of the chair. the tube to the left of the chair.

17. Open the tube BS15-Libro-s - Edit>Copy.
Go back to your work and go to Edit>Paste as new layer.
Place  the tube on the chair. the tube on the chair.

18. Layers>New Raster Layer.
Set your foreground color to #421e00.
Flood Fill  the layer with your foreground color. the layer with your foreground color.
19. Selections>Select All.
Selections>Modify>Contract - 3 pixels.
Press CANC on the keyboard 
Selections>Select None.
20. Layers>Merge>Merge visible.
Edit>Copy.
21. Image>Resize, to 90%, resize all layers not cheched.
22. Image>Canvas Size - 950 x 700 pixels.
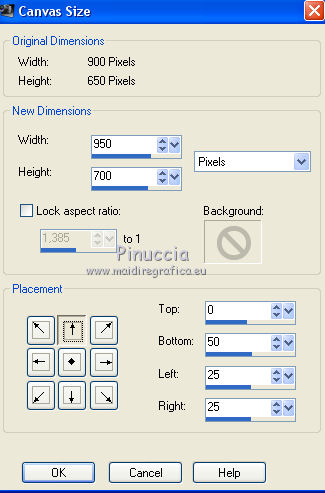
23. Layers>New Raster Layer.
Layers>Arrange>Send to Bottom.
Selections>Select All.
Edit>Paste into Selection.
Selections>Select None.
24. Adjust>Blur>Gaussian Blur - radius 25.

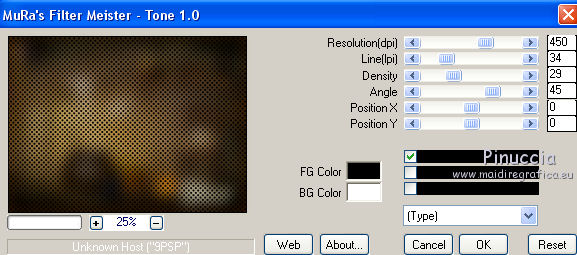
25. Effects>Plugins>Mura's Meister - Tone.
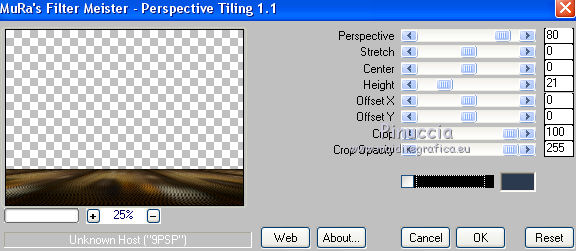
26. Effects>Plugins>Mura's Meister - Perspective Tiling.
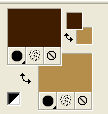
27. Set your background color to #b58e4d,
keep your foreground color to #421e00
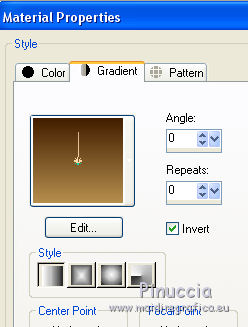
Set your foreground color to a Foreground/Background Gradient, style Linear.
28. Layers>New Raster Layer.
Layers>Arrange>Send to Bottom.
Flood Fill  the layer with your Gradient. the layer with your Gradient.
29. Activate the top layer.
Open the tubeBS III - Edit>Copy.
Go back to your work and go to Edit>Paste as new layer.
Move  the tube in the lower left. the tube in the lower left.
30. Effects>3D Effects>Drop Shadow, color black.
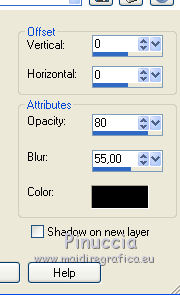
31. Open the tube Texto_Noche de Brujas - Edit>Copy.
Go back to your work and go to Edit>Paste as new layer.
Move  the text in the lower right. the text in the lower right.
32. Layers>Merge>Merge All.
33. Image>Add borders, 2 pixels, symmetric, #421e00.
Image>Add borders, 2 pixels, symmetric, #fca12c.
Image>Add borders, 2 pixels, symmetric, #421e00.
34. Sign your work and save as jpg.

If you have problems or doubts, or you find a not worked link, or only for tell me that you enjoyed this tutorial, write to me.
16 October 2017
|
 WITCHES NIGHT
