This tutorial was translated with PSPX3 but it can also be made using other versions of PSP.
Since version PSP X4, Image>Mirror was replaced with Image>Flip Horizontal,
and Image>Flip with Image>Flip Vertical, there are some variables.
In versions X5 and X6, the functions have been improved by making available the Objects menu.
In the latest version X7 command Image>Mirror and Image>Flip returned, but with new differences.
See my schedule here
French translation here
Your versions here

For this tutorial, you will need:
Material here
Tube nativita_byClo
Angelito_Texto_Christmas Happy_nines
sneugle_snowflakes
Plugins
consult, if necessary, my filter section here
Filters Unlimited 2.0 here
Graphics Plus - Cross Shadow here
Alien Skin Eye Candy 5 Impact - Extrude here
Filters Graphics Plus can be used alone or imported into Filters Unlimited.
(How do, you see here)
If a plugin supplied appears with this icon  it must necessarily be imported into Unlimited

You can change Blend Modes according to your colors.
In the newest versions of PSP, you cannot find the foreground/background gradient ou Corel_06_29.
You can use the Gradient folder of Corel X that you can find here
1. Open a new transparent image 1000 x 600 pixels.
2. Set your foreground color to #00618b,
and your background color to #c7bbba.

Set your foreground color to a Foreground/Background Gradient, style Rectangular.
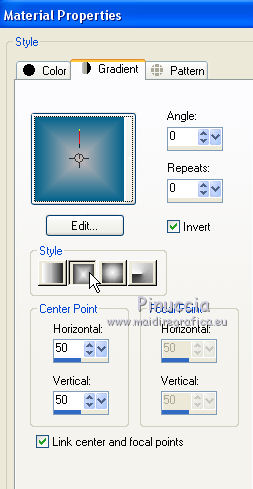
Flood Fill  the transparent image with your Gradient.
3. K key to activate the Pick Tool 
with PSP 9 D key to activate the Deformation Tool 
mode Scale  ,
,
push the central node at the top, down to 200 pixels,
and the central node at the bottom, up to 300 pixels.

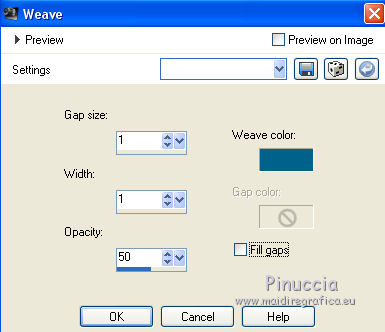
4. Effects>Texture Effects>Weave
weave color: foreground color #00618b
5. Again K key to activate the Pick Tool 
or D key to active the Deformation Tool 
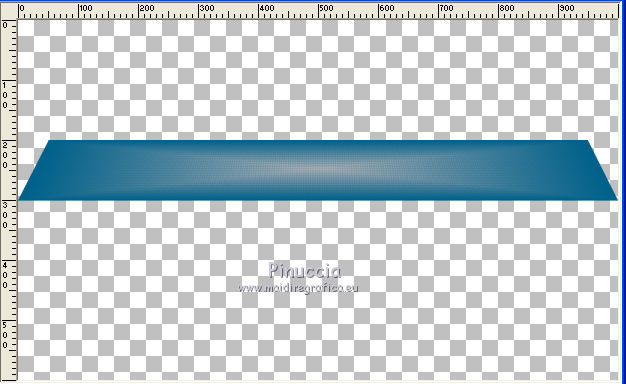
mode Perspective  ,
,
push the left top node to the right, to 50 pixels.

the right node will move symmetrically.
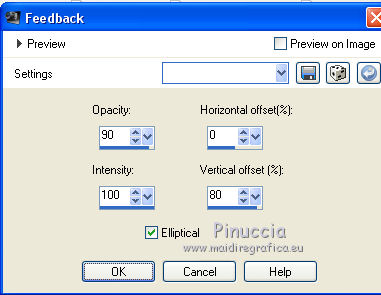
6. Effects>Reflection Effects>Feedback.
7. Image>Flip.
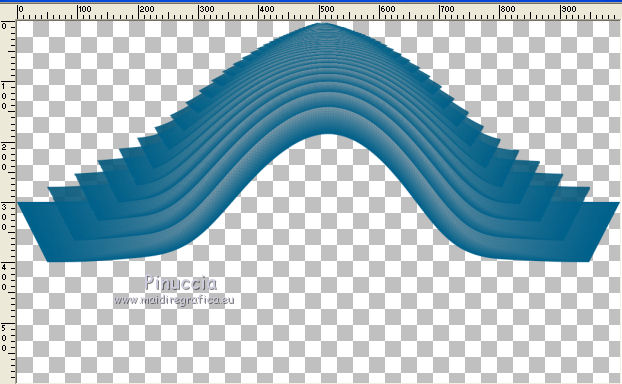
8. Activate the Warp Brush Tool  with these settings

point the mouse to the bottom center (500 pixels)

and push the image to the top, in order to obtein about this.
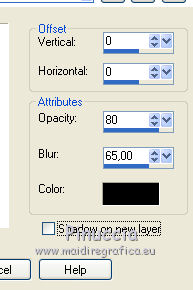
9. Effects>3D Effects>Drop Shadow, color black.
10. Layers>Duplicate.
11. Effects>Geometric Effects>Circle.

12. Image>Flip.
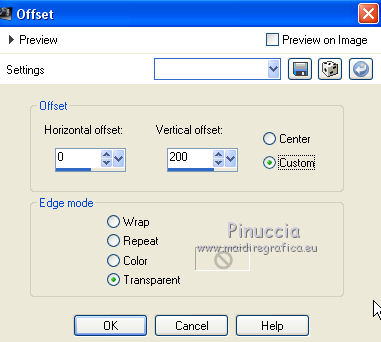
Effects>Image Effects>Offset.
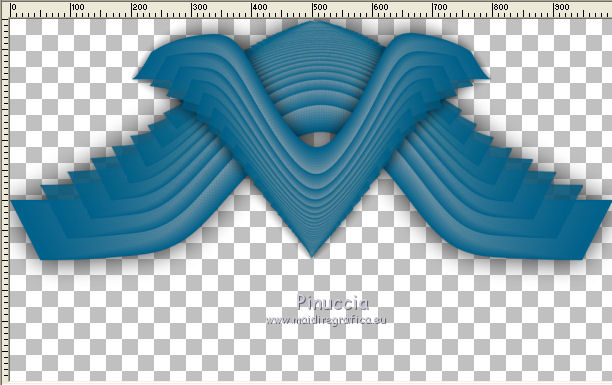
You should have about this
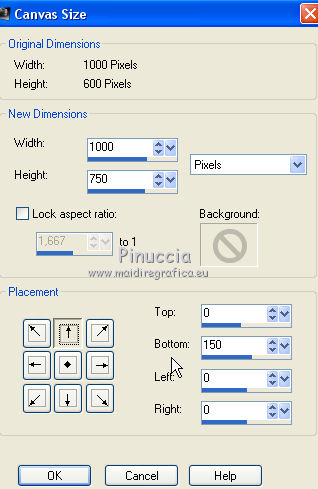
13. Image>Canvas Size - 1000 x 750 pixels.
14. Layers>New Raster Layer.
Layers>Arrange>Send to Bottom.
Flood Fill  the layer with your Gradient.
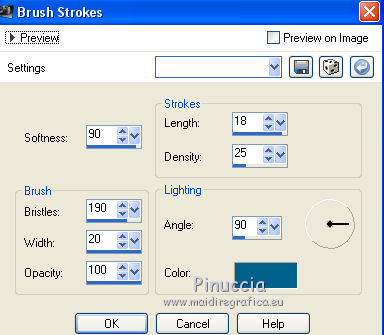
15. Effects>Art Media Effects>Brush Strokes - foreground color #00618b.
16. Selection Tool 
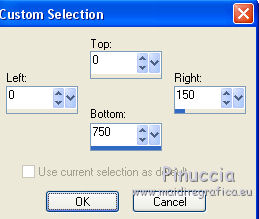
(no matter the type of selection, because with the custom selection your always get a rectangle)
clic on the Custom Selection 
and set the following settings.
17. Selections>Promoted selection to layer.
Selections>Select None.
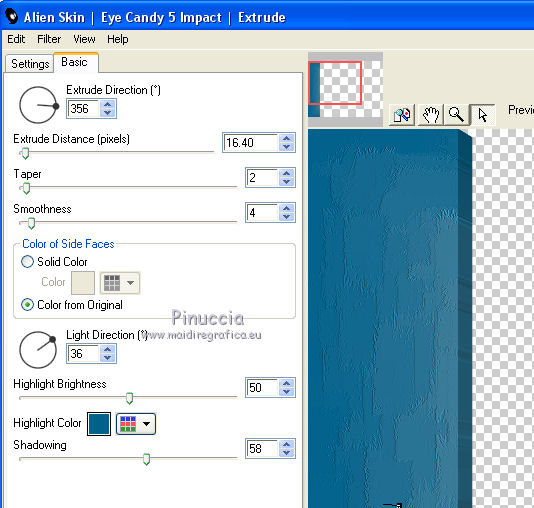
18. Effects>Plugins>Alien Skin Eye Candy 5 Impact - Extrude - foreground color #00618b.
19. Effects>3D Effects>Drop Shadow, same settings.

20. Layers>Duplicate.
Image>Mirror.
21. Open the tube nativita_byClo - Edit>Copy.
Go back to your work and go to Edit>Paste as new layer.
Image>Resize, 2 times to 80% and 1 time to 90%, resize all layers not checked.
Move  the tube down.
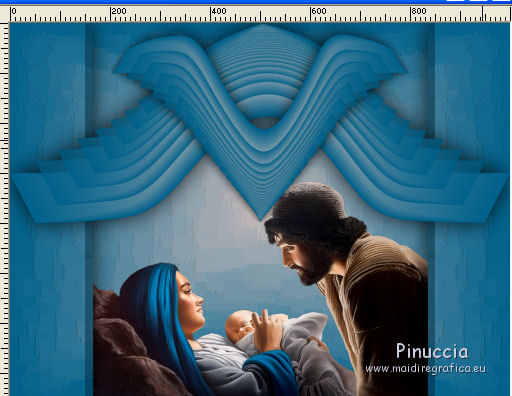
22. Effects>3D Effects>Drop Shadow, same settings.

23. Activate the top layer.
Open the tube Angelito_Texto_Christmas Happy_nines - Edit>Copy.
Go back to your work and go to Edit>Paste as new layer.
Move  the tube at the top, see my example.
24. Open the tube sneugle_snowflakes - Edit>Copy.
Go back to your work and go to Edit>Paste as new layer.
Move  the tube to the left side, see my example.
Layers>Duplicate.
Image>Mirror.
25. Sign your work on a new layer.
26. Layers>Merge>Merge All.
Image>Resize, to 90%, resize all layers checked.
27. Image>Add borders, 2 pixels, symmetric, foreground color #00618b.
Image>Add borders, 5 pixels, symmetric, background color #c7bbba.
Image>Add borders, 30 pixels, symmetric, foreground color #00618b.
28. Activate the Magic Wand Tool 
and clic on the 30 pixels border to select it.
29. Change the settings of your gradient, style Radial.
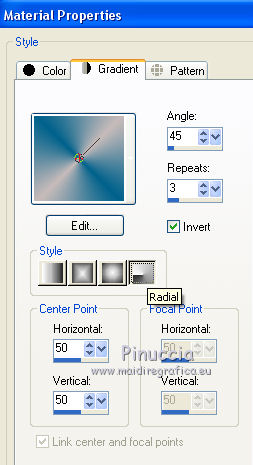
Flood Fill  the selection with your Gradient.
30. Effects>Plugins>Graphics Plus - Cross shadow.
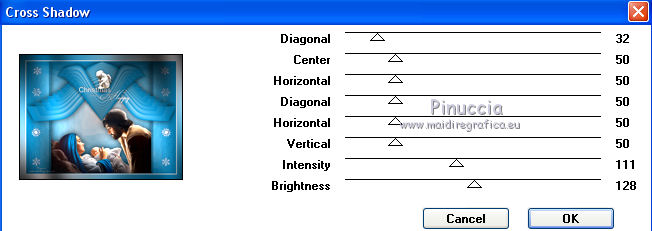
Selections>Select None.
31. Image>Add borders, 2 pixels, symmetric, foreground color #00618b.
32. Save as jpg.

If you have problems or doubt, or you find a not worked link, or only for tell me that you enjoyed this tutorial, write to me.
12 November 2016
