Here you find the original of this tutorial:

This tutorial was created with PSP X2 but it can also be made using other versions of PSP.
Since version PSP X4, Image>Mirror was replaced with Image>Flip Horizontal,
and Image>Flip with Image>Flip Vertical, there are some variables.
In versions X5 and X6, the functions have been improved by making available the Objects menu.
In the latest version X7 command Image>Mirror and Image>Flip returned, but with new differences.
See my schedule here
French translation of janvier 2015 here
Your versions here
For this tutorial, you will need:
Material here
For the tubes thanks Tocha and Animabelle
Effects>Plugins
consult, if necessary, my filter section here
Andromeda - Designs here
Transparency - Eliminate Black here

You can change Blend Modes according to your colors.
In the newest versions of PSP, you don't find the foreground/background gradient (Corel_06_029).
You can use the gradients of the older versions.
The Gradient of CorelX here
Copy the selection in the Selections Folder.
Open the mask in PSP and minimize it with the rest of the material.
1. Open a new transparent image 1000 x 750 pixels.
2. Set your foreground color to #506d8d,
and your background color to #dacacb.

Set your foreground color to a Foreground/Background Gradient, style Linear

Flood Fill  the transparent image with your Gradient.
3. Selections>Select All.
Open the tube Tocha24697 and go to Edit>Copy.
minimize the tube: you'll use it later
Go back to your work and go to Edit>Paste into Selection.
Selections>Select None.
4. Effects>Image Effects>Seamless Tiling, default settings.

5. Adjust>Blur>Gaussian Blur - radius 30.

6. Effects>Artistic Effects>Enamel, color white.

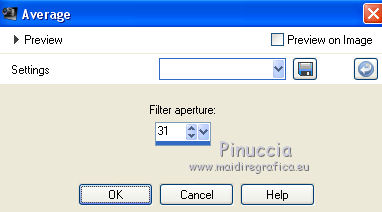
7. Adjust>Blur>Average
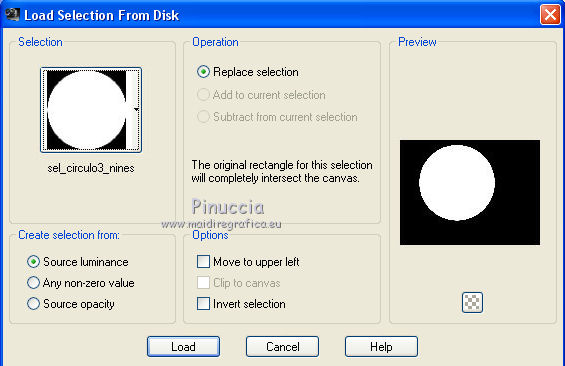
8. Selections>Load/Save Selection>Load Selection from Disk.
Look for and load the selection sel_circulo3_nines.
9. Layers>New Raster Layer.
Change the Gradient settings.

Flood Fill  the selection with your Gradient.
10. Selections>Modify>Contract - 20 pixels.
Press CANC on the keyboard 
11. Selections>Modify>Expand - 2 pixels.
12. Layers>New Raster Layer.
Layers>Arrange>Move Down (under the circle layer).

Set your foreground color to #d19221.
Flood Fill  the layer with the new foreground color.
13. Layers>New Raster Layer.
Open the tube 04_fleurs_animabelle_page 3 and go to Edit>Copy.
Go back to your work and go to Edit>Paste into Selection.
Layers>Duplicate
and change the Blend Mode of this layer to Multiply.

Keep selected.
14. Layers>New Raster Layer.
The layer is under the circle layer.
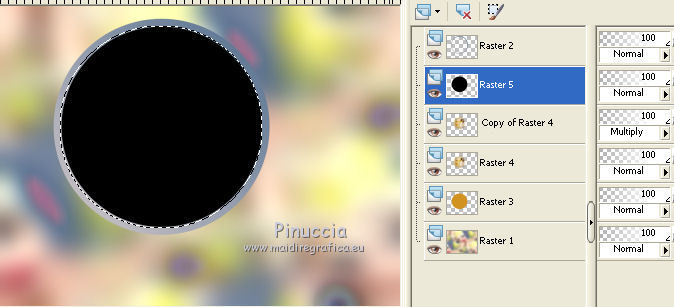
Set your foreground color to black.
Flood Fill  this layer with color black.
15. Effects>Plugins>Andromeda - Designs
click on "plus" of Category to get, to the right, Symbols 1,
and place your settings

If you want see the result, click on Preview.

16. Effects>Plugins>Transparency - Eliminate Black.
17. Selections>Float
Selections>Defloat.
Layers>New Raster Layer.
Flood Fill  the selection with your background color #d4cacb.
Selections>Select None.
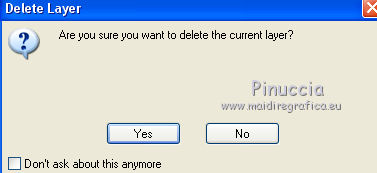
18. Now you can delete the layer with Andromeda:
click on the red cross

Reply yes
19. Activate the layer of the circle.

20. Selections>Select All.
Selections>Float.
21. Effects>3D Effects>Inner Bevel.
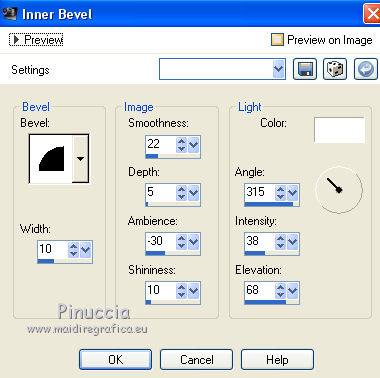
Selections>Select None.
22. Close your background layer.
Layers>Merge>Merge visible.
23. Effects>Image Effects>Offset.
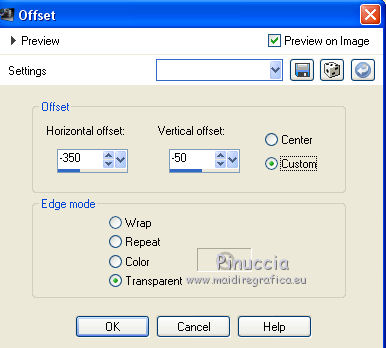
24. Effects>3D Effects>Drop Shadow, color black.
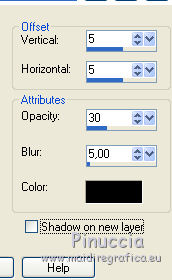
25. Layers>Duplicate.
Image>Mirror.
26. Open again and activate your background layer.
Layers>New Mask layer>From image
Open the menu under the source window and you'll see all the files open.
Select the mask mask.ket-fadesuave.

Layers>Merge>Merge Group.
Layers>New Mask layer>From image
Open the menu under the source window
and select again the mask mask.ket-fadesuave.
Layers>Merge>Merge Group.
27. Open the tube 67_fleurs_animabelle_page 3 and go to Edit>Copy.
Go back to your work and go to Edit>Paste as new layer.
28. Effects>Image Effects>Offset.
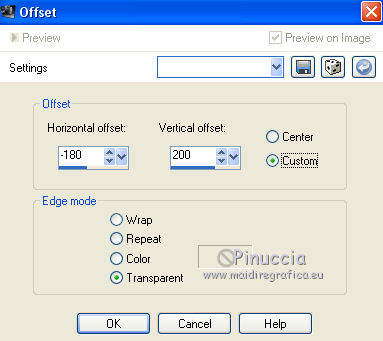
29. Effects>Reflection Effects>Rotating Mirror.

for my example I erased  the shadows of the tube


30. Selection Tool 
(no matter the type of selection, because with the custom selection your always get a rectangle)
clic on the Custom Selection 
and set the following settings.

31. Set your foreground color to the initial color #506d8d.
Change again the settings of your Gradient.

Flood Fill  the selection with your Gradient.
32. Effects>3D Effects>Inner Bevel, same settings.

Selections>Select None.
33. Effects>Reflection Effects>Feedback.

34. Effects>3D Effects>Drop Shadow, color black.

35. Activate your top layer.
Activate again the tube Tocha24697 and go to Edit>Copy.
Go back to your work and go to Edit>Paste as new layer.
Image>Resize, to 80%, resize all layers not checked.
Move  the tube a bit higher.
36. Effects>3D Effects>Drop Shadow, color black.
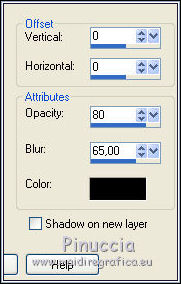
37. Layers>New Raster Layer.
Layers>Arrange>Send to Bottom.
Set your foreground color to #9e002a.
Flood Fill  the layer with the new foreground color.
38. Activate your top layer.
Sign your work on a new layer.
Layers>Merge>Merge All and save as jpg.

If you have problems or doubt, or you find a not worked link, or only for tell me that you enjoyed this tutorial, write to me.
20 December 2019
 english version

 english version
