|
TOP MAKE UP VICE
 ENGLISH VERSION ENGLISH VERSION
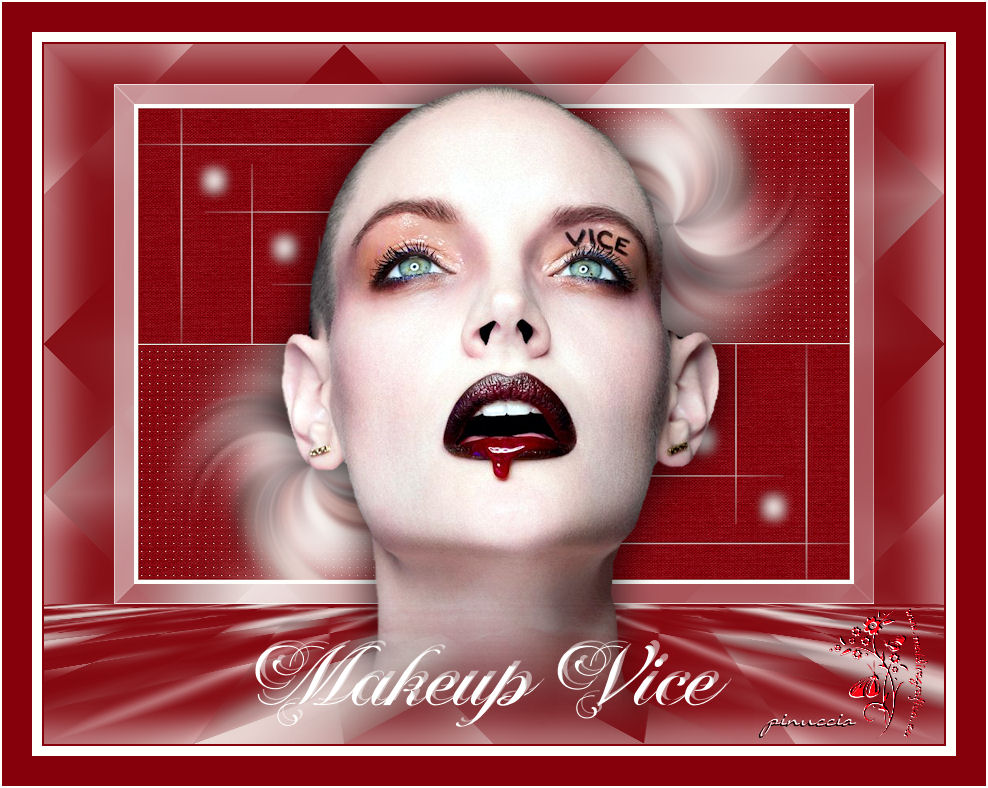
Here you find the original of this tutorial:

This tutorial was translated with PSPX3 but it can also be made using other versions of PSP.
Since version PSP X4, Image>Mirror was replaced with Image>Flip Horizontal,
and Image>Flip with Image>Flip Vertical, there are some variables.
In versions X5 and X6, the functions have been improved by making available the Objects menu.
In the latest version X7 command Image>Mirror and Image>Flip returned, but with new differences.
See my schedule here
French translation here
Your versions ici
For this tutorial, you will need:
Material here
Renee_tube_lazer_makeup vice
Narah_Mask_0610
Mask.ket-fadesuave
Texto-Makeup Vice-nines
Plugins
consult, if necessary, my filter section here
Filters Unlimited 2 here
Mura's Meister - Perspective Tiling here
Mehdi - Sorting Tiles here
AP Lines - Lines SilverLining here

You can change Blend Modes according to your colors.
Open the masks in PSP and minimize them with the rest of the material.
1. Set your foreground color to #fffffc,
Set your Background color to #86000c.
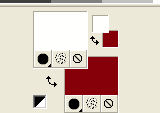
Open a new transparent image 450 x 300 pixels.
Flood Fill  the transparent image with your foreground color #fffffc. the transparent image with your foreground color #fffffc.
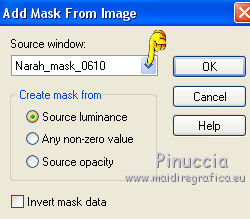
2. Layers>New Mask layer>From image
Open the menu under the source window and you'll see all the files open.
Select the mask Narah_Mask_0610.
Layers>Merge>Merge Group
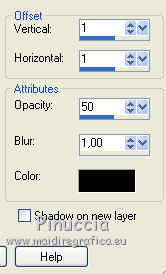
3. Effects>3D Effects>Drop Shadow, color black.
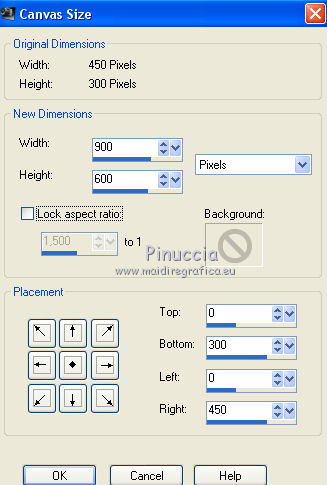
4. Image>Canvas Size - 900 x 600 pixels.
5. Layers>Duplicate.
Image>Mirror.
Image>Flip.
6. Layers>Merge>Merge down.
7. Layers>New Raster Layer.
Layers>Arrange>Send to Bottom.
8. Flood Fill  the layer with your background color #86000c. the layer with your background color #86000c.

9. Effects>Plugins>Filters Unlimited 2.0 - Paper Textures - Canvas Fine, par défaut.

Keep the bottom layer selected.
10. Selection Tool 
(no matter the type of selection, because with the custom selection your always get a rectangle)
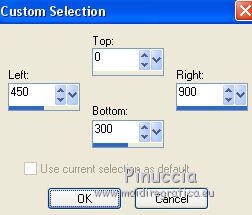
clic on the Custom Selection 
and set the following settings.
11. Selections>Promote Selection to Layer.
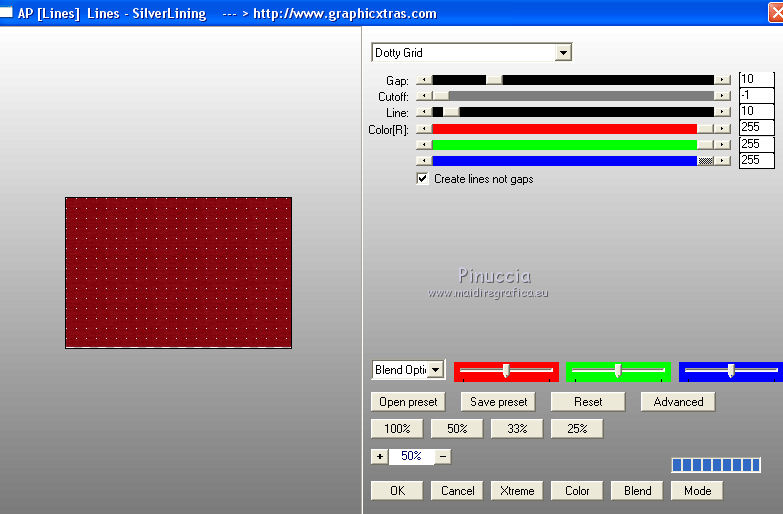
12. Effects>Plugins>AP Lines - Lines SilverLining.
13. Layers>New Raster Layer.
Flood Fill  the layer with your foreground color #fffffc. the layer with your foreground color #fffffc.
14. Selections>Modify>Contract - 1 pixel.
Press CANC on the keyboard 
Keep selected.
15. Layers>New Raster Layer.
Open the tube Renee_tube_lazer_makeup - Edit>Copy.
.
Go back to your work and go to Edit>Paste as new layer.
Image>Resize, à 50%, resize all layers not checked.
Place  rightly the tube on the selection. rightly the tube on the selection.

16. Selections>Invert.
Press CANC on the keyboard.
Keep selected.
17. Selections>Invert.
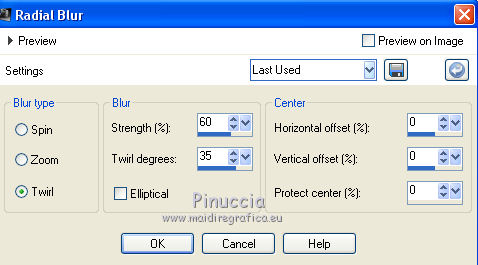
18. Adjust>Blur>Radial Blur.
Selections>Select None.
19. Layers>Merge>Merge down - 2 times.
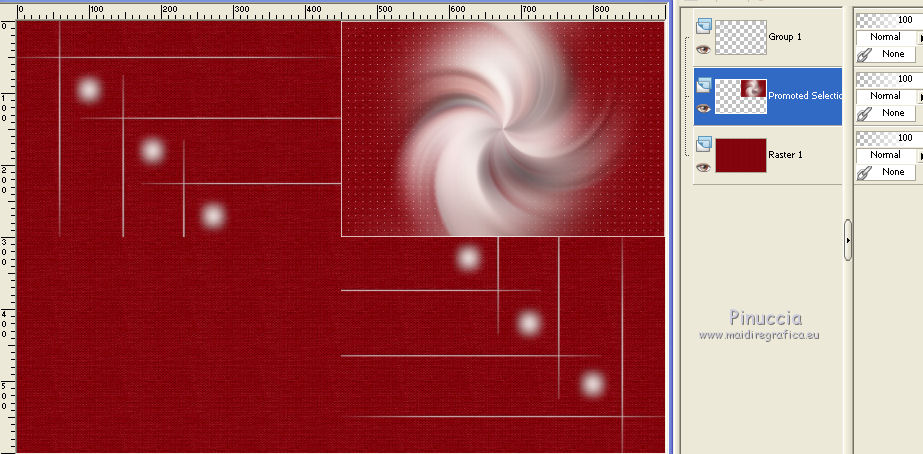
20. Layers>Duplicate.
Image>Mirror.
Image>Flip.
21. Layers>New Raster Layer.
Layers>Arrange>Bring to top.
Flood Fill  the layer with your foreground color #fffffc. the layer with your foreground color #fffffc.
22. Selections>Select All.
Selections>Modify>Contract - 5 pixels.
Press CANC on the keyboard.
Selections>Select None.
23. Layers>Merge>Merge visible.
24. Edit>Copy.
25. Image>Resize, to 80%, resize all layers not checked.
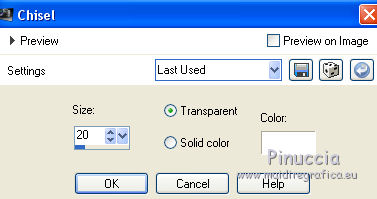
26. Effects>3D Effects>Chisel, color white.
27. Layers>New Raster Layer.
Layers>Arrange>Send to Bottom.
Selections>Select All.
28. Edit>Paste into Selection.
Selections>Select None.
29. Adjust>Blur>Gaussian Blur - radius 25.

30. Effects>Plugins>Mehdi - Sorting Tiles.

31. Layers>Duplicate.
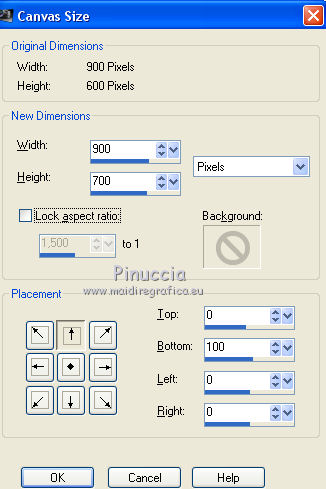
32. Image>Canvas Size - 900 x 700 pixels.
33. Effects>Plugins>Mura's Meister - Perspective Tiling.

34. Activate the top layer.
Open the tube Renee_tube_lazer_makeup - Edit>Copy.
.
Go back to your work and go to Edit>Paste as new layer.
Image>Resize, to 80%, resize all layers not checked.
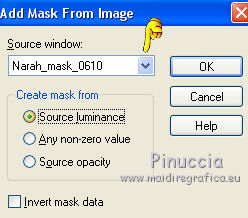
35. Layers>New Mask layer>From image
Open the menu under the source window and select the mask mask.ket-fadesuave.
Layers>Duplicate (to apply the mask 2 times)
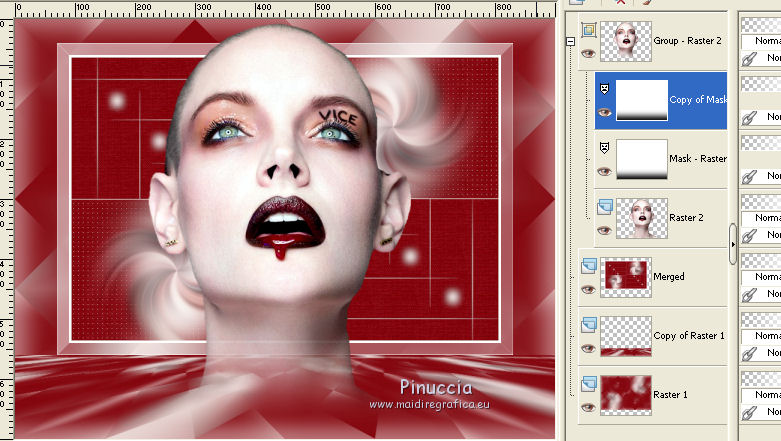
Layers>Merge>Merge Group.
Place  the tube in the middle. the tube in the middle.
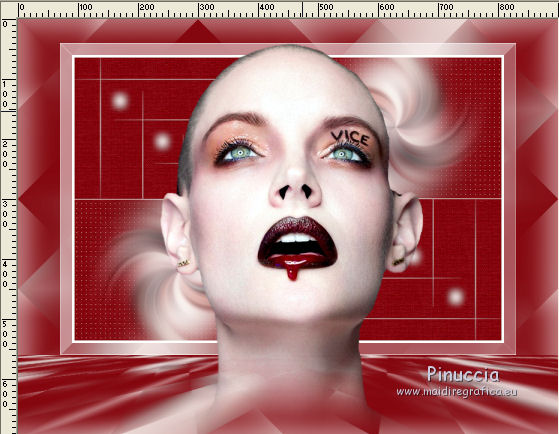
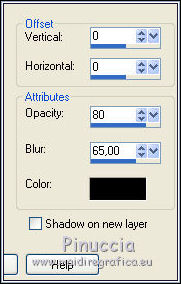
36. Effects>3D Effects>Drop Shadow, color black.
37. Open the text Makup Vice_nines - Edit>Copy.
.
Go back to your work and go to Edit>Paste as new layer.
Move  the text at the bottom, see my example. the text at the bottom, see my example.
38. Layers>Merge>Merge All.
39. Image>Add borders, 2 pixels, symmetric, background color #86000c.
Image>Add borders, 10 pixels, symmetric, foreground color #fffffc.
Image>Add borders, 30 pixels, symmetric, background color #86000c.
Image>Add borders, 2 pixels, symmetric, foreground color #fffffc.
40. Sign your work and save as jpg.
Your versions ici

If you have problems or doubts, or you find a not worked link, or only for tell me that you enjoyed this tutorial, write to me.
6 September 2017
|
 ENGLISH VERSION
