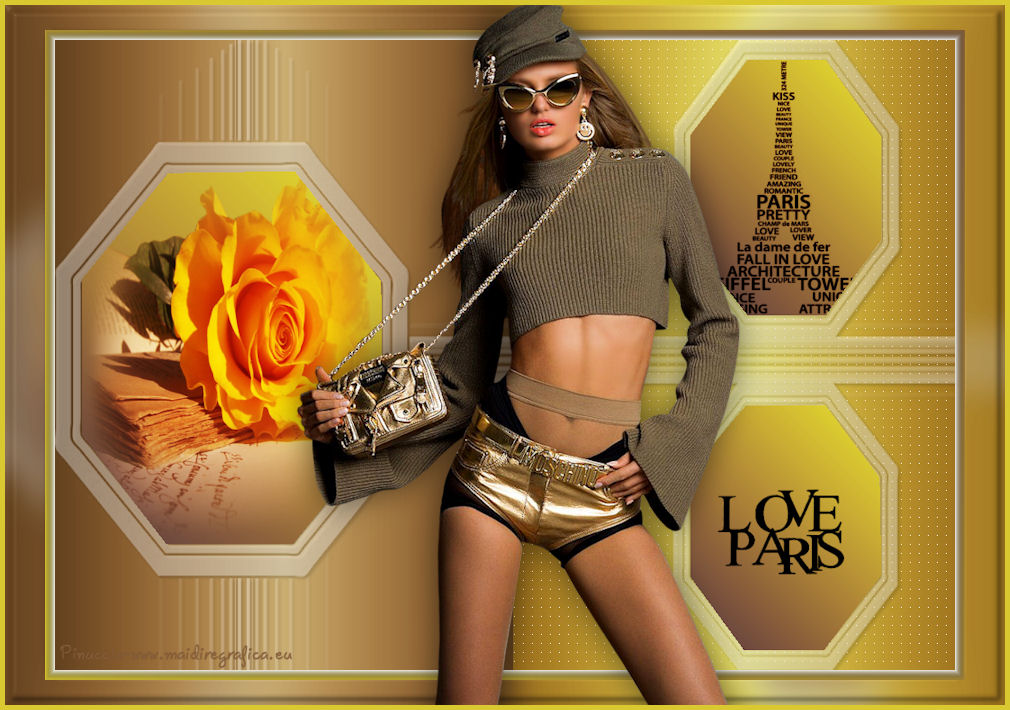
Here you find the original of this tutorial:

This tutorial was created with PSP X2 but it can also be made using other versions of PSP.
Since version PSP X4, Image>Mirror was replaced with Image>Flip Horizontal,
and Image>Flip with Image>Flip Vertical, there are some variables.
In versions X5 and X6, the functions have been improved by making available the Objects menu.
In the latest version X7 command Image>Mirror and Image>Flip returned, but with new differences.
See my schedule here
French translation here
Your versions here
For this tutorial, you will need:
Material here
Tube Tocha24800 by Tony Chavarria
Tube calguisParis29112014 by Guismo
Tube calguisloveparis29112014 by Guismo
Misted calguisrosemist2889 by Guismo
Narah_mask_0792
4 Selecciones sel_rombo_nines
Filtres:
consult, if necessary, my filter section here
Filters Unlimited 2.0 here
AP 01 [Innovations] - Lines SilverLining ici
VM Extravaganza - Picture in a Picture ici
Filters VM Extravaganza can be used alone or imported into Filters Unlimited.
(How do, you see here)
If a plugin supplied appears with this icon  it must necessarily be imported into Unlimited

Copy the Selections in the Selections folder.
Open the mask and minimize with the rest of the material.
1. Open a new transparent image 1000 x 700 pixels.
2. Set the Foreground color to #d0df62,
and the Background color to #445377.

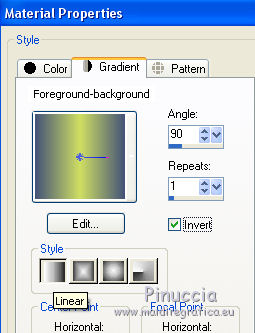
Set the Foreground color to Foreground/background Gradient, style Linear.

Flood Fill  with the gradient.
4. Effects>Plugins>Filters Unlimited 2.0 - VM Extravaganza - Picture in a picture.

5. Selections>Load/Save selection>Load Selection from disk.
Look for and load the selection sel_rombo3_nines.

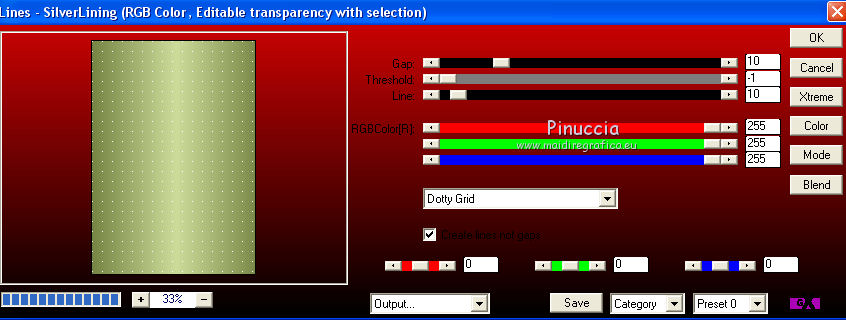
6. Effects>Plugins>AP 01 [Innovations] - Lines SilverLining.

Selections>Select None.
7. Set the Foreground color to white color #fffffff.
Set the opacity of Flood Fill Tool to 40.
Layers>New Raster Layer.
Flood Fill  the layer with white color.

8. Layers>New Mask layer>From image
Open the menu under the source window and you'll see all the files open.
Select the mask Narah_mask_0792:

Layers>Merge>Merge group.
9. Adjust>Sharpness>Sharpen more.
10. Effects>3D Effects>Drop Shadow, color black.

11. Selections>Load/Save selection>Load Selection from disk.
Look for and load the selection sel_rombo_nines.

12. Layers>New Raster Layer.
Set again the Foreground color to #d0df62.
Set the Foreground color to Foreground/background Gradient, style Linear.

Flood Fill  the layer with the gradient
(don't forget to set again the opacity to 100).
13. Open the tube calguisrosemist2889 - Edit>Copy.
Back to your work and go to Edit>Paste into Selection.
Selections>Select None.
14. Selections>Load/Save selection>Load Selection from disk.
Look for and load the selection sel_rombo1_nines.

15. Layers>New Raster Layer.
Flood Fill  the selection with the gradient.
16. Open the tube calguisParis29112014 - Edit>Copy.
Back to your work and go to Edit>Paste into Selection.
Selections>Select None.
17. Selections>Load/Save selection>Load Selection from disk.
Look for and load the selection sel_rombo2_nines.

18. Layers>New Raster Layer.
Flood Fill  the selection with the gradient.
Selections>Select None.
19. Open the tube calguisloveparis - Edit>Copy.
Back to your work and go to Edit>Paste as New Layer.
Image>Resize, 2 times to 80%, resize all layers not checked.
Move  the tube on the lower rhomb.

20. Layers>Merge>Merge visible.
21. Edit>Copy (to keep your work in memory).
22. Image>Resize, to 90%, resize all layers not checked.
23. Activate the Magic Wand Tool 
clic on the transparent space to select it.
24. Edit>Paste into Selection (your work is in memory).
25. Adjust>Blur>Gaussian Blur - radius 15.

26. Effects>3D Effects>Inner bevel.

27. Selections>Invert.
28. Effects>3D Effects>Chisel.

Selections>Select None.
29. Layers>New Raster Layer.
Layers>Arrange>Send to Bottom.
Change the settings of the gradient: Invert not checked.

Flood Fill  the layer with the gradient.
30. Activate the top layer.
Open the tube Tocha24800, Edit>Copy.
Go back to your work and Edit>Paste as new layer.
Image>Resize - to à 85%, resize all layers not checked.
Image>Mirror.
31. Effects>3D Effects>Drop Shadow, color black.

32. Layers>Merge>Merge all.
33. Image>Add borders, 5 pixels, symmetric, color #dce455.
34. Sign your work et save as jpg.
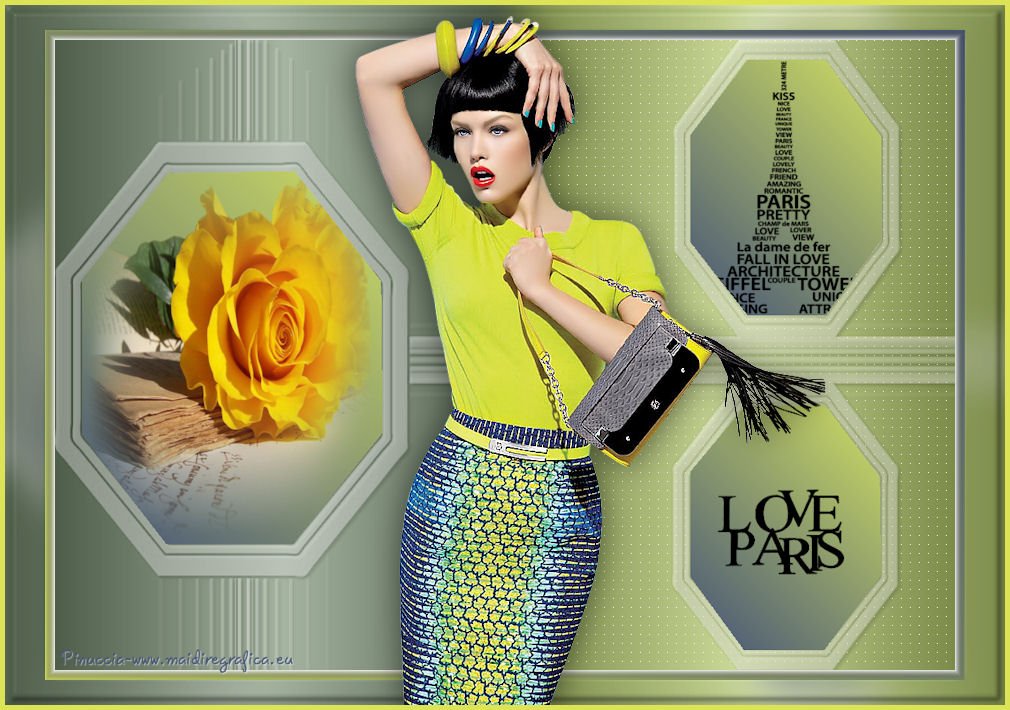
The tube of this version is by Min@


If you have problems or doubt, or you find a not worked link, or only for tell me that you enjoyed this tutorial, write to me.
12 March 2014

