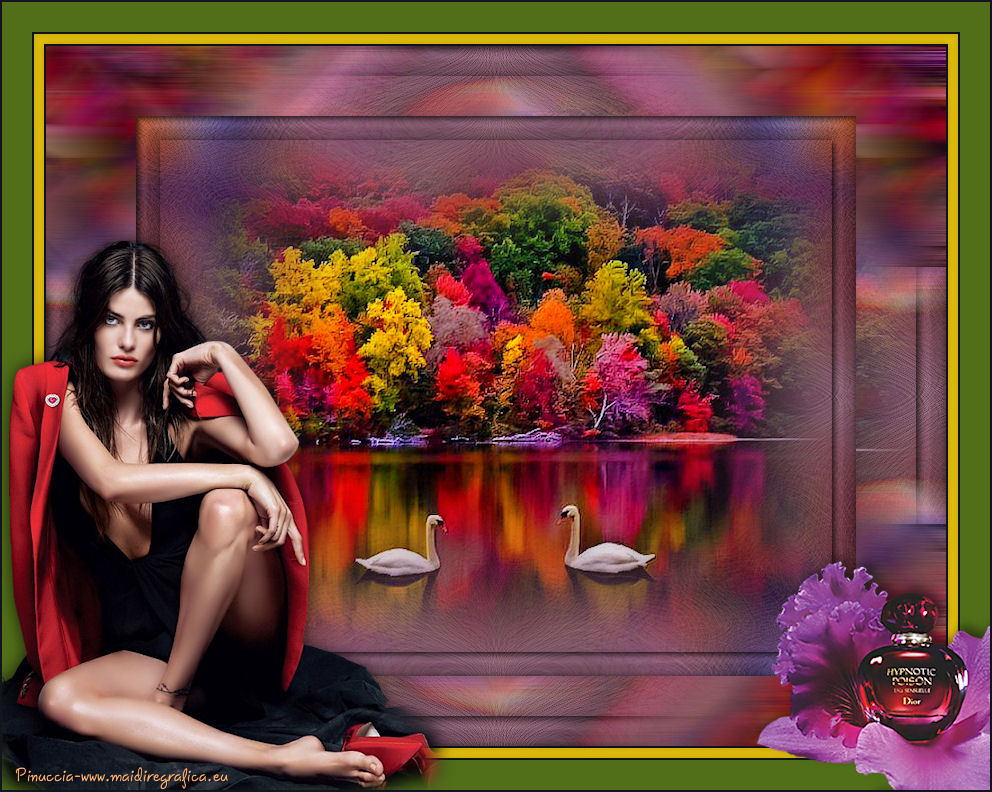
Here you find the original of this tutorial:

This tutorial was created with PSP X2 but it can also be made using other versions of PSP.
Since version PSP X4, Image>Mirror was replaced with Image>Flip Horizontal,
and Image>Flip with Image>Flip Vertical, there are some variables.
In versions X5 and X6, the functions have been improved by making available the Objects menu.
In the latest version X7 command Image>Mirror and Image>Flip returned, but with new differences.
See my schedule here
French translation here
Your versions here
For this tutorial, you will need:
Material here
Tube MinALady3.24.3.15 by Min@
Tube ketlandscape2015030 by Ket
Tube 12930422550_divers_nikita
Tube Radyga-tubes-050-18-03-2013
Filtres:
consult, if necessary, my filter section here
Filters Unlimited 2.0 here
Simple - Diamonds, 4Way Average here
Xero XL - Porcelain here
Filters Simple can be used alone or imported into Filters Unlimited.
(How do, you see here)
If a plugin supplied appears with this icon  it must necessarily be imported into Unlimited

1. Open a new transparent image 900 x 700 pixels.
2. Set the Foreground color to #02066a,
and the Background color to #faae6b.
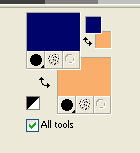
Set the Foreground color to Foreground/background Gradient, style Linear.
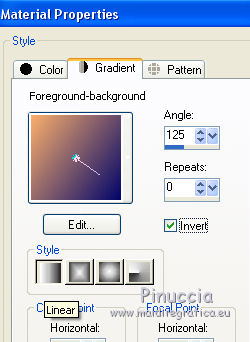
Flood Fill  with the gradient.
3. Open the tube 12930422550_divers_nikita - Edit>Copy.
Back to your work and go to Edit>Paste as New Layer.
Erase the watermark.
Image>Flip.
4. Effects>Image Effects>Seamless Tiling, default.

5. Adjust>Blur>Radial blur.
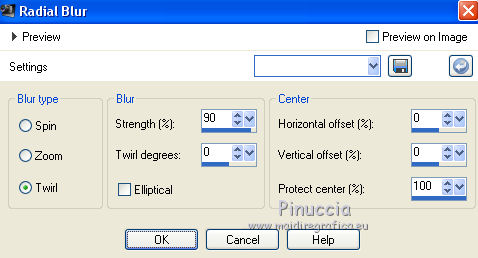
6. Layers>Merge>Merge visible.
7. Again Effects>Image Effects>Seamless Tiling, default.
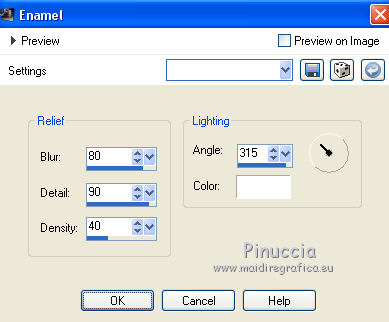
8. Effects>Artistic Effects>Enamel, color white.
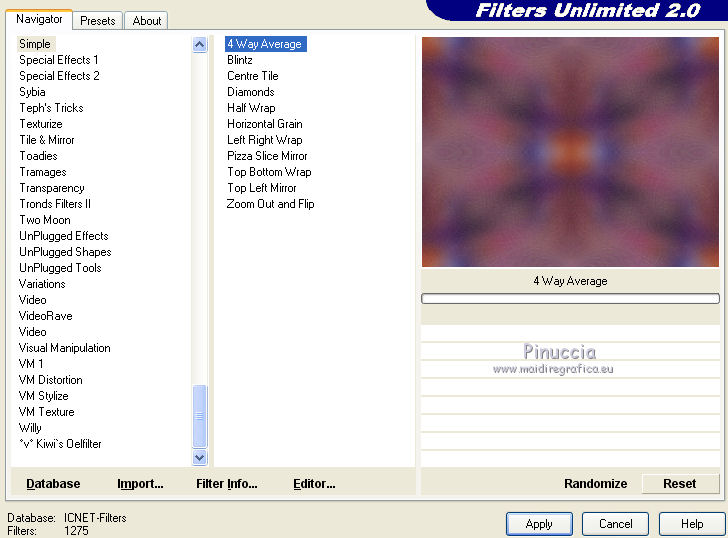
9. Effects>Plugins>Filters Unlimited 2.0 - Simple - 4Way Average.
10. Open the tube ketlandscape2015030 - Edit>Copy.
Back to your work and go to Edit>Paste as New Layer.
Layers>Merge>Merge visible.
11. Selections>Select All.
Selections>Modify>Contract - 30 pixels.
Selections>Invert.
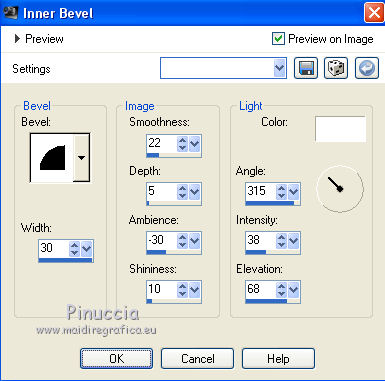
12. Effecs>3D Effects 3D>Inner bevel.
13. Layers>New Raster Layer.
Effects>3D Effects>Cutout - color black.
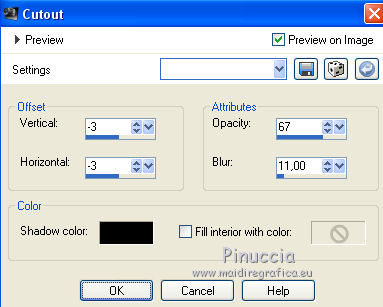
Repeat Effect Cutout, but vertical and horizontal 3.
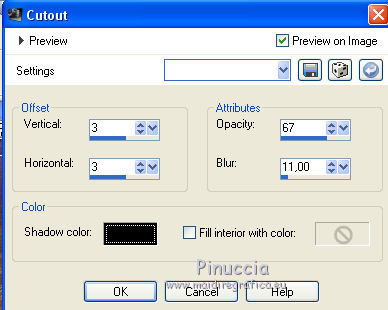
Sélections>Select None.
Layers>Merge>Merge down.
14. Layers>Duplicate.
Image>Resize - to 80%, resize all layers not checked.
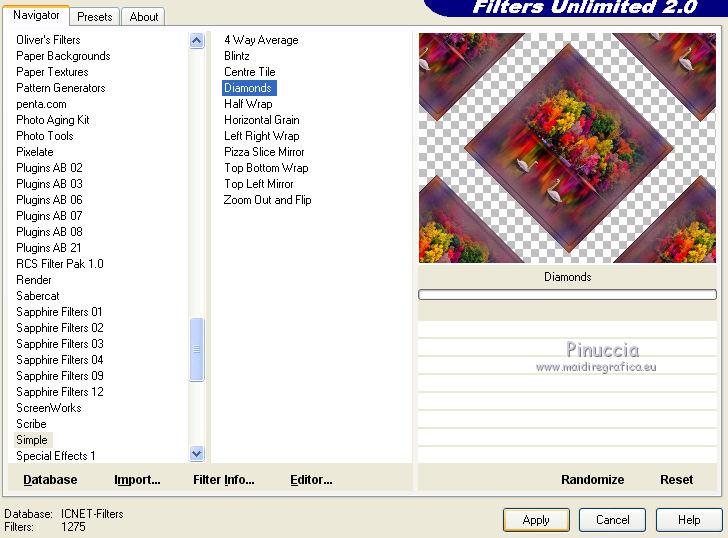
15. Effects>Plugins>Filters Unlimited 2.0 - Simple - Diamonds.
16. Effects>Distortion Effects>Wind - from right, intensity 100.
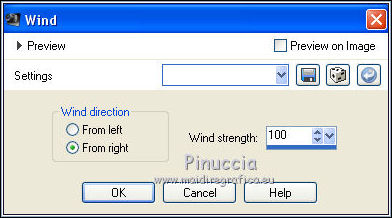
17. Effets>Effets de distorsion>Vent - from left, intensity 100.

18. Activate the bottom layer.
Layers>Duplicate.
Image>Resize - to 80%, resize all layers not checked.
Layers>Arrange>Bring to Top.
19. Calques>Fusionner>Tous.
20. Image>Add borders, 2 pixels, symmetric, color #121520.
Image>Add borders, 10 pixels, symmetric, color #e6c10d.
Image>Add borders, 2 pixels, symmetric, color #121520.
Image>Add borders, 30 pixels, symmetric, color #54711d.
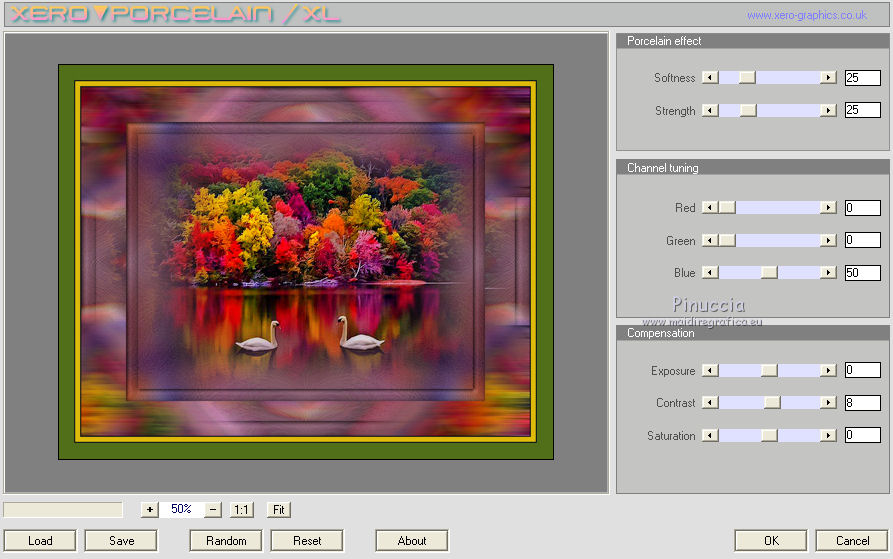
21. Effects>Plugins>Xero XL - Porcelain.
22. Open the tube Min@.Lady3.24.3.15 y - Edit>Copy.
Back to your work and go to Edit>Paste as New Layer.
Image>Resize - to 80%, resize all layers not checked.
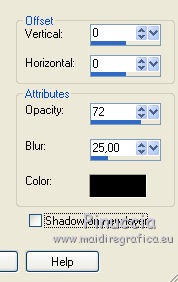
23. Effects>3D Effects>Drop Shadow, color black.
24. Open the tube Radyga-050-18-03-2013 - Edit>Copy.
Back to your work and go to Edit>Paste as New Layer.
Image>Resize - to 80%, resize all layers not checked.
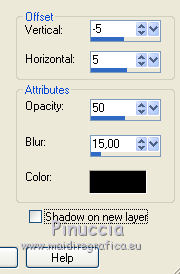
25. Effects>3D Effects>Drop Shadow, color black.
26. Image>Add borders, 5 pixels, symmetric, color #121520.
26. Sign your work et save as jpg.

If you have problems or doubt, or you find a not worked link, or only for tell me that you enjoyed this tutorial, write to me.
6 April 2014
