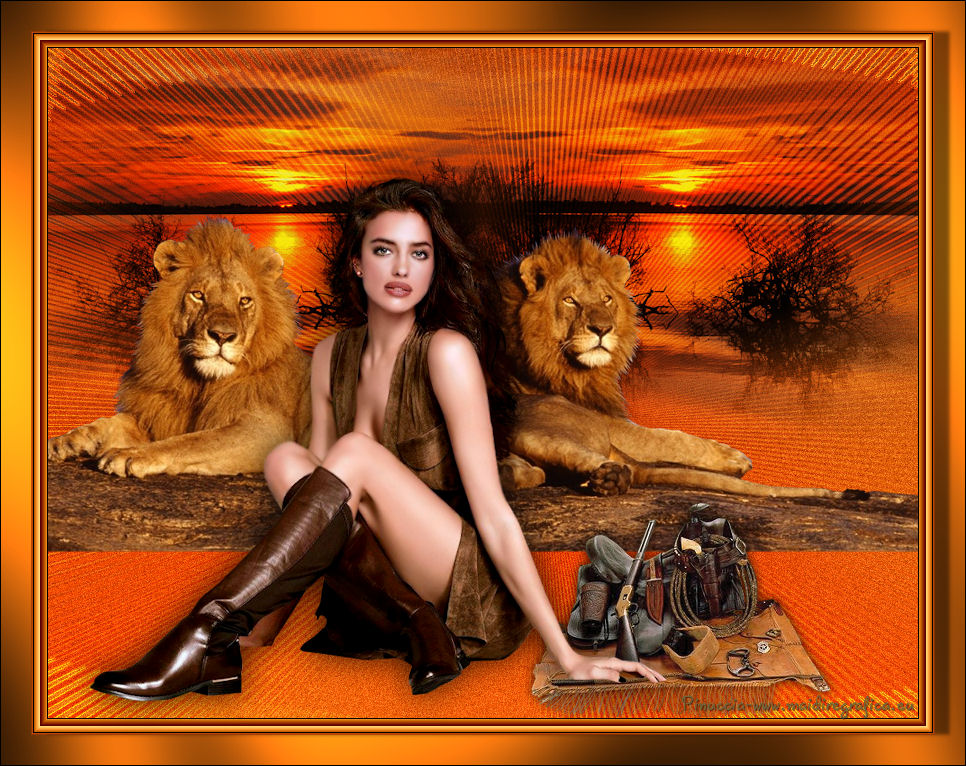
This tutorial was translated with PSPX3 but it can also be made using other versions of PSP.
Since version PSP X4, Image>Mirror was replaced with Image>Flip Horizontal,
and Image>Flip with Image>Flip Vertical, there are some variables.
In versions X5 and X6, the functions have been improved by making available the Objects menu.
In the latest version X7 command Image>Mirror and Image>Flip returned, but with new differences.
See my schedule here
French translation here
Your versions here
For this tutorial, you will need:
Material here
Tube Min@Irina.2.19.9.15
80_mist_exclusif_pausage_animabelle
Myst-2_AfricanLionsMasaiMara
COWBOYSBOOTS-SADDLE-GUN
Plugins
consult, if necessary, my filter section here
Filters Unlimited 2.0 ici
AAA Frames - Frame Works ici
Tramages - Pool Shadow ici

Filters Tramages can be used alone or imported into Filters Unlimited.
(How do, you see here)
If a plugin supplied appears with this icon  it must necessarily be imported into Unlimited
1. Open a new transparent image 900 x 700 pixels.
2. Set your foreground color to #f7780f.
Set your background color to #ba4706.
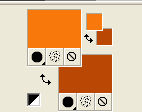
Set your foreground color to a foreground/background gradient, style Linear.
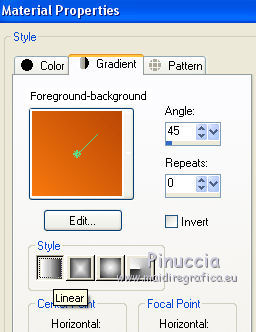
Flood Fill  your transparente image with your gradient.
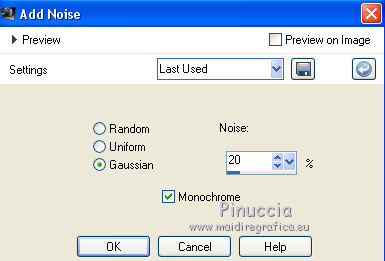
3. Adjust>Add/Remove Noise>Add Noise.
4. Open the tube 80_mist_exclusif_pausage_animabelle - Edit>Copy.
Go back to your work and go to Edit>Paste as new layer.
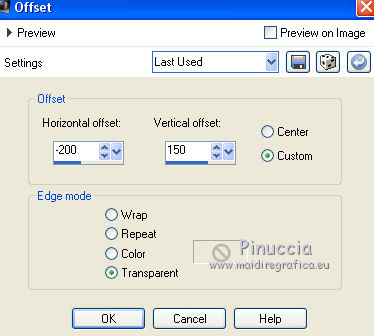
5. Effects>Image Effects>Offset.
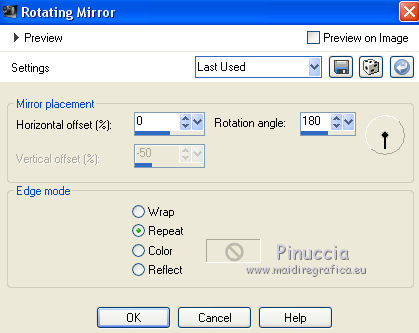
6. Effects>Reflections Effects>Rotating Mirror.
7. Open the tube Myst-2_AfricanLions - Edit>Copy.
Go back to your work and go to Edit>Paste as new layer.
8. Effects>Image Effects>Seamless Tiling, default settings.

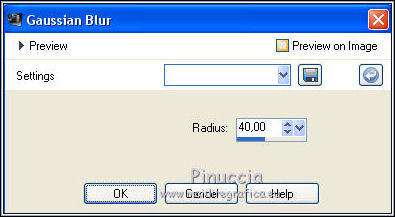
9. Adjust>Blur>Gaussian Blur - radius 40.
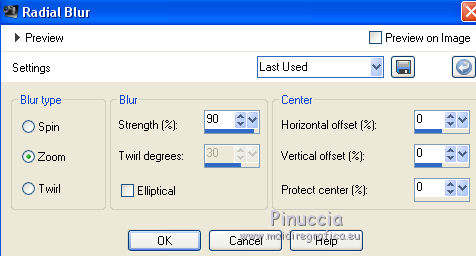
10. Adjust>Blur>Radial Blur.
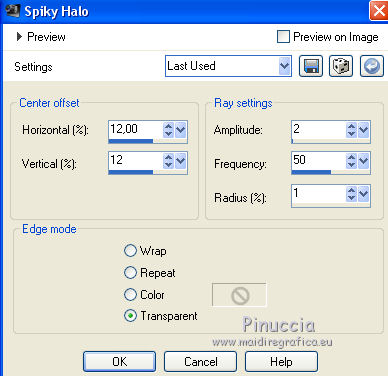
11. Effects>Distortion Effects>Spiky Halo.
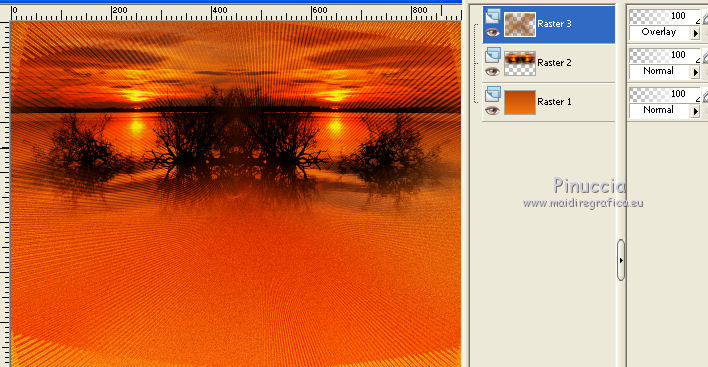
12. Effects>Edge Effects>Enhance more.
Change the blend mode of this layer to Overlay.
13. Edit>Paste as new layer (the tube Myst-2_AfricanLions is still in memory).
14. Layers>Merge>Merge visible.
15. Effects>Plugins>AAA Frames - Frame Works.
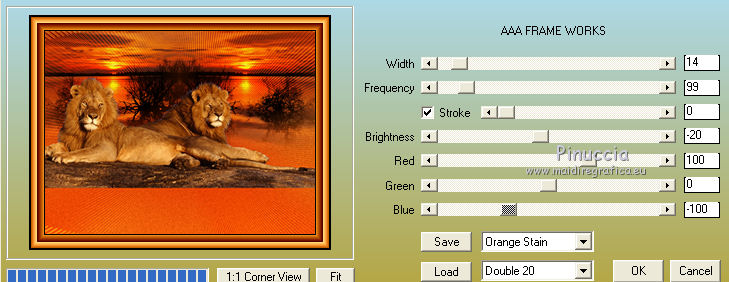
16. Open the tube COWBOYSBOOTS-SADDLE-GUN y Edit>Copy.
Go back to your work and go to Edit>Paste as new layer.
Move  the tube in the lower right.
17. Open the tube Min@Irina.2.19.9.15 - Edit>Copy.
Go back to your work and go to Edit>Paste as new layer.
Image>Resize, to 80%, resize all layer not cheched.
Erase the watermark.
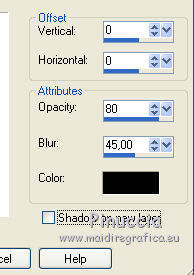
18. Effects>3D Effects 3D>Drop Shadow, color black.
19. Layers>Merge>Merge All.
20. Image>Add borders, 2 pixels, symmetric, background color #ba4706.
Image>Add borders, 30 pixels, symmetric, foreground color #f7780f.
21. Activate the Magic Wand tool 
clic on 30 pixel's bord to select it.
22. Effects>Plugins>Tramages - Pool Shadow, default settings.
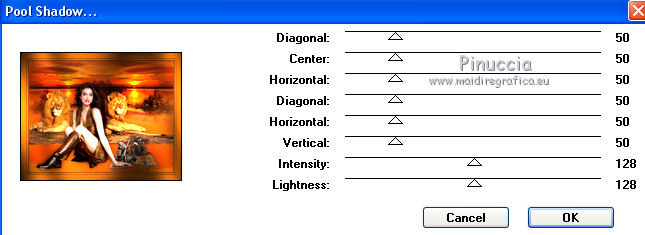
23. Selections>Invert.
24. Effects>3D Effects>Drop shadow, color black.
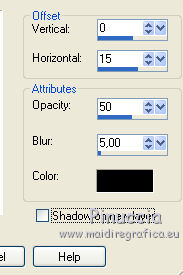
Selections>Select None.
25. Image>Add borders, 1 pixel, symmetric, color black.
26. Sign your work and save as jpg.

If you have problems or doubt, or you find a not worked link, or only for tell me that you enjoyed this tutorial, write to me.
16 February 2016
