This tutorial was translated with PSPX3 but it can also be made using other versions of PSP.
Since version PSP X4, Image>Mirror was replaced with Image>Flip Horizontal,
and Image>Flip with Image>Flip Vertical, there are some variables.
In versions X5 and X6, the functions have been improved by making available the Objects menu.
In the latest version X7 command Image>Mirror and Image>Flip returned, but with new differences.
See my schedule here
French translation here
Your versions here
For this tutorial, you will need:
Material here
Tube DBK Ethnic Model-D221
Mist_AlexSun70.16
Tube 6_divers_animabelle
Yvette_ALot0fRomance_Wordart2
Textura Brick015
Plugins
AAA Frames - Foto Frame here
Alien Skin Eye Candy 5 Impact - Extrude here

Open the masks in Psp and minimize them with the rest of the material.
1. Open a new transparent image 1000 x 750 pixels.
2. Set your foreground color to #c2c2c2.
Flood Fill  the transparent image with your foreground color #c2c2c2.
3. Effects>Texture Effects>Texture - select the texture brick015.
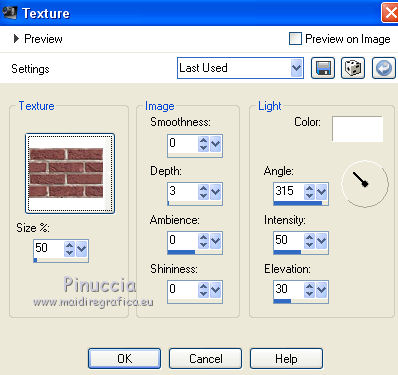
4. Layers>New Mask layer>From image
Open the menu under the source window and you'll see all the files open.
Select the mask Marge_Top Fade.
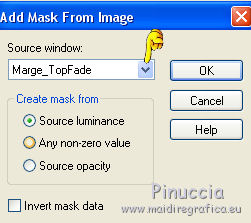
Layers>Duplicate - 2 times (to apply the masque 3 times).
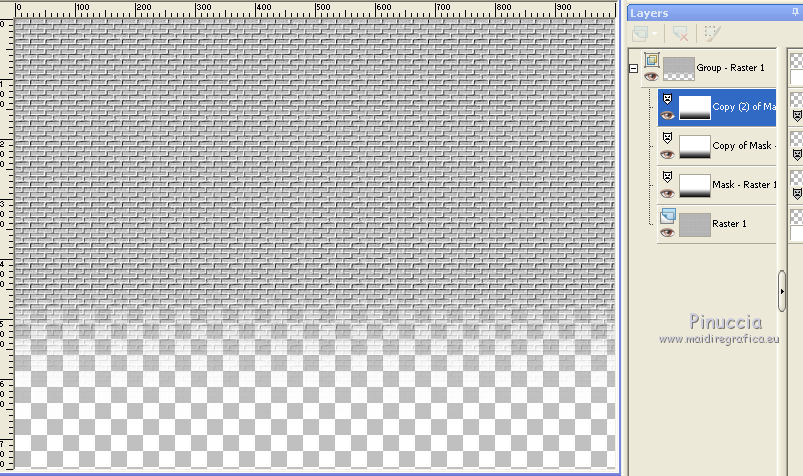
Layer>Merge>Merge Group.
5. Open the tube AlexSun70.16 - Edit>Copy.
Go back to your work and go to Edit>Paste as new layer.
6. Effects>Image Effects>Offset.
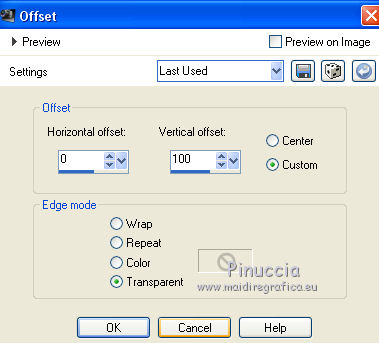
7. Layers>Duplicate.
Layers>Merge>Merge down.
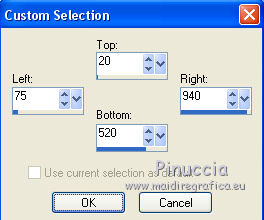
8. Selection Tool 
(no matter the type of selection, because with the custom selection your always get a rectangle)
clic on the Custom Selection 
and set the following settings.
9. Layers>New Raster Layer.
Flood Fill  with your foreground color #c2c2c2.
Layers>Arrange>Move down (under the landscape layer).
Selections>Select None.
10. Layers>New Raster Layer.
Layers>Arrange>Bring to Top (over the landscape layer).
Flood Fill  with your foreground color #c2c2c2.
11. Selections>Modify>Contract - 3 pixels.
Press CANC on the keyboard 
Selections>Select None.
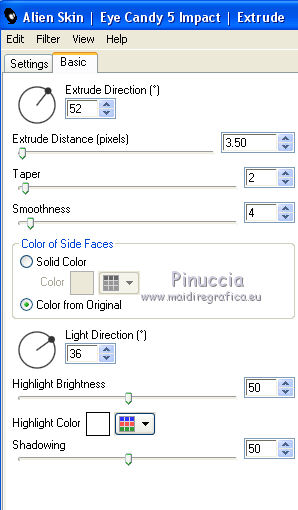
12. Effects>Plugins> Eye Candy 5 Impact - Extrude.
13. Layers>New Raster Layer.
Layers>Arrange>Send to Bottom.
Flood Fill  with your foreground color #c2c2c2.
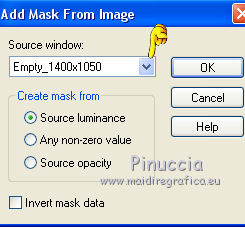
14. Layers>New Mask layer>From image
Open the menu under the source window
and select the mask Empty_1400x1050.
Layers>Merge>Merge Group.
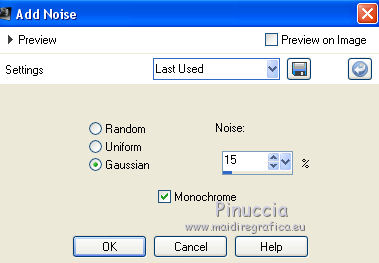
15. Adjust>Add/Remove Noise>Add Noise.
16. Layers>New Raster Layer.
Layers>Arrange>Send to Bottom.
Set your foreground color to #6e4c39.
Flood Fill  with your foreground color #6e4c39.
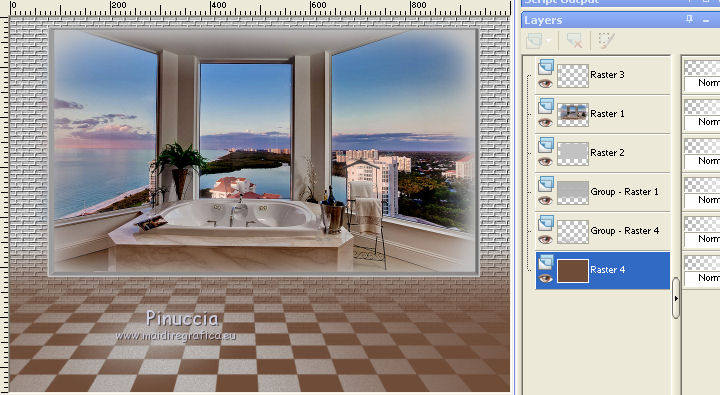
17. Activate the top layer.
Open the tube DBK Ethnic Model-D221 - Edit>Copy.
Go back to your work and go to Edit>Paste as new layer.
Image>Resize, 2 times to 80% and 1 time to 90%, resize all layers not checked.
Image>Mirror.
Move  the tube to the left side.
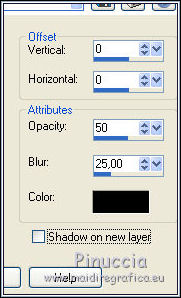
18. Effects>3D Effects>Drop Shadow, color black.
19. Open the tube 6_divers_animabelle - Edit>Copy.
Go back to your work and go to Edit>Paste as new layer.
Image>Resize, 2 times to 50%, resize all layers not checked.
Move  the tube to the right side.
20. Effects>3D Effects>Drop Shadow, same settings.

21. Layers>Merge>Merge visibles.
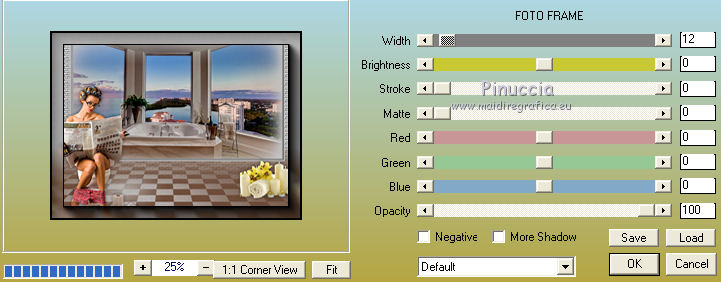
22. Effects>Plugins>AAA Frames - Foto Frame.
23. Open the wordart Yvette_ALot0fRomance_Wordart2 - Edit>Copy.
Go back to your work and go to Edit>Paste as new layer.
Move  the text at the middle bottom.
24. Sign your work.
Layers>Merge>Merge All and save as jpg.

If you have problems or doubt, or you find a not worked link, or only for tell me that you enjoyed this tutorial, write to me.
25 March 2017
