|
TOP HAPPY 2018


Here you find the original of this tutorial:

This tutorial was translated with PSPX3 but it can also be made using other versions of PSP.
Since version PSP X4, Image>Mirror was replaced with Image>Flip Horizontal,
and Image>Flip with Image>Flip Vertical, there are some variables.
In versions X5 and X6, the functions have been improved by making available the Objects menu.
In the latest version X7 command Image>Mirror and Image>Flip returned, but with new differences.
See my schedule here
French translation here
Your versions here
For this tutorial, you will need:
Material here
Tube 2654-woman-LB TUBES
Tube 2544-David Gandy -LB TUBES
Misted_somine tube-HaZal
Tube Año 2018-coly
Texto_ny_sign2-6
Patron_negro_dorado_nines
seleccion sel.257.nines y sel.257.2.nines
Plugins
consult, if necessary, my filter section here
Filters Unlimited 2.0 here
Mura's Meister - Perspective Tiling here
Mehdi - Sorting Tiles here
Italian Editors Effect - Mosaico here
Tramages - Tow the line here
Filters Italian Editors and Tramages can be used alone or imported into Filters Unlimited.
(How do, you see here)
If a plugin supplied appears with this icon  it must necessarily be imported into Unlimited it must necessarily be imported into Unlimited

You can change Blend Modes according to your colors.
In the newest versions of PSP, you don't find the foreground/background gradient (Corel_06_029).
You can use the gradients of the older versions.
The Gradient of CorelX here
Copy the Selections in the Selections Folder.
Open the pattern patron_negro_dorato_nines in PSP and minimize it with the rest of the material.
1. Open a new transparent image 900 x 600 pixels.
2. Set your foreground color to #170d24
set your background color to #a9a582.

Set your foreground color to a Foreground/Background Gradient, style Sunburst.
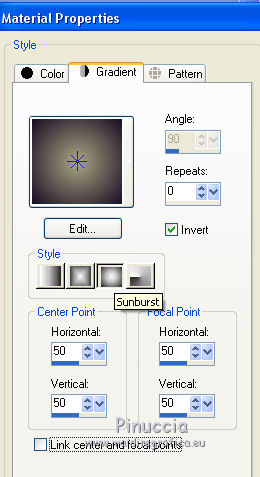
Flood Fill  the transparent image with your Gradient. the transparent image with your Gradient.
3. Effects>Plugins>Mehdi - Sorting Tiles.

4. Layers>Duplicate.
5. Image>Canvas Size - 900 x 700 pixels.
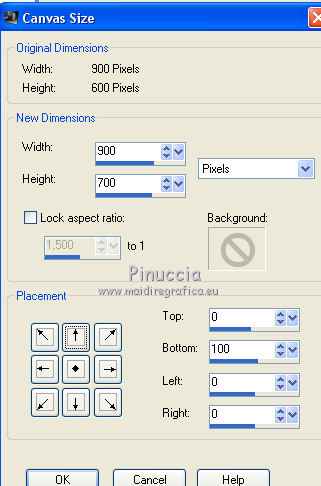
6. Effects>Plugins>Mura's Meister - Perspective Tiling.
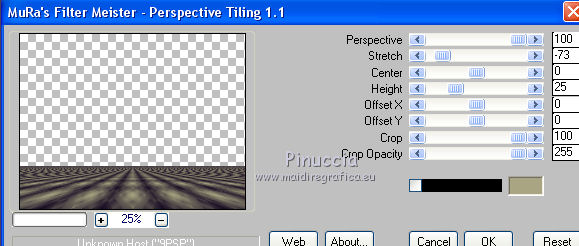
7. Activate the Magic Wand Tool  , feather 20, , feather 20,

and click on the transparent part to select it.

Press 3 times CANC on the keyboard 
Selections>Select None.
don't forget to set again the feather to 0.
8. Selections>Load/Save Selection>Load Selection from Disk.
Look for and load the selection sel.257.nines
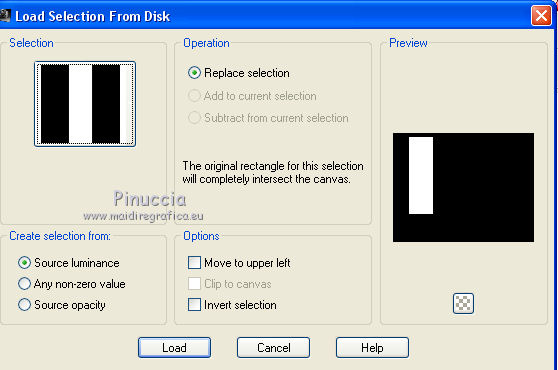
9. Layers>New Raster Layer.
Flood fill  with your foreground color #a9a582. with your foreground color #a9a582.
10. Selections>Modify>Contract - 2 pixels.
Press CANC on the keyboard 
11. Set your foreground color to Pattern, and select the pattern patron_negro_dorato_nines
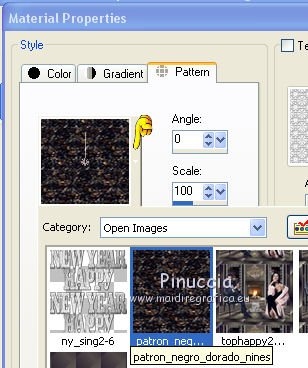
Flood Fill  the selection with your pattern. the selection with your pattern.
Selections>Select None.
12. Layers>Duplicate.
Image>Mirror.
13. Layers>Merge>Merge down.
14. Effects>Plugins>Italian Editors Effect - Mosaico.

15. Selections>Load/Save Selection>Load Selection from Disk.
Look for and load the selection sel.257.2.nines
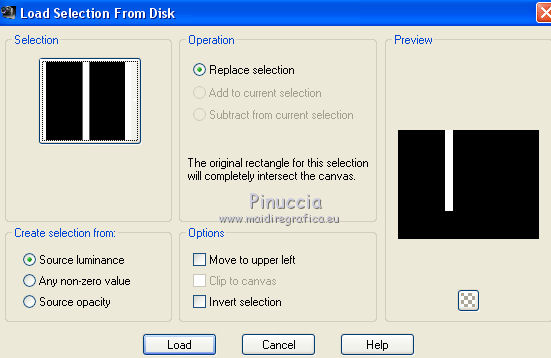
16. Layers>New Raster Layer.
Flood Fill  with the pattern patron_negro_dorado_nines. with the pattern patron_negro_dorado_nines.
Selections>Select None.
17. Effects>Plugins>Filters Unlimited 2.0 - Special Effects 1 Jailed.

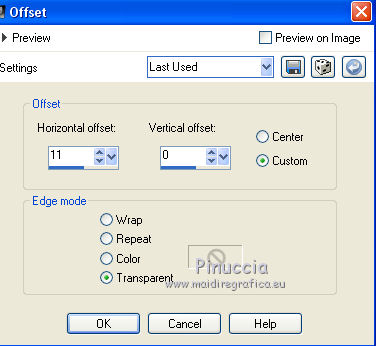
18. Effects>Image Effects>Offset.
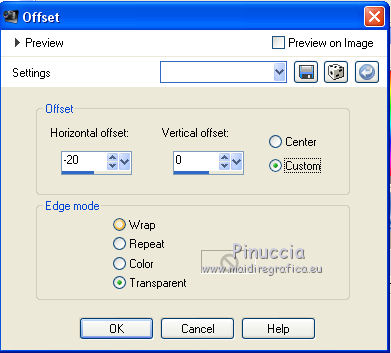
19. Layers>Duplicate.
Effects>Image Effects>Offset.
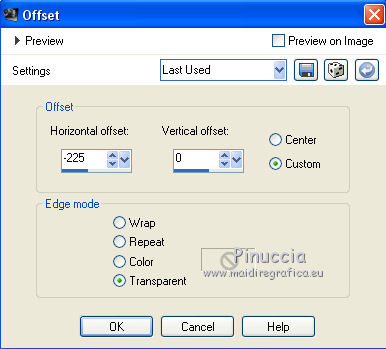
20. Layers>Merge>Merge down.
Layers>Duplicate.
Image>Mirrror.
Effects>Image Effects>Offset.
22. Activate the bottom layer, Raster 1.
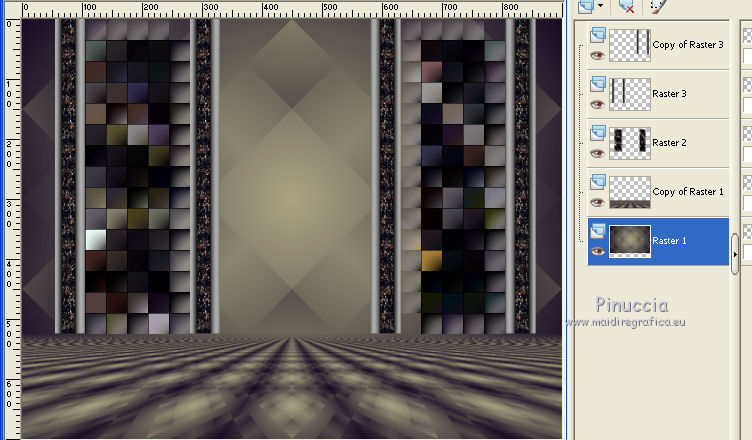
23. Layers>New Raster Layer.
Open the tube de HaZal - Edit>Copy.
Go back to your work and go to Edit>Paste as new layer.
Place  the tube in the middle. the tube in the middle.

24. Activate the top layer.
Open the tube 2654-woman-LB TUBES - Edit>Copy.
Go back to your work and go to Edit>Paste as new layer.
Image>Resize, to 90%, resize all layers not checked.
Move  the tube to the right side. the tube to the right side.
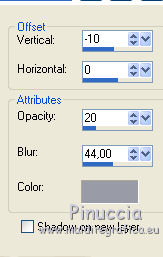
25. Effects>3D Effects>Drop Shadow, color #999ba7.
26. Open the tube 2544-David Gandy-LB TUBES - Edit>Copy.
Go back to your work and go to Edit>Paste as new layer.
Image>Resize, to 90%, resize all layers not checked.
Image>Mirror.
Move  the tube to the left side. the tube to the left side.
27. Effects>3D Effects>Drop Shadow, color #999ba7.

28. Open the tube an 2018-coly - Edit>Copy.
Go back to your work and go to Edit>Paste as new layer.
Image>Resize, 2 times to 50% and 1 time to 80%, resize all layers not checked.
Place  rightly the tube, voir mon example. rightly the tube, voir mon example.
29. Open the tube ny_sign2-6 - Edit>Copy.
Go back to your work and go to Edit>Paste as new layer.
Move  the tube under the number. the tube under the number.

30. Layers>Merge>Merge All.
31. Image>Add borders, 2 pixels, symmetric, foreground color #170d24.
Image>Add borders, 30 pixels, symmetric, background color #a9a582.
31. Activate the Magic Wand Tool  , tolerance et feather 0, , tolerance et feather 0,
and click on the 30 pixels border to select it.
32. Placer en avant plan le dégradé et changer les réglages, style Linéaire.
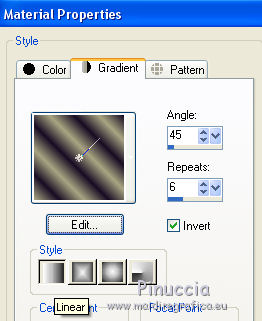
33. Flood Fill  the selection with your Gradient. the selection with your Gradient.
34. Effects>Plugins>Tramages - Tow the line.

35. Selections>Invert.
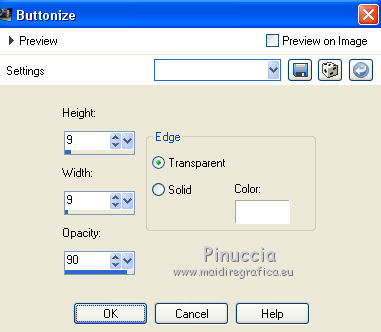
Effects>3D Effects>Buttonize, color #ffffff.
36. Image>Add borders, 2 pixels, symmetric, foreground color #170d24.
37. Sign your work and save as jpg.

If you have problems or doubts, or you find a not worked link, or only for tell me that you enjoyed this tutorial, write to me.
9 December 2017
|

