Here you find the original of this tutorial:

This tutorial was created with PSP X2 but it can also be made using other versions of PSP.
Since version PSP X4, Image>Mirror was replaced with Image>Flip Horizontal,
and Image>Flip with Image>Flip Vertical, there are some variables.
In versions X5 and X6, the functions have been improved by making available the Objects menu.
In the latest version X7 command Image>Mirror and Image>Flip returned, but with new differences.
See my schedule here
French translation here
Your versions here
For this tutorial, you will need:
Material here
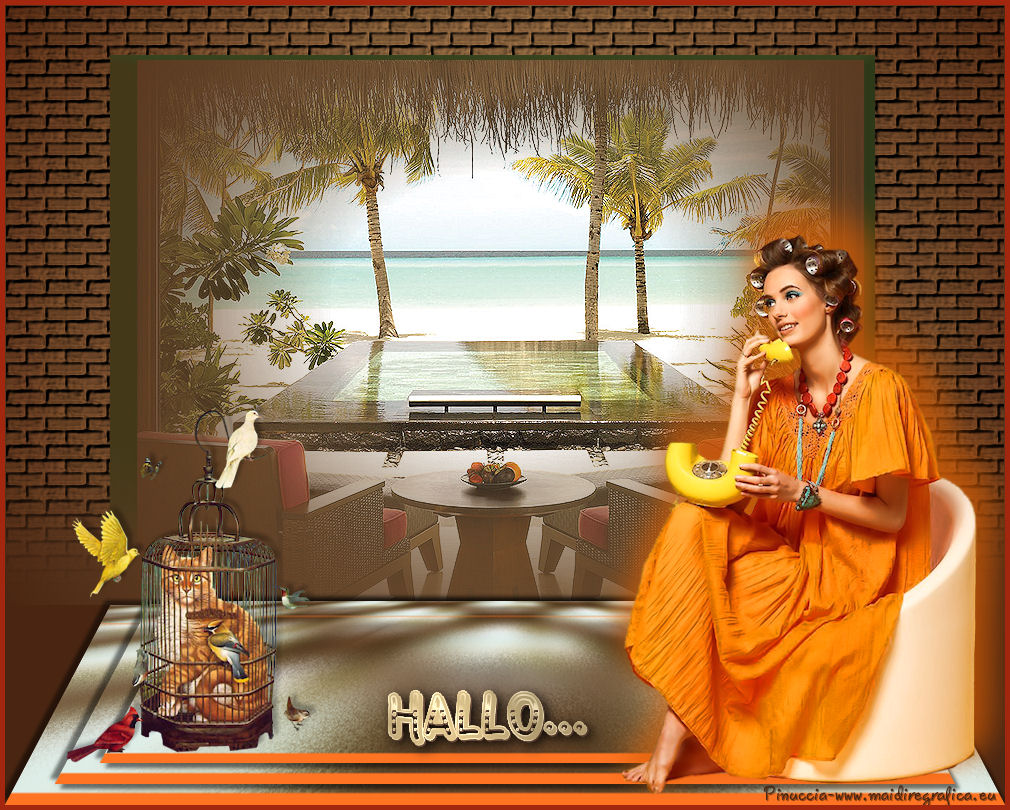
Tube Femme-1007-Azalee
Tube 80_interieur_maison_animabelle
Tube gato en jaula y pajaros d/a
Texto Hallo_ac
Filtres:
consult, if necessary, my filter section here
Alien Skin Eye Candy 5 Impact - Extrude ici
Mura's Meister - Perspective Tiling ici

Copy the texture brick015 in the Textures folder.
Open the mask in PSP and minimize with the rest of the materiel.
1. Open a new transparent image 1000 x 600 pixels.
2. Set the Foreground color with #4a2612,
and the Background color with #92764d.

Set the Foreground color to Foreground/background Gradient, style Sunburst.

Flood Fill  with the gradient.
3. Open the tube 80_interieur_maison_animabelle - Edit>Copy.
Back to your work and go to Edit>Paste as New Layer.
4. Layers>New Raster Layer.
Flood Fill the layer with the gradient.
5. Effects>Texture Effects>Texture - select the texture Brick015.

6. Activate Selection Tool 
and select Custom selection
 with these settages:

Press CANC on the keyboard 
Selections>Select None.
7. Effets>Plugins>Alien Skin Eye Candy 5 Impact - Extrude - Highlight color #4a2612.

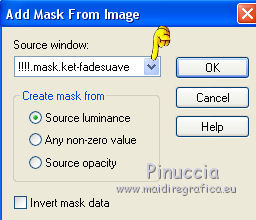
8. Layers>New Mask layer>From image
Open the menu under the source window and you'll see all the files open.
Select the mask mask_ket.fadesuave:
Layers>Merge>Merge group.
Apply the mask a second time.
Layers>Merge>Merge group.
9. Layers>Merge>Merge visible.
10. Layers>Duplicate.
Effects>Image Effects d'image>Seamless Tiling, default.

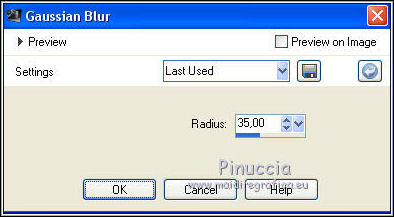
11. Adjust>Blur>Gaussian blur - radius 35.
12. Effects>Texture Effects>Mosaic Antique.

13. Custom Selection

14. Layers>New Raster Layer.
Set the foreground color with #ff7423.
Flood Fill the selection with this color.
Selections>Select None.
15. Layers>Merge>Merge down.
16. Image>Canvas Size - 1000 x 800 pixels.

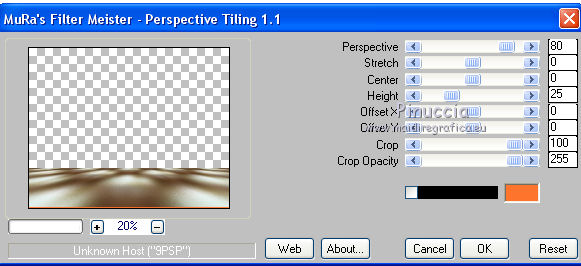
17. Effects>Plugins>Mura's Meister - Perspective Tiling.
18. K key to activate the Pick Tool 
with PSP 9 D key to activate Deformation Tool 
mode Perspective  ,
,
push the left upper node to the right
(the node on the right will move symmetrically) as below.

19. Layers>Duplicate.
Image>Resize - 90%, resize all layers not checked.
20. Again Layers>Duplicate.
Image>Resize - 90%, resize all layers not checked.
21. Move  the layers as below.

22. On the three layers:
Effects>3D Effects>Drop Shadow.
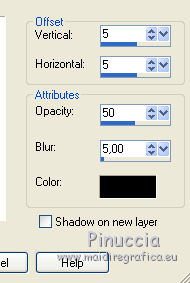
Repeat Drop Shadow, but vertical and horizontal -5.
23. Layers>New Raster Layer.
Layers>Arrange>Send to bottom.
Set the Foreground color again to #4a2612
Flood Fill the layer with foreground color.
24. Open the tube Femme-1007-Azalee - Edit>Copy.
Back to your work and go to Edit>Paste as New Layer.
Image>Resize - 2 times to 80%, resize all layers not checked.
Move the tube to the right side.
25. Effects>3D Effects>Drop Shadow, color #d65d04 - 2 times.

26. Open the tube gato en jaula y pajaros - Edit>Copy.
Back to your work and go to Edit>Paste as New Layer.
Image>Resize - to 80%, resize all layers not checked.
Move the tube to the left side.
27. Effects>3D Effects>Drop Shadow, color black.

28. Open the tube "texto" - Edit>Copy.
Back to your work and go to Edit>Paste as New Layer.
Move where you want.
29. Layers>Merge>Merge All.
30. Image>Add borders, 5 pixels, symmetric, color #a3260f.
31. Sign your work et save as jpg.
If you have problems or doubt, or you find a not worked link, or only for tell me that you enjoyed this tutorial, write to me.
6 April 2014