This tutorial was translated with PSPX3 but it can also be made using other versions of PSP.
Since version PSP X4, Image>Mirror was replaced with Image>Flip Horizontal,
and Image>Flip with Image>Flip Vertical, there are some variables.
In versions X5 and X6, the functions have been improved by making available the Objects menu.
In the latest version X7 command Image>Mirror and Image>Flip returned, but with new differences.
See my schedule here
French translation here
Your versions here
For this tutorial, you will need:
Material here
Tube Criss 1528 by Linda Gatita
Mist_C-Josy505
Mist_Mary 0812-145
Tube DBK MYCAR_2012-1 by Karina
Tube TReagen2079
Tube bolt_jump-EMILSE
texto Teskst I can be
Sélections: sel_carretera_nines et sel_carretera1_nines
Plugins
consult, if necessary, my filter section here
Mura's Meister - Perspective Tiling here
AAA Frames - Foto Frame here

You can change Blend Modes according to your colors.
Copy the Selections in the Selections Folder.
1. Open a new transparent image 1000 x 700 pixels.
2. Selections>Select All.
3. Open the tube C-Josy505.
Activate the background layer - Edit>Copy.
Go back to your work and go to Edit>Paste into Selection.
Selections>Select None.
4. Adjust>Blur>Gaussian Blur - radius 25.

5. Activate again the tube C-Josy505.
Activate the tube layer Raster 1 - Edit>Copy.
Go back to your work and go to Edit>Paste as new layer.
6. Image>Resize, 2 times to 80%, resize all layers not checked.
7. Open the tube Mary 0812-145 - Edit>Copy.
Go back to your work and go to Edit>Paste as new layer.
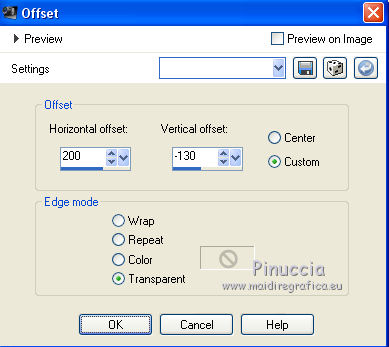
8. Effects>Image Effects>Offset.
9. Selections>Load/Save Selection>Load Selection from Disk.
Look for and load the selection sel_carretera_nines.
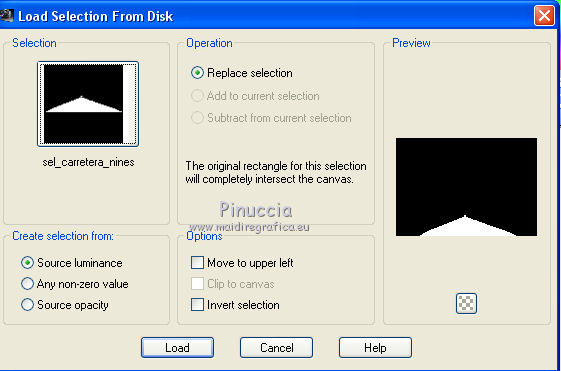
Press CANC on the keyboard 
Selections>Select None.
10. Open the tube DBK MYCAR_2012-1 - Edit>Copy.
Go back to your work and go to Edit>Paste as new layer.
Image>Resize, 1 time to 70% and 1 time to 80%, resize all layers not checked.
Move  the tube at the bottom right.
11. Open the tube TReagen2079 - Edit>Copy.
Go back to your work and go to Edit>Paste as new layer.
Move  the tube at the bottom left.
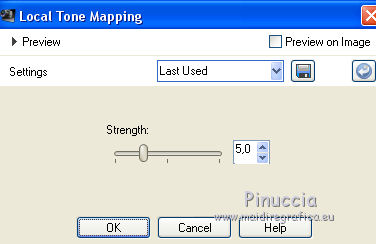
12. Adjust>Brightness and Contrast>Clarify (in the newest versions Local Tone Mapping).
13. Open the tube Criss 1528 - Edit>Copy.
Go back to your work and go to Edit>Paste as new layer.
Image>Resize, 2 times to 80%, resize all layers not checked.
Place  the tube in the middle.

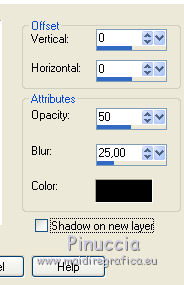
14. Effects>3D Effects>Drop Shadow, color black.
15. Layers>New Raster Layer.
Set your foreground color to #afbf18.
Flood Fill  the layer with your foreground color.
16. Selections>Select All.
Selections>Modify>Contract - 5 pixels.
Press CANC on the keyboard.
Selections>Invert.
17.Effects>3D Effects>Buttonize, color white.
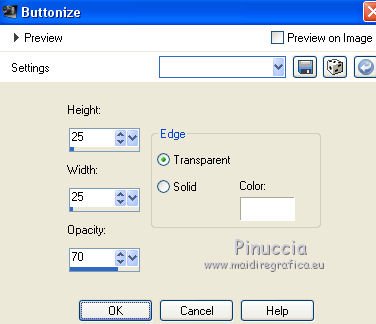
Selections>Select None.
18. Layers>Merge>Merge visible.
19. Edit>Copy.
20. Image>Resize, to 90%, resize all layers not checked.
21. Image>Canvas Size - 1000 x 800 pixels.
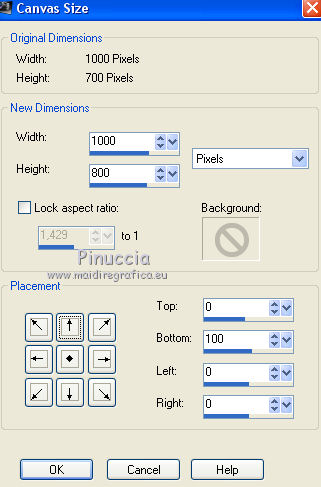
22. Selections>Select All.
Layers>New raster layer.
Layers>Arrange>Send to bottom.
Edit>Paste into Selection.
Selections>Select None.
23. Adjust>Blur>Gaussian Blur - radius 25.

24. Selections>Load/Save Selection>Load Selection from Disk.
Look for and load the selection sel_carretera1_nines.
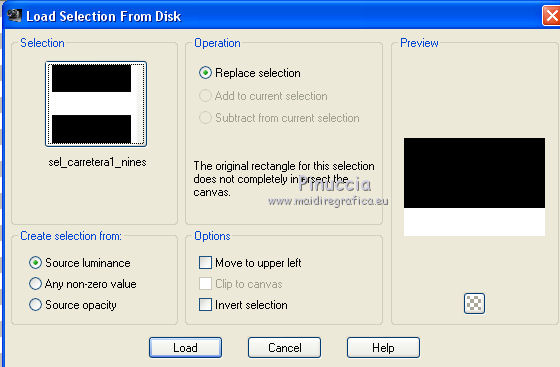
Selections>Transformer la sélection en calque.
25. Effects>Artistic Effects>Halftone.
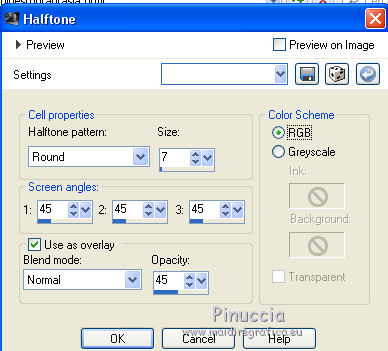
Selections>Select None.
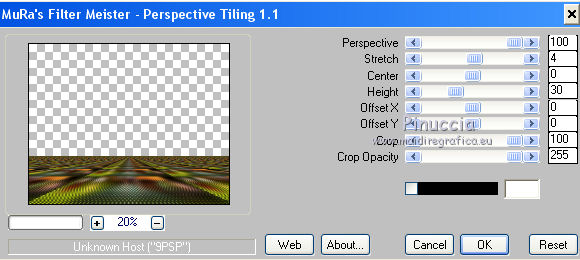
26. Effects>Plugins>Mura's Meister - Perspective Tiling.
27. Effects>Plugins>AAA Frames - Foto Frame.

28. Activate the top layer.
Open the tube bolt_jump - Edit>Copy.
Go back to your work and go to Edit>Paste as new layer.
Image>Resize, to 80%, resize all layers not checked.
Move  the tube to the left side.
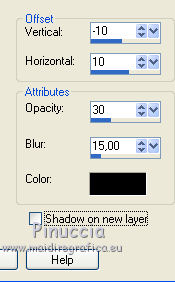
29. Effects>3D Effects>Drop Shadow, color black.
30. Open the text Teskst I can be - Edit>Copy.
Go back to your work and go to Edit>Paste as new layer.
Move  the text at the bottom right.
31. Layers>Merge>Merge All.
Image>Add borders, 3 pixels, symmetric, color #afbf18.
32. Sign your work and save as jpg.

If you have problems or doubt, or you find a not worked link, or only for tell me that you enjoyed this tutorial, write to me.
21 February 2017
