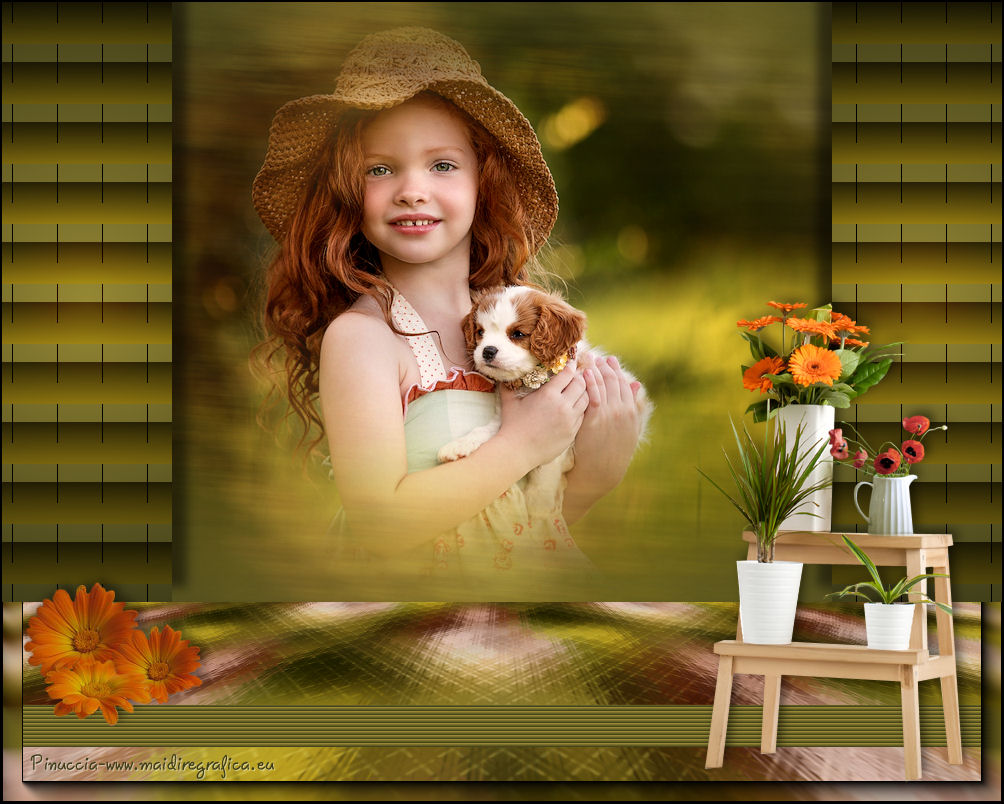
Here you find the original of this tutorial:

This tutorial was created with PSP X2 but it can also be made using other versions of PSP.
Since version PSP X4, Image>Mirror was replaced with Image>Flip Horizontal,
and Image>Flip with Image>Flip Vertical, there are some variables.
In versions X5 and X6, the functions have been improved by making available the Objects menu.
In the latest version X7 command Image>Mirror and Image>Flip returned, but with new differences.
See my schedule here
French translation here
Your versions here
For this tutorial, you will need:
Material here
51_enfant_p2_animabelle
Tube calguisetageplante05092014 by Guismo
Tube Gabry-fiore 61
Filtres:
consult, if necessary, my filter section here
Mura's Meister - Perspective Tiling here
Redfield - Emblazer here
AAA Frames - Foto Frame here
VanDerLee - Unplugged-X here

You can change Blend Modes according to your colors.
1. Open a new transparent image 1000 x 600 pixels.
2. Set your foreground color to #968834,
and your background color to #403e19.
Set your foreground color to Foreground/Background Gradient, style Sunburst.

Flood Fill  the transparent image with your gradient.
4. Open the tube 51_enfant_p2_animabelle - Edit>Copy.
Go back to your work and go to Edit>Paste as New Layer.
5. Effects>Plugins>Redfield - Emblazer,
Select the preset Strokes and ok.

Repeat the plugins another time.
6. Adjust>Blur>Motion Blur.

Change the blend mode of this layer to Overlay.
7. Edit>Paste as New Layer (the tube 51_enfant_p2_animabelle is still in memory).
Image>Resize, 80%, resize all layers not checked.
8. Adjust>Brightness and Contrast>Brightness and Contrast.

9. Selection Tool 
(no matter the type of selection, because with the custom selection your always get a rectangle)
clic on the Custom Selection 
and set the following settings.

10. Layers>New Raster Layer.
Flood Fill  the layer with your gradient.
11. Effects>Plugins>VanDerLee - Unplugged-X - Jalusi
color #968834.

12. Effects>3D Effects>Drop Shadow, color black.

Selections>Select None.
13. Layers>Duplicate.
Image>Mirror.
14. Layers>Merge>Merge visible.
15. Layers>Duplicate.
16. Effects>Image Effects>Seamless Tiling, default settings.

17. Adjust>Blur>Gaussian Blur - radius 25.

18. Effects>Plugins>Redfield - Emblazer, same settings.

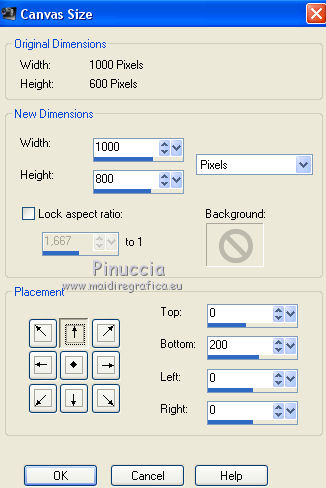
19. Image>Canvas Size - 1000 x 800 pixels.

20. Effects>Plugins>Mura's Meister - Perspective Tiling.

21. Layers>New Raster Layer.
Layers>Arrange>Send to Bottom.
Set your foreground color to Color.
Flood Fill  the layer with your foreground color #968834.
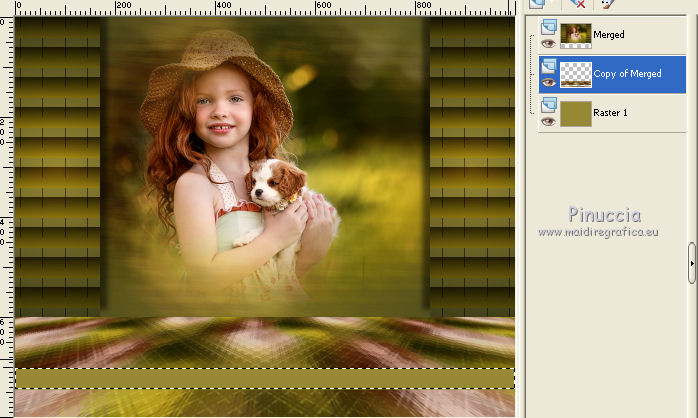
22. Activate the layer with Perspective Tiling.
Layers>Arrange>Move Down.
Activate the Magic Wand Tool 
clic on the little strip to select it.

23. Again activate the bottom layer.
Effects>Texture Effects>Blinds - color #403e19.

Selections>Select None.
24. Again activate the calque above (filtre Perspective Tiling).
Layers>Merge>Merge down.
25. Effects>Plugins>AAA Frames - Foto Frame.

26. Activate the top layer.
Open the tube calguisetagereplante05092014, Edit>Copy.
Go back to your work and go to Edit>Paste as New Layer.
Image>Mirror.
Move  the tube to the right side.
27. Effets>Effets 3D>Ombre portée, couleur noire.

28. Open the tube Gabry-fiore 61, Edit>Copy.
Go back to your work and go to Edit>Paste as New Layer.
Move  the tube to the left side.
29. Image>Add borders, 2 pixels, symmetric, color black.
30. Sign your work and save as jpg.

If you have problems or doubt, or you find a not worked link, or only for tell me that you enjoyed this tutorial, write to me.
8 September 2015

