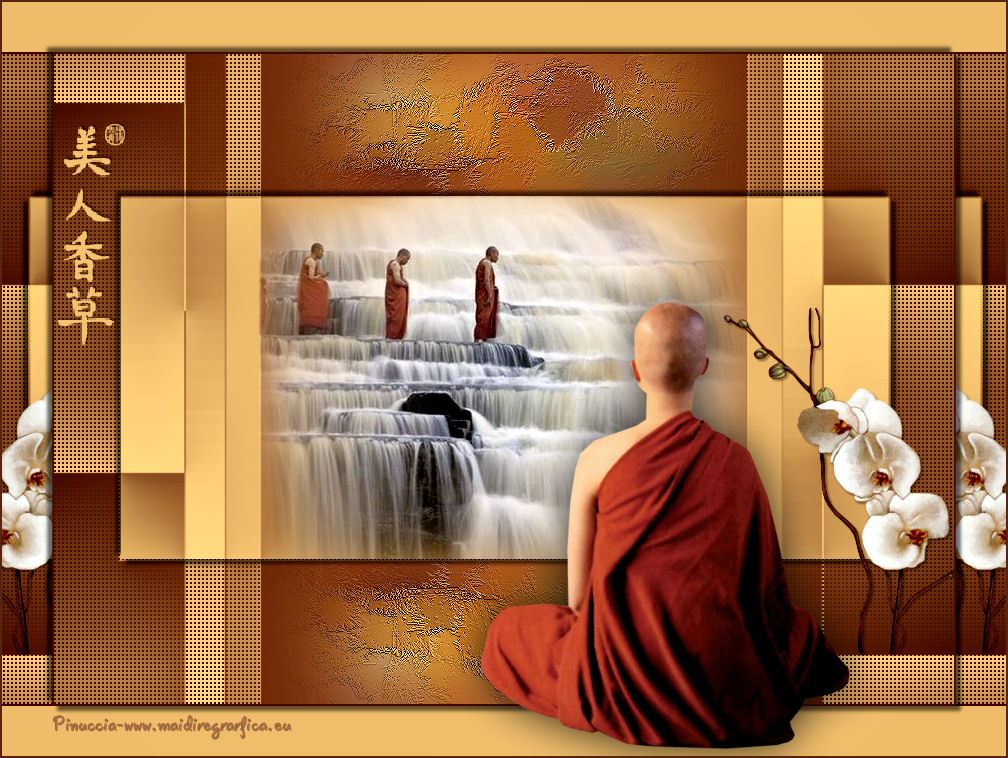
This tutorial was translated with PSPX3 but it can also be made using other versions of PSP.
Since version PSP X4, Image>Mirror was replaced with Image>Flip Horizontal,
and Image>Flip with Image>Flip Vertical, there are some variables.
In versions X5 and X6, the functions have been improved by making available the Objects menu.
In the latest version X7 command Image>Mirror and Image>Flip returned, but with new differences.
See my schedule here
French translation here
Your versions here
For this tutorial, you will need:
Material here
calguisboudiste08032016 by Guismo
calguismisted08032016 by Guismo
Fleur misted jewel 0035
chili_AsianFlower1
Adorno_caligraphie_ac
LF_Mask-209
Plugins
consult, if necessary, my filter section here
Filters Unlimited 2.0 here
Kiwi Oelfilters - Guck Mal here
FM Tile Tools - Saturation Emboss here
Filters Kiwi can be used alone or imported into Filters Unlimited.
(How do, you see here)
If a plugin supplied appears with this icon  it must necessarily be imported into Unlimited

Open the mask in PSP and minimize it with the rest of the material.
1. Open a new transparent image 900 x 650 pixels.
2. Set your foreground color to #57250e.
Set your background color to #ab613c.
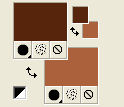
Set your foreground color to a foreground/background gradient, style Linear.
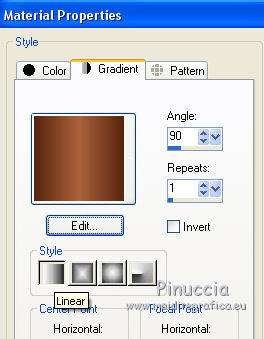
Flood Fill  your transparente image with your gradient.
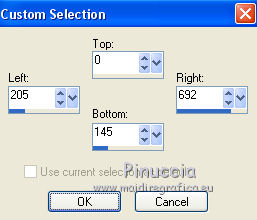
3. Selection Tool 
(no matter the type of selection, because with the custom selection your always get a rectangle)
clic on the Custom Selection 
and set the following settings.
4. Layers>New Raster Layer.
Open the tube Fleur misted jewel 0035, Edit>Copy.
Go back to your work and go to Edit>Paste into Selection.
5. Adjust>Blur>Gaussian blur - radius 25.

6. Effects>Art Media Effects>Brushes - color #fed5a7.
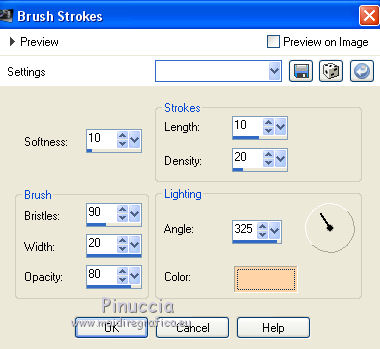
Selections>Select None.
7. Layers>Duplicate.
Image>Flip.
8. Layers>New Raster Layer.
Set your foreground color to #fed5a7.
Flood Fill  the layer with your new foreground color.
9. Layers>New Mask layer>From image
Open the menu under the source window and you'll see all the files open.
Select the mask LF-Mask-209:
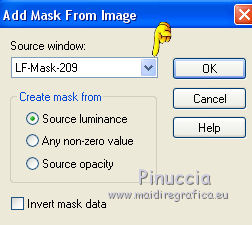
Layers>Merge>Merge group.
10. Effects>Plugins>FM Tile Tools - Saturation Emboss, default settings.

11. Custom Selection 
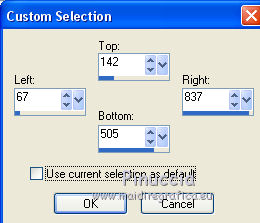
12. Selections>Invert.
13. Effects>Textures Effects>Weave.
couleur du tissage #fed5a7
couleur des interstices #57250e.
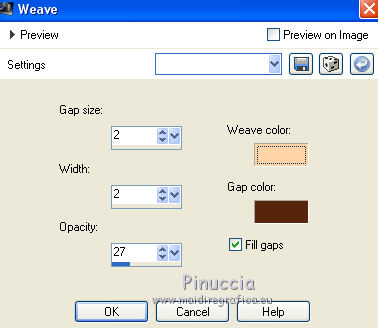
14. Selections>Invert.
15. Effects>3D Effects>Drop Shadow, color black.
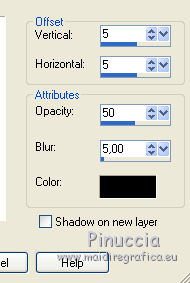
Repeat Drop Shadow, but vertical and horizontal -5.
Selections>Select None.
16. Open the tube calguismisted08032016 - Edit>Copy.
Go back to your work and go to Edit>Paste as new layer.
17. Custom Selection 
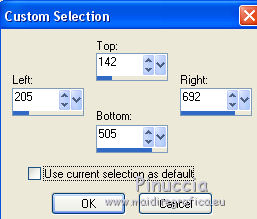
18. Selections>Invert.
Press CANC on the keyboard 
Selections>Select None.
19. Open the tube Adorno-caligraphie-ac - Edit>Copy.
Go back to your work and go to Edit>Paste as new layer.
Move  the tube to the left side, see my example.
20. Open the tube chili_AsianFlower - Edit>Copy.
Go back to your work and go to Edit>Paste as new layer.
Move  the tube to the right side, see my example.
21. Effects>3D Effects>Drop Shadow, color black.
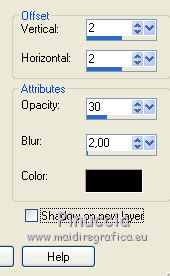
22. Layers>Merge>Merge All.
23. Image>Add borders, 2 pixels, symmetric, color #57250e.
Image>Add borders, 50 pixels, symmetric, color #edc27c.
24. Activate the Magic Wand tool 
clic on 50 pixels' bord to select it.
25. Effects>Plugins>Filters Unlimited 2.0 - Kiwi Oelfilters - Guck Mal.

26. Selections>Invert.
27. Effects>3D Effects>Drop Shadow, color black.

Repeat Drop Shadow, but vertical and horizontal -5.
Selections>Select None.
28. Adjust>Brightness and Contrast >Brightness and Contrast .
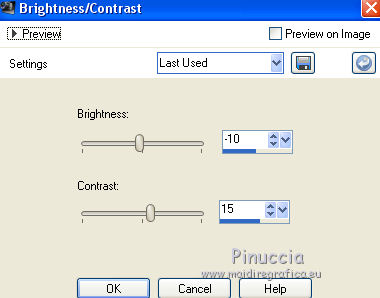
29. Open the tube calguisboudiste08032016 - Edit>Copy.
Go back to your work and go to Edit>Paste as new layer.
Image>Resize, 2 times to 80%, resize all layers not checked.
Move  the tube to the bottom right.
30. Effects>3D Effects>Drop Shadow, color black.

31. Image>Add borders, 2 pixels, symmetric, color #57250e.
32. Sign your work and save as jpg.

If you have problems or doubt, or you find a not worked link, or only for tell me that you enjoyed this tutorial, write to me.
20 March 2016

