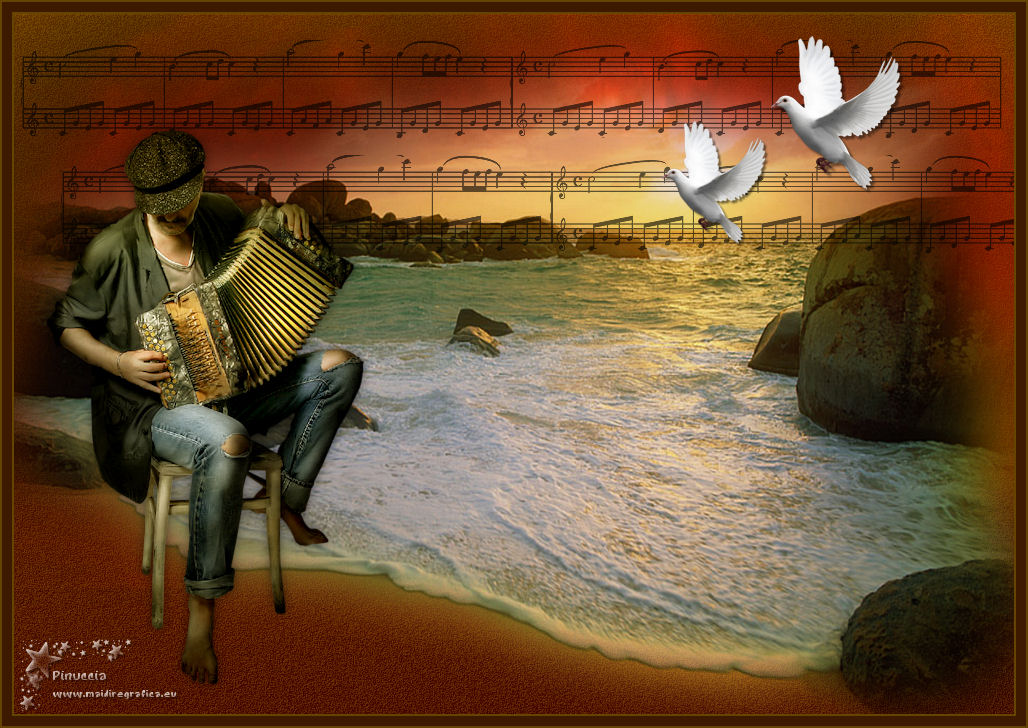
Here you find the original of this tutorial:

This tutorial was created with PSP X2 but it can also be made using other versions of PSP.
Since version PSP X4, Image>Mirror was replaced with Image>Flip Horizontal,
and Image>Flip with Image>Flip Vertical, there are some variables.
In versions X5 and X6, the functions have been improved by making available the Objects menu.
In the latest version X7 command Image>Mirror and Image>Flip returned, but with new differences.
See my schedule here
French translation of november 2014 here
Your versions here
For this tutorial, you will need:
Material here
For the tubes thanks Animabelle, Anna.br, AnaRidzi and Guismo
Effects>Plugins
consult, if necessary, my filter section here
Nik Software - Color Efex Pro here
FM Tile Tools - Saturation Emboss here

You can change Blend Modes according to your colors.
In the newest versions of PSP, you don't find the foreground/background gradient (Corel_06_029).
You can use the gradients of the older versions.
The Gradient of CorelX here
Open the mask in PSP and minimize it with the rest of the material.
1. Set your foreground color to #3d1900,
and your background color to #654300.

2. Set your foreground color to a Foreground/Background Gradient, style Linear
(the light color at the bottom)

3. Open a new transparent image 1000 x 700 pixels.
Flood Fill  the transparent image with your Gradient.
4. Adjust>Add/Remove Noise>Add Noise.

5. Effects>Plugins>FM Tile Tools - Saturation Emboss, default settings.

6. Open the tube AR-58 and go to Edit>Copy.
Go back to your work and go to Edit>Paste as new layer.
7. Layers>New Mask layer>From image
Open the menu under the source window and you'll see all the files open.
Select the mask TopFade.

Layers>Merge>Merge Group.
Layers>New Mask layer>From image
Open the menu under the source window
and select again the mask TopFade.
Layers>Merge>Merge Group.
8. Layers>Duplicate.
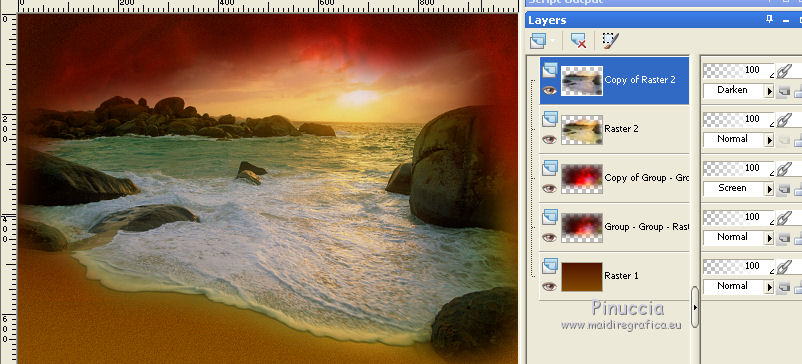
Change the Blend Mode of this layer to Screen.

9. Effects>Plugins>FM Tile Tools - Saturation Emboss, default settings.

10. Open the tube calguismistedsea 11710 and go to Edit>Copy.
Go back to your work and go to Edit>Paste as new layer.
Layers>Duplicate.
Change the Blend Mode of this layer to Darken.

11. Activate the layer below of the original.
Effects>Plugins>Nick Software - Bi-Color Filters,
Color Set Brown 1, as below

12. Open the tube MusicalBars and go to Edit>Copy.
Go back to your work and go to Edit>Paste as new layer.
13. Layers>Duplicate.
Image>Mirror.
Layers>Merge>Merge Down.
Reduce the opacity of this layer to 60%.
14. Layers>Duplicate.
Place  the tube as below.

15. Open the tube anna.br_pomba and go to Edit>Copy.
Go back to your work and go to Edit>Paste as new layer.
Image>Resize, 2 times to 50%, resize all layers not checked.
Image>Mirror.
16. Effects>3D Effects>Drop Shadow, color black.

17. Layers>Duplicate.
Image>Resize, to 80%, resize all layers not checked.
Place  the layer as below.

18. Open the tube 28_homme_animabelle and go to Edit>Copy.
Go back to your work and go to Edit>Paste as new layer.
Image>Resize, to 80%, resize all layers not checked.
Layers>Duplicate.
Change the Blend Mode of this layer to Darken.
19. Activate the layer below of the original.
20. Effects>Plugins> Nick Software - Bi-Color Filter
Color Set Brown 2, as below

21. Layers>Merge>Merge Down.

22. Activate the layer above.
Layers>Merge>Merge Down.
22. Effects>3D Effects>Drop Shadow, color black.

23. Adjust>Brightness and Contrast>Brightness and Contrast.

24. Layers>Merge>Merge All.
25. Image>Add borders, 2 pixels, symmetric, color #654300.
Image>Add borders, 10 pixels, symmetric, color #3D1900.
Image>Add borders, 2 pixels, symmetric, color #654300.
26. Sign your work and save as jpg.

If you have problems or doubt, or you find a not worked link, or only for tell me that you enjoyed this tutorial, write to me.
24 December 2019
 english version
