|
TOP CLASSIC
 ENGLISH VERSION ENGLISH VERSION

Here you find the original of this tutorial:

This tutorial was translated with PSPX7 but it can also be made using other versions of PSP.
Since version PSP X4, Image>Mirror was replaced with Image>Flip Horizontal,
and Image>Flip with Image>Flip Vertical, there are some variables.
In versions X5 and X6, the functions have been improved by making available the Objects menu.
In the latest version X7 command Image>Mirror and Image>Flip returned, but with new differences.
See my schedule here
French translation here
Your versions ici
For this tutorial, you will need:
Material here
Tube2939_mulher_mara_pontes
Mist_4399-luzcristina
(here the links of the authors' sites)
Plugins
consult, if necessary, my filter section here
Filters Unlimited 2.0 here
Xenofex 2 - Classic Mosaic here
Mura's Meister - Perspective Tiling here
AAA Frames - Texture Frame here
Eye Candy 3 - Perspective Shadow here
Penta.com - Jeans here
Filters Penta.com can be used alone or imported into Filters Unlimited.
(How do, you see here)
If a plugin supplied appears with this icon  it must necessarily be imported into Unlimited it must necessarily be imported into Unlimited

You can change Blend Modes according to your colors.
In the newest versions of PSP, you don't find the foreground/background gradient (Corel_06_029).
You can use the gradients of the older versions.
The Gradient of CorelX here
1. Open a new transparent image 900 x 600 pixels.
2. Set your foreground color to #3a596d,
and your background color to #a2bdd8.

Set your foreground color to a Foreground/Background Gradient, style Rectangular.
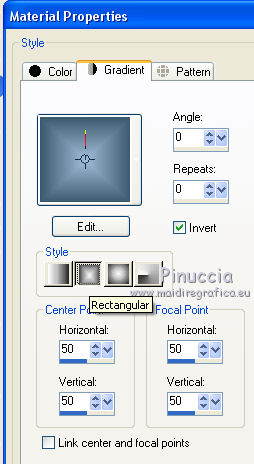
Flood Fill  the transparent image with your Gradient. the transparent image with your Gradient.
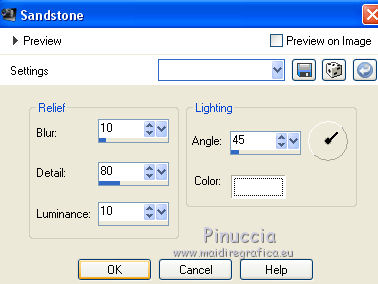
3. Effects>3D Effects >Sandstone, color white #ffffff.
4. Selection Tool 
(no matter the type of selection, because with the custom selection your always get a rectangle)
clic on the Custom Selection 
and set the following settings.
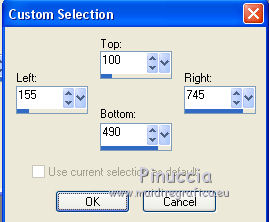
Press CANC on the keyboard 
Selections>Select None.
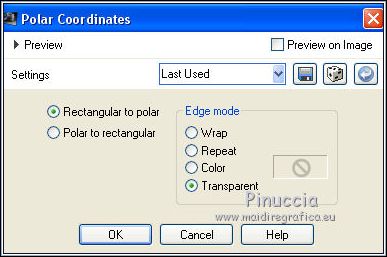
5. Effects>Distortion Effects>Polar Coordinates.
6. Image>Resize, to 80%, resize all layers not checked.
7. Activate your Magic Wand Tool 
and click on the transparent part to select it.

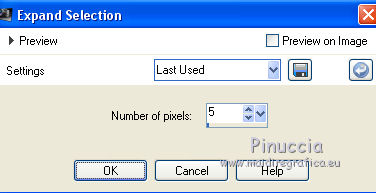
8. Selections>Modify>Expand - 5 pixels.
9. Layers>New Raster Layer.
Layers>Arrange>Move Down.
Flood Fill  with your background color #a2bdd8. with your background color #a2bdd8.
Keep selected.
10. Layers>New Raster Layer.
Open the tube 4399-luzcristina and go to Edit>Copy.
Go back to your work and go to Edit>Paste into Selection.
Selections>Select None.
Layers>Merge>Merge Down.
11. Effects>Plugins>Alien Skin Xenofex 2 - Classic Mosaic
Grout color - click on the little palette to set your foreground color #3a596d.

12. Layers>Merge>Merge visible.
13. Layers>Duplicate.
Effects>Image Effects>Seamless Tiling, default settings.

14. Layers>Arrange>Move Down.
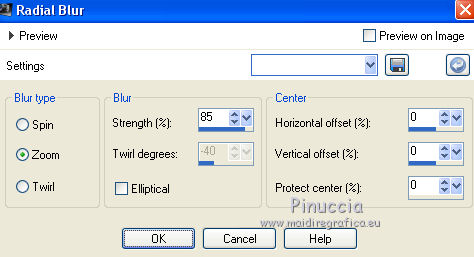
15. Adjust>Blur>Radial Blur.
16. Adjust>Sharpness>Sharpen More.
17. Layers>New Raster Layer.
Layers>Arrange>Send to Bottom.
Set your foreground color to #9f56ad.

Flood Fill  the layer with your foreground color. the layer with your foreground color.
18. Activate the top layer, Merged.
Image>Flip.
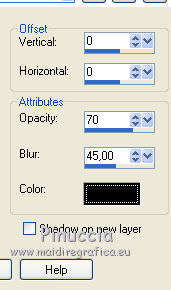
19. Effects>3D Effects>Drop Shadow, color black.
20. Layers>Duplicate.
Close this layers and activate the layer below.
Layers>Merge>Merge visible.
21. Effects>Plugins>AAA Frames - Texture Frame - 2 times with these settings

22. Open and activate the closed layer.
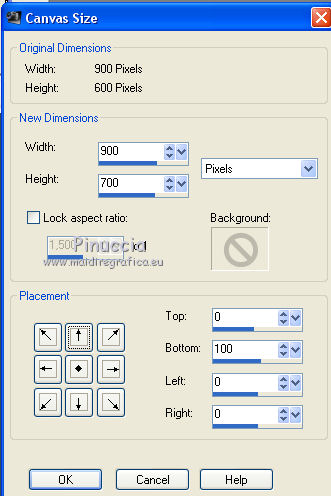
23. Image>Canvas Size - 900 x 700 pixels.
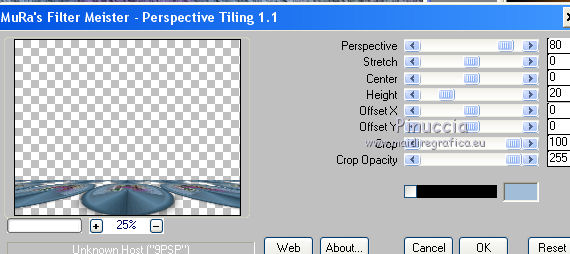
24. Effects>Plugins>Mura's Meister - Perspective Tiling.
25. Open tube2939_mulher_mara_pontes and go to Edit>Copy.
Go back to your work and go to Edit>Paste as new layer.
Place  the tube in the middle. the tube in the middle.
26. Effects>Plugins>Eye Candy 3 - Perspective Shadow, color black.

27. Layers>New Raster Layer.
Layers>Arrange>Send to Bottom.
Flood Fill  with your foreground color #9f56ad. with your foreground color #9f56ad.
28. Layers>Merge>Merge All.
29. Image>Add borders, 1 pixel, symmetric, color black.
Image>Add border, 20 pixels, symmetric, color #3b647a.
30. Activate your Magic Wand Tool 
and click on this border to select it.
31. Effects>Plugins>Penta.com - Jeans.

32. Selections>Invert.
33. Effects>3D Effects>Drop Shadow, color black.

Selections>Select All.
34. Image>Add borders, 1 pixel, symmetric, color black.
35. Sign your work and save as jpg.
Your versions here

If you have problems or doubts, or you find a not worked link, or only for tell me that you enjoyed this tutorial, write to me.
3 February 2019
|
 ENGLISH VERSION
