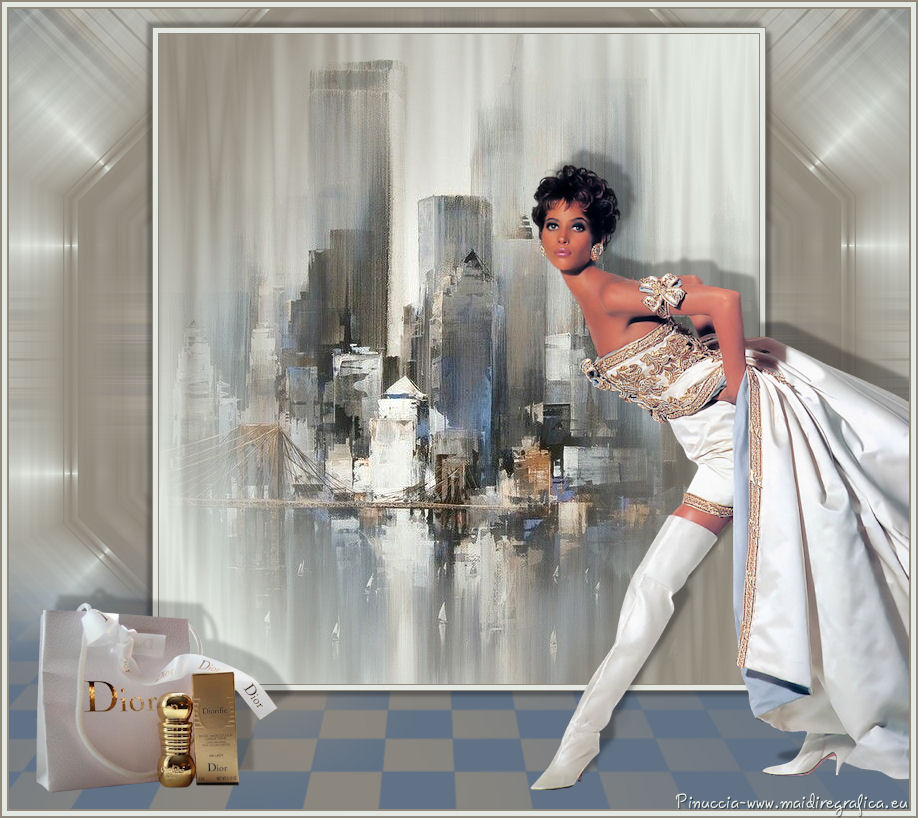
Here you find the original of this tutorial:

This tutorial was created with PSP X2 but it can also be made using other versions of PSP.
Since version PSP X4, Image>Mirror was replaced with Image>Flip Horizontal,
and Image>Flip with Image>Flip Vertical, there are some variables.
In versions X5 and X6, the functions have been improved by making available the Objects menu.
In the latest version X7 command Image>Mirror and Image>Flip returned, but with new differences.
See my schedule here
French translation here
Your versions here
For this tutorial, you will need:
Material here
Tube MR_Christy by Maryse
Misted_manhattan_tubed_by_thafs
Tube MR_Dior Pacaging by Maryse
Masque Empty_1400x1050
Masque mask.ket-fadesuave
Filtres:
consult, if necessary, my filter section here
Mehdi - Melt, Weaver ici

Open the masks in PSP and minimize them with the rest of the material.
1. Open a new transparent image 600 x 650 pixels.
2. Set the foreground color to #928a7d,
and the background color to #e3e9e2.

Set the Foreground color to Foreground/Background Gradient, style Radial.

Flood Fill  the transparent image with your gradient.
3. Effects>Plugins>Mehdi - Melt.

4. Open the misted_manhattan_tubed_by_thafs - Edit>Copy.
Go back to your work and go to Edit>Paste as new layer.
5. Layers>Merge>Merge All.
6. Image>Add borders, 1 pixel, symmetric, color #928a7d.
Image>Add borders, 5 pixels, symmetric, color #e3e9e2.
Image>Add borders, 1 pixel, symmetric, color #928a7d.
7. Layers>Promote background layer.
8. Edit>Copy.
9. Image>Canvas size - 900 x 700 pixels.

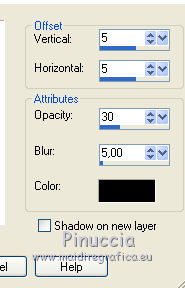
10. Effects>3D Effects>Drop Shadow, color black.

Repeat Drop Shadow, mais vertical and horizontal -5.
11. Layers>New Raster Layer.
Layers>Arrange>Send to Bottom.
Selections>Select All.
Edit>Paste into Selection.
Selections>Select None.
12. Effects>Plugins>Mehdi - Weaver.

13. Effects>Reflections Effects>Kaleidoscope.

14. Layers>New Mask layer>From image
Open the menu under the source window and you'll see all the files open.
Select the mask mask.ket-fadesuave:

Layers>Merge>Merge group.
Again Layers>New Mask layer>From image
Open the menu under the source window
and select the mask mask-ket-fadesuave.
Layers>Merge>Merge group.
15. Image>Canvas Size - 900 x 800 pixels.

16. Layers>New Raster Layer.
Layers>Arrange>Send to Bottom.
Set your foreground color to Color.
Flood Fill  with foreground color #928a7d.
17. Layers>New Mask layer>From image
Open the menu under the source window and you'll see all the files open.
Select the mask Empty_1400-1050:

Layers>Merge>Merge group.
18. Set your foreground color to #617286.
Layers>New Raster Layer.
Layers>Arrange>Send to Bottom.
Flood Fill  with the foreground color #617286.
19. Activate the top layer.
Open the tube MR_Christy, - Edit>Copy.
Go back to your work and go to Edit>Paste as new layer.
Image>Resize, 2 times to 80%, resize all layers not checked.
20. Effects>3D Effects>Drop Shadow, color black.

Edit>Repeat Drop Shadow.
21. Open the tube MR_Dior Packaging, - Edit>Copy.
Go back to your work and go to Edit>Paste as new layer.
Image>Resize, to 50%, resize all layers not checked.
Move  the tube in the lower left corner.
20. Effects>3D Effects>Drop Shadow, same settings.

21. Layers>Merge>Merge All.
22. Image>Add borders, 2 pixels, symmetric, color #928a7d.
23. Image>Add borders, 5 pixels, symmetric, color #e3e9e2.
24. Image>Add borders, 2 pixels, symmetric, color #928a7d
25. Sign your work and save as jpg.

If you have problems or doubt, or you find a not worked link, or only for tell me that you enjoyed this tutorial, write to me.
12 Juin 2014

