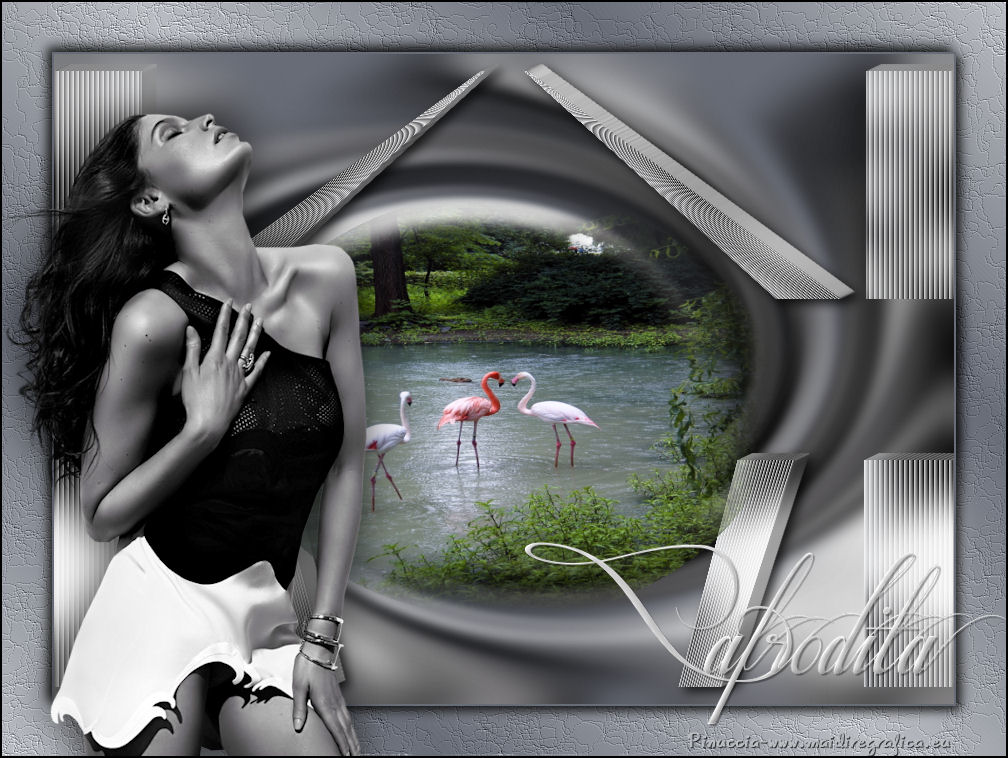
This tutorial was translated with PSPX3 but it can also be made using other versions of PSP.
Since version PSP X4, Image>Mirror was replaced with Image>Flip Horizontal,
and Image>Flip with Image>Flip Vertical, there are some variables.
In versions X5 and X6, the functions have been improved by making available the Objects menu.
In the latest version X7 command Image>Mirror and Image>Flip returned, but with new differences.
See my schedule here
French translation here
Your versions here
For this tutorial, you will need:
Material here
Tube calguisetitiacasta26052016 by Guismo
Mist_anna.br_flamingos.1049
sel_afrodita_nines
sel_afrodita1_nines
Texto Afrodita_nines
Plugins
consult, if necessary, my filter section here
Alien Skin Eye Candy 5 Impact - Extrude here

In the newest versions of PSP, you cannot find the foreground/background gradient ou Corel_06_29.
You can use the Gradient folder of Corel X that you can find here
Copy the selection in the Selections Folder.
Placer les sélections dans le dossier Sélections.
1. Open a new transparent image 900 x 650 pixels.
2. Selections>Select All.
3. Open the tube calguisetitiacasta26052016 - Edit>Copy.
Go back to your work and go to Edit>Paste into Selection.
Selections>Select None.
4. Effects>Image Effects>Seamless Tiling.

5. Adjust>Blur>Gaussian Blur - radius 20.

6. Effects>Distortion Effects>Twirl.

7. Layers>New Raster Layer.
Layers>Arrange>Send to bottom.
Set your foreground color to #686c77,
Flood Fill  the layer with your foreground color.
8. Layers>Merge>Merge visible.
9. Selections>Load/Save Selection>Load Selection from Disk.
Look for and load the selection sel_afrodita_nines.

10. Effects>Texture Effects>Blinds - color white.
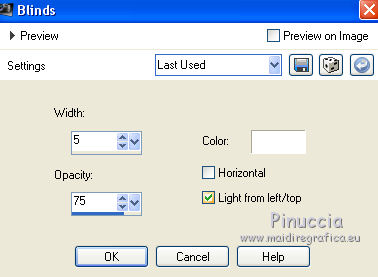
11. Selections>Promote Selection to Layer.
Selections>Select None.
12. Layers>Duplicate.
Image>Mirror.
13. Layers>Merge>Merge Down.
14. Layers>Duplicate.
Activate the layer below of the original.
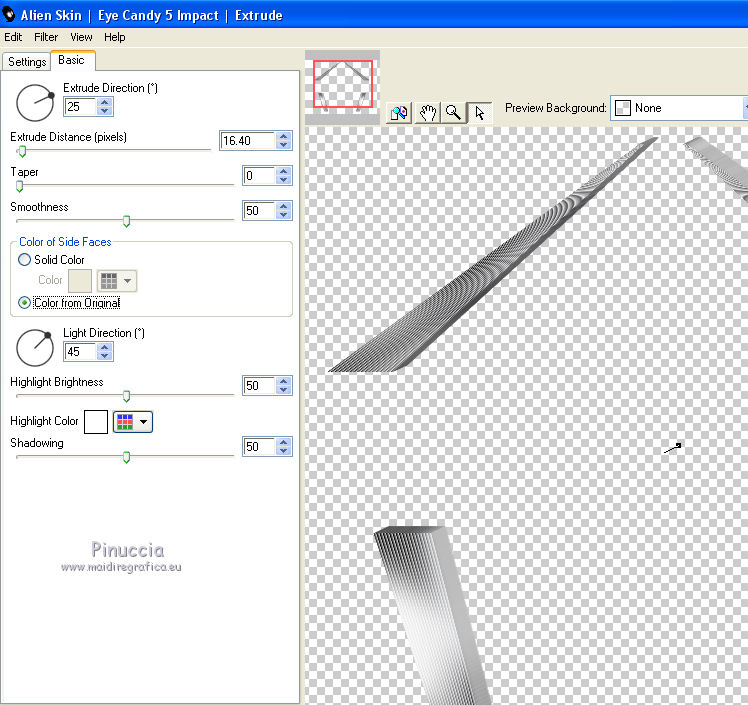
15. Effects>Plugins>Alien Skin Eye Candy 5 Impact - Extrude.
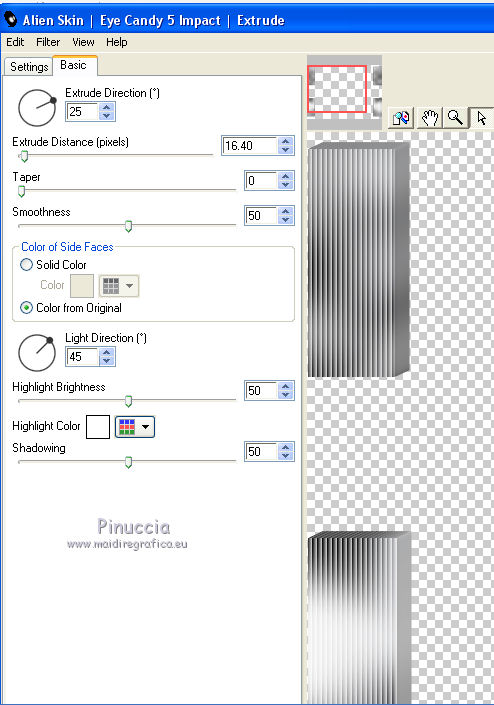
16. Activate the top layer of the copy.
Effects>Geometric Effects>Pentagon.
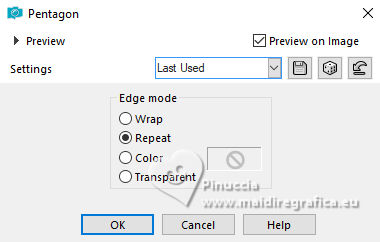
17. Repeat Effects>Plugins>Alien Skin Eye Candy 5 Impact - Extrude, same settings.
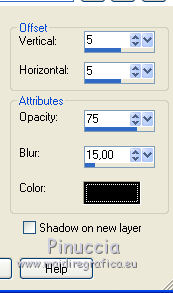
18. Effects>3D Effects>Drop Shadow, color black.
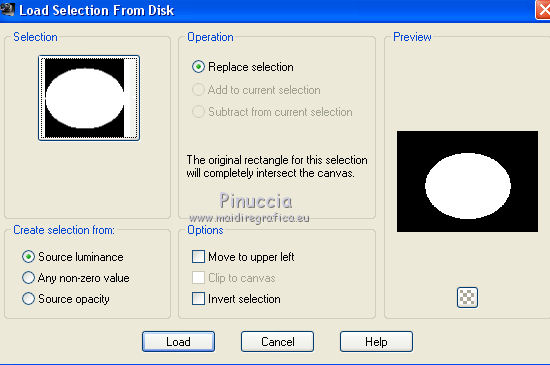
19. Selections>Load/Save Selection>Load Selection from Disk.
Look for and load the selection sel_afrodita1_nines.
20. Layers>New Raster Layer.
Open the tube anna.br_flamingos.1049 - Edit>Copy.
Go back to your work and go to Edit>Paste into Selection.
Selections>Select None.
21. Layers>Merge>Merge All.
22. Image>Add borders, 2 pixels, symmetric, color #686c77.
Image>Add borders, 50 pixels, symmetric, color white.
23. Activate the Magic Wand tool 
and clic on the white bord to select it.
24. Set your background color to #babdc2
keep your foreground color to #686c77.
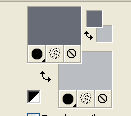
Set your foreground color to a Foreground/Background Gradient, style Linear.
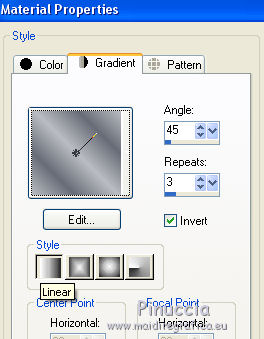
25. Flood fill  the selection with your gradient.
26. Effects>Texture Effects>Fine Leather, color #808080.
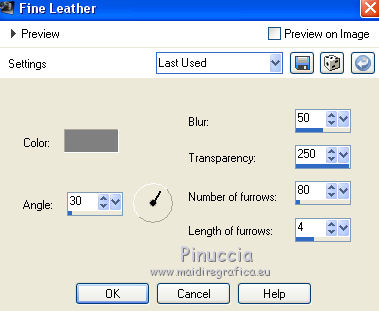
27. Selections>Invert.
Effects>3D Effects>Drop shadow, same settings.

Repeat Drop Shadow, but vertical and horizontal -5.
Selections>Select None.
28. Open the tube calguistitiacasta26052016 - Edit>Copy.
Go back to your work and go to Edit>Paste as new layer.
Image>Resize, 1 time to 80% and 1 time to 95%, resize all layers not checked.
Move  the tube to the left side.
29. Effects>3D Effects>Drop Shadow, color black.

30. Open the text Texto_Afrodita_nines - Edit>Copy.
Go back to your work and go to Edit>Paste as new layer.
Move  the text at the bottom right.
31. Sign your work.
32. Layers>Merge>Merge All.
33. Image>Add borders, 2 pixels, symmetric, color black.
Save as jpg.

If you have problems or doubt, or you find a not worked link, or only for tell me that you enjoyed this tutorial, write to me.
15 June 2016
