Here you find the original of this tutorial:

This tutorial was translated with PSPX3 but it can also be made using other versions of PSP.
Since version PSP X4, Image>Mirror was replaced with Image>Flip Horizontal,
and Image>Flip with Image>Flip Vertical, there are some variables.
In versions X5 and X6, the functions have been improved by making available the Objects menu.
In the latest version X7 command Image>Mirror and Image>Flip returned, but with new differences.
See my schedule here
French translation here
Your versions here
For this tutorial, you will need:
Material here
Tube FB0055 by Isa
Misted Kamil-190
Tube Adrimar-49
Narah_mask_0896
Plugins
consult, if necessary, my filter section here
Filters Unlimited 2.0 here
Mura's Seamless - Mirror Diagonal here
Tramages - Pool Shadow here
Andromeda - Designs here
Transparency - Eliminate White here
Filters Visual Manipulation et Mura's Seamless can be used alone or imported into Filters Unlimited.
(How do, you see here)
If a plugin supplied appears with this icon  it must necessarily be imported into Unlimited

Copy the mask 20-20 in the Masks Folder.
Open Nara's mask in PSP and minimize it with the rest of the material.
1. Open a new transparent image 900 x 650 pixels.
Set your foreground color to #7a781e,
and your background color to #eae28c.
Set your foreground color to a foreground/background gradient, style Linear.

Flood Fill  the transparent image with your gradient.
3. Selection Tool 
(no matter the type of selection, because with the custom selection your always get a rectangle)
clic on the Custom Selection 
and set the following settings.

4. Layers>New Raster Layer.
Activate the tube Kamil-190 - erase the watermark - Edit>Copy.
Go back to your work and go to Edit>Paste into Selection.
5. Adjust>Blur>Gaussian Blur - radius 10.

6. Effects>Art Media Effects>Brush Strokes, color #977e17.

Selections>Select None.
7. Edit>Paste as New Layer (the tube Kamil-190 is still in memory).
Image>Resize, to 90%, resize all layers not checked.
8. Layers>New Raster Layer.
Change the settings of your gradient.

Flood Fill  the layer with your gradient.
9. Layers>New Mask layer>From image
Open the menu under the source window and you'll see all the files open.
Select the mask Narah_mask_0896.

Layers>Merge>Merge group.
10. Effects>Plugins>Xero - Tekstya.

11. Effects>Edge Effects>Enhance.
12. Effects>3D Effects>Drop Shadow, color black.

13. Layers>Duplicate.
14. Effects>Plugins>MuRa's Seamless - Mirror Diagonal.

15. Layers>Merge>Merge All.
16. Image>Add borders, 2 pixels, symmetric, color #7a781e.
17. Edit>Copy.
18. Image>Canvas Size - 954 x 704 pixels.

Activate the Magic Wand Tool 
clic on the white space to select it.
Edit>Paste into Selection.
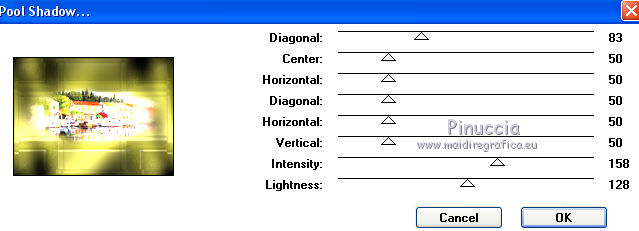
19. Effects>Plugins>Tramages/Pool Shadow.

20. Selections>Invert.
Effects>Effects 3D>Cutout, color black.

Repeat Cutout, but vertical and horizontal -3.

Selections>Select None.
21. Layers>New Raster Layer.
Set your foreground color to white #ffffff.
Set the opacity of your flood fill tool to 40,

Flood Fill  with color white.
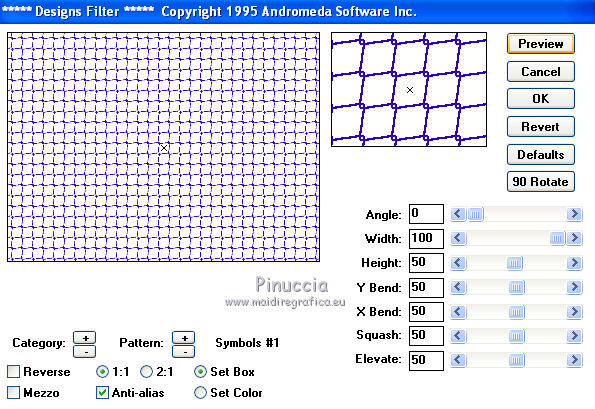
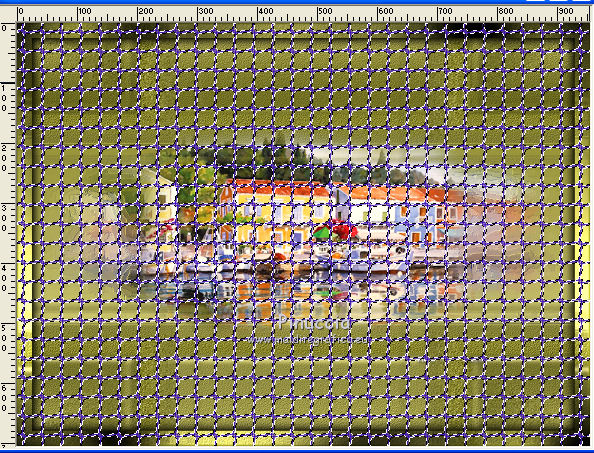
22. Effects>Plugins>Andromeda - Designs.

23. Effects>Plugins>Transparency - Eliminate White.
24. Selections>Select all.
Selections>Float.
Selections>Defloat.
to select the Effect Andromeda.

25. Layers>New Raster Layer.
Set again opacity of Flood Fill tool to 100,
and Flood Fill  the selection with your background color #eae28c.
Selections>Select None.
26. Layers>Load/Save Mask>Load Mask from Disk.
Look for and load the mask 20-20.
don't worry if you see another color of Andromeda Effect

Layers>Merge>Merge Group.
Apply the mask another time.
Layers>Merge>Merge Group.
27. Change the blend mode of this layer to Screen and the opacity to 70.
28. Delete the layer with the Andromeda effect.
Layers>Merge>Merge All.
29. Image>Add border, 50 pixels, symmetric, background color #eae28c.
30. Activate the tube Adrimar 49, Edit>Copy.
Go back to your work and go to Edit>Paste as New Layer.
Image>Resize, 1 time to 50% and 1 time to 80%, resize all layers not checked.
Image>Mirror.
Move  the tube to the left side.
31. Effects>3D Effects>Drop Shadow, color black.

32. Activate the tube FB0055_Isa, erase the watermark, Edit>Copy.
Go back to your work and go to Edit>Paste as New Layer.
Image>Resize, to 90%, resize all layers not checked.
Effects>3D Effects>Drop Shadow, same settings.
Move  the tube to the right side.
33. Layers>Merge>Merge All.
34. Image>Add borders, 2 pixels, symmetric, color #7a781e.
35. Image>Resize, to 90%, or as you like better, resize all layers checked.
Sign your work and save as jpg.

If you have problems or doubt, or you find a not worked link, or only for tell me that you enjoyed this tutorial, write to me.
7 November 2015

