Here you find the original of this tutorial:

This tutorial was created with PSPX3 but it can also be made using other versions of PSP.
Since version PSP X4, Image>Mirror was replaced with Image>Flip Horizontal,
and Image>Flip with Image>Flip Vertical, there are some variables.
In versions X5 and X6, the functions have been improved by making available the Objects menu.
In the latest version X7 command Image>Mirror and Image>Flip returned, but with new differences.
See my schedule here
French translation here
Your versions here
For this tutorial, you will need:
Material here
Tube Gabry-woman tripla-00-46
Plugins
consult, if necessary, my filter section here
Filters Unlimited 2.0 here
VM Natural - Starmaker here
Filters VM Natural can be used alone or imported into Filters Unlimited.
(How do, you see here)
If a plugin supplied appears with this icon  it must necessarily be imported into Unlimited

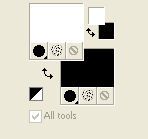
1. Set your Foreground color to #ffffff,
and your Background color to #000000.

Set the Foreground color to Foreground/Background Gradient, style Linear.

2. Open a new transparent image 1000 x 700 pixels.
Flood Fill  with your Gradient.
3. Layers>New Raster Layer.
Flood Fill  with your background color.
4. Effects>Plugins>Filters Unlimited 2.0 - VM Natural - Starmaker.

5. Change the Blend mode of this layer to Hard Light.
6. Open the tube Gabry-woman tripla-00-46
Activate the layer Raster 4 - Edit>Copy.
don't close the tube; you'll use it again
Go back to your work and go to Edit>Paste as new layer.
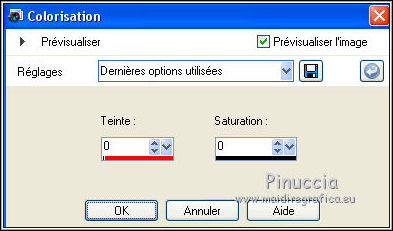
7. Adjust>Réglage>Teinte et Saturation>Coloriser.

8. Effects>Image Effects>Seamless Tiling, default settings.

9. Adjust>Blur>Gaussian Blur - radius 50.

10. Effects>Reflections Effects>Feedback.

11. Effects>Reflections Effects>Kaleidoscope.

12. Edit>Paste as new layer (the Gabry's tube is still in memory).
Image>Resize, 3 times to 80%, resize all layers not checked.
Réglage>Teinte et Saturation>Coloriser, comme précédemment.

Move  the tube en bas à droite.
13. Effects>3D Effects>Drop Shadow, color white.

14. Again open the tube Gabry-woman tripla-00-46.
Activate the layer Raster 2 - Edit>Copy.
Go back to your work and go to Edit>Paste as new layer.
Image>Resize, 2 times to 80%, resize all layers not checked.
15. Réglage>Teinte et Saturation>Coloriser, comme précédemment.

16. Effects>3D Effects>Drop Shadow, same settages.

17. Effects>Image Effects>Offset.

18. Layers>Merge>Merge All.
19. Image>Add borders, 2 pixels, symmetric, color black.
Image>Add borders, 5 pixels, symmetric, color white.
Image>Add borders, 2 pixels, symmetric, color black.
Image>Add borders, 30 pixels, symmetric, color white.
20. Sign your work.
21. Image>Resize, 90%, resize all layer checked.
Save as jpg.

If you have problems or doubt, or you find a not worked link, or only for tell me that you enjoyed this tutorial, write to me.
15 June 2015

