|
TAG SWEETNESS
 ENGLISH VERSION ENGLISH VERSION
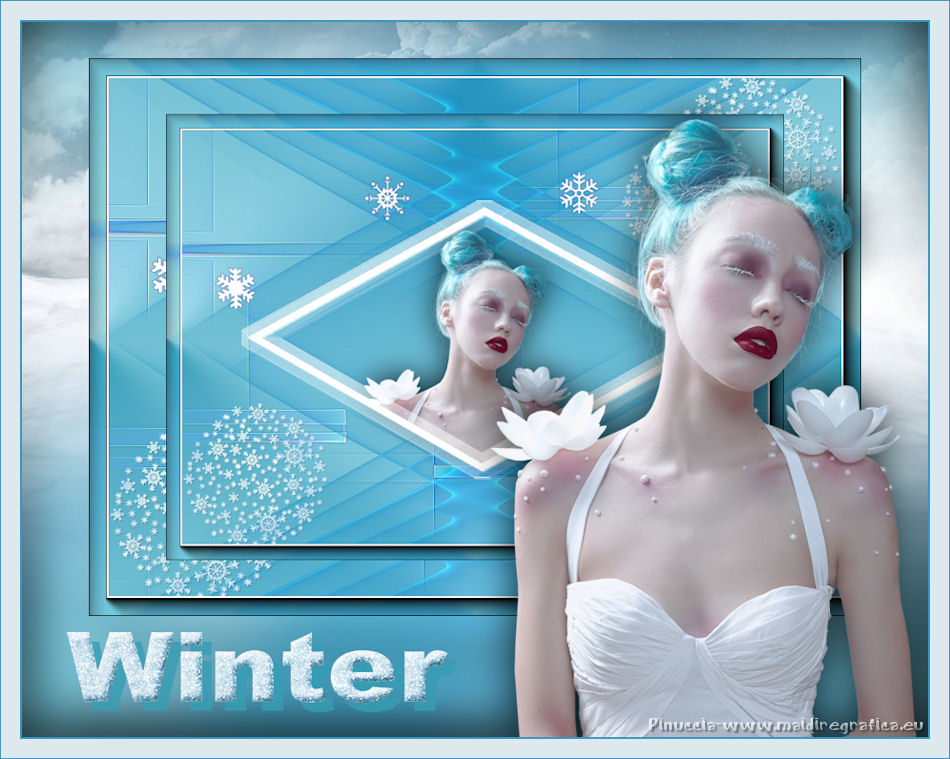
Here you find the original of this tutorial:

This tutorial was translated with PSPX7 but it can also be made using other versions of PSP.
Since version PSP X4, Image>Mirror was replaced with Image>Flip Horizontal,
and Image>Flip with Image>Flip Vertical, there are some variables.
In versions X5 and X6, the functions have been improved by making available the Objects menu.
In the latest version X7 command Image>Mirror and Image>Flip returned, but with new differences.
See my schedule here
French translation here
your versions ici

For this tutorial, you will need:
Material here
Tube calguissweetness01092018 by Guismo
calguismistedbear17112014 by Guismo
La Forma 24_Nines
La Forma 30_Nines
AM_CristalSnowflake_48
CherSwitz-Snowflakes4
AM_Cristal_Word1
(you find here the links to the material authors' sites)
Plugins
consult, if necessary, my filter section here
AAA Frames - Foto Frame here

You can change Blend Modes according to your colors.
In the newest versions of PSP, you don't find the foreground/background gradient (Corel_06_029).
You can use the gradients of the older versions.
The Gradient of CorelX here
Copy the selection in the Selections Folder
1. Open a new transparent image 900 x 650 pixels.
2. Set your foreground color to #369db4,
and your background color to #baeaf2.
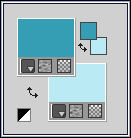
Set your foreground color to a Foreground/Background Gradient, style Linear.
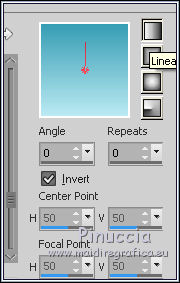
Flood Fill  the transparent image with your Gradient. the transparent image with your Gradient.
3. Open Forma 24_Nines, erase the watermark and go to Edit>Copy.
Go back to your work and go to Edit>Paste as new layer.
4. Layers>Merge>Merge visible.
5. Effects>Image Effects>Seamless Tiling, default settings.

6. Effects>Edge Effects>Enhance More.
7. Open Forma 30_Nines, erase the watermark and go to Edit>Copy.
Go back to your work and go to Edit>Paste as new layer.
8. Effects>Image Effects>Offset.
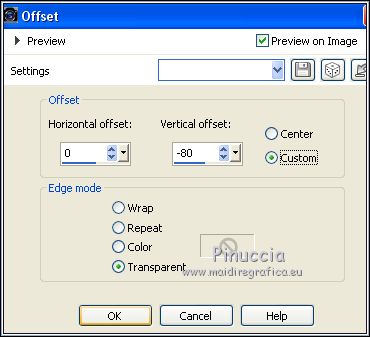
9. Layers>Duplicate.
Image>Flip.
10. Layers>Merge>Merge Down.
Reduce the opacity of this layer to 50%.
11. Selections>Load/Save Selection>Load Selection from Disk.
Look for and load the selection sel.74nav.nines.
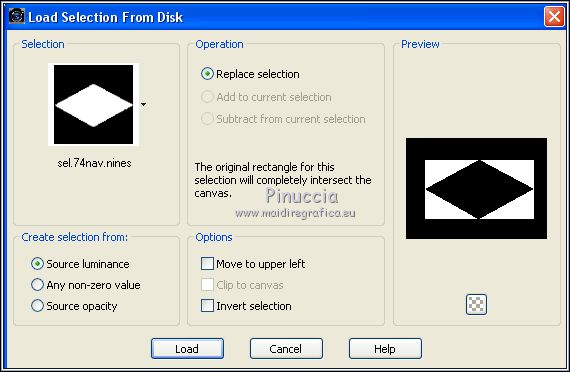
12. Layers>New Raster Layer.
Set your foreground color to #ffffff.
Flood Fill  the layer with color white #ffffff. the layer with color white #ffffff.
13. Selections>Modify>Contract - 10 pixels.
Press CANC on the keyboard 
Keep selected.
14. Open the tube calguissweetness01092018 - Edit>Copy.
Go back to your work and go to Edit>Paste as new layer.
Image>Resize, 4 times to 80%, resize all layers not checked.
Place  the tube on the selection. the tube on the selection.
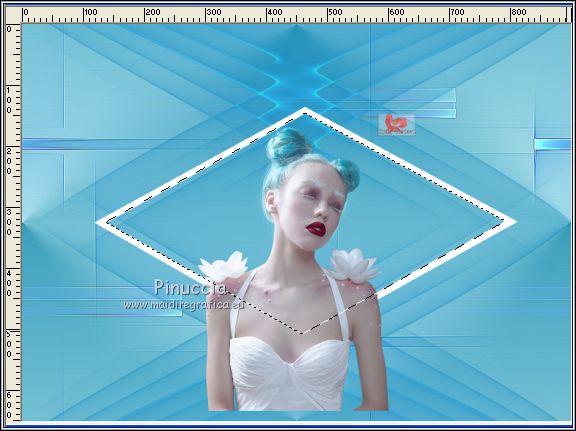
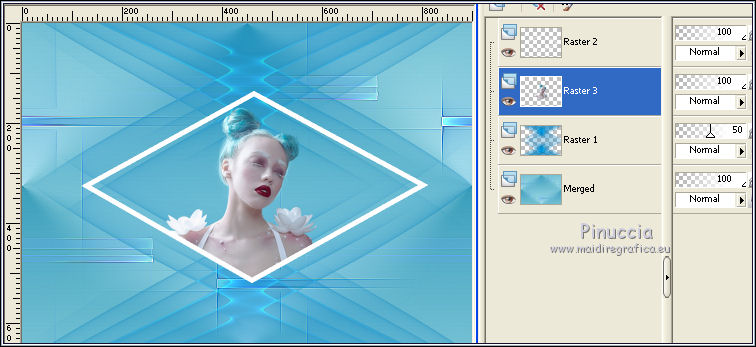
15. Selections>Invert.
Press CANC on the keyboard.
Selections>Select None.
Layers>Arrange>Move Down (under the white frame layer).
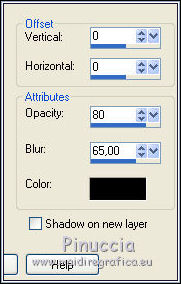
16. Effects>3D Effects>Drop Shadow, color black.
17. Activate the layer of the white frame.
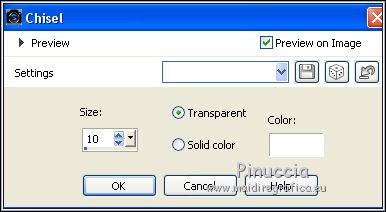
Effects>3D Effects>Chisel, color white.
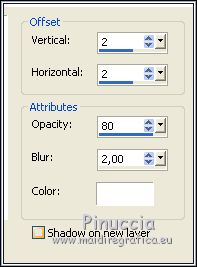
18. Effects>3D Effects>Drop Shadow, color white.
19. Open AM_CristalSnowflake_48 - Edit>Copy.
Go back to your work and go to Edit>Paste as new layer.
Don't move it
20. Open CherSwitz-Snowflakes4 - Edit>Copy.
Go back to your work and go to Edit>Paste as new layer.
Dont' move it
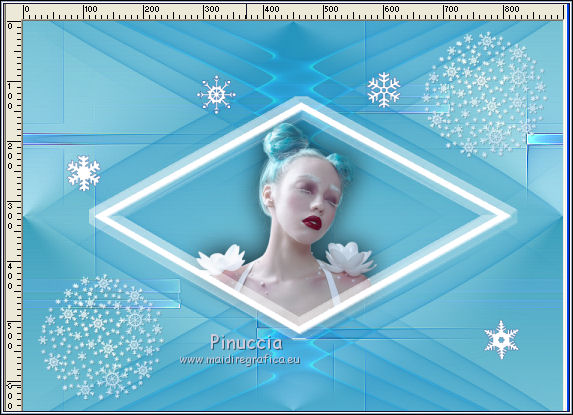
21. Layers>Merge>Merge visible.
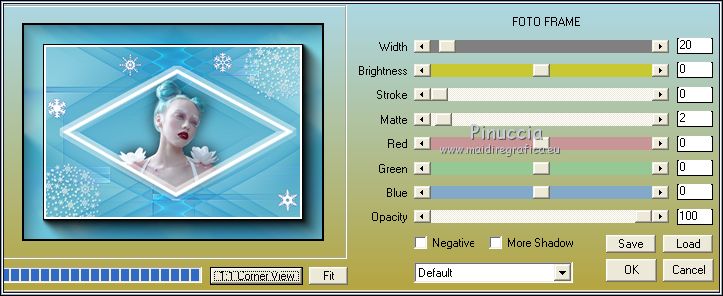
22. Effects>Plugins>AAA Frames - Foto Frame.
23. Edit>Copy.
24. Image>Resize, to 80%, resize all layers not checked.
25. Layers>New Raster Layer.
Layers>Arrange>Send to Bottom.
26. Selections>Select All.
Edit>Paste into Selection.
Selections>Select None.
27. Layers>Merge>Merge visible.
28. Edit>Copy.
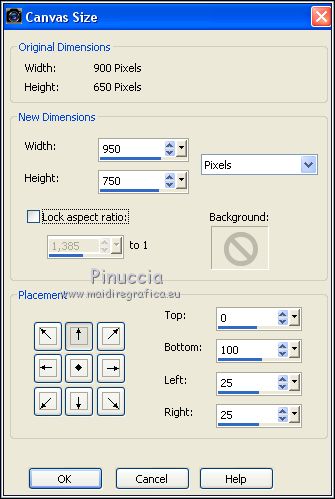
29. Image>Canvas Size - 950 x 750 pixels.
30. Image>Resize, to 90%, resize all layers not checked.
31. Layers>New Raster Layer.
Layers>Arrange>Move Down.
Selections>Select All.
Edit>Paste into Selection.
Selections>Select None.
32. Adjust>Blur>Gaussian Blur - radius 25.

33. Open the tube calguismistedbear17112014 - Edit>Copy.
Go back to your work and go to Edit>Paste as new layer.
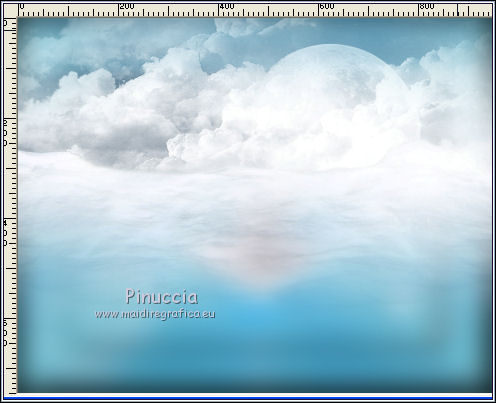
Move  the tube up as below the tube up as below
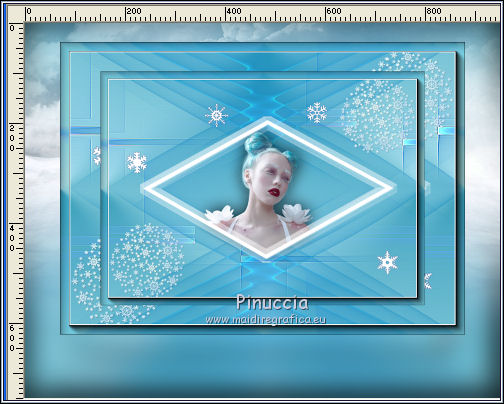
if your close the top layer, you can see this:
34. Activate the top layer.
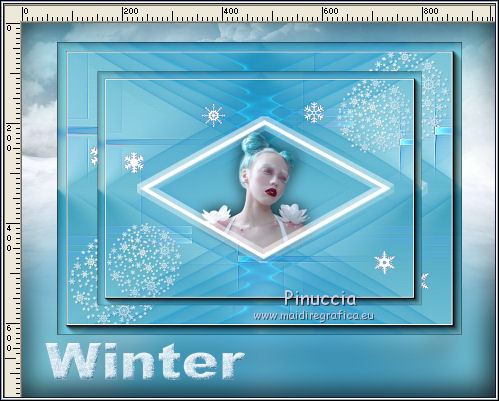
Open word1 - Edit>Copy.
Go back to your work and go to Edit>Paste as new layer.
Image>Resize, to 80%, resize all layers not checked.
Move  the tube at the bottom left. the tube at the bottom left.
35. Effects>3D Effects>Drop Shadow, color #369db4.
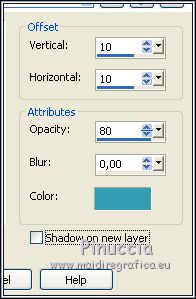
36. Open again the tube calguissweetness01092018, erase the watermark and go to Edit>Copy.
Go back to your work and go to Edit>Paste as new layer.
Image>Resize, 2 times to 80% and 1 time to 90%, resize all layers not checked.
Move  the tube at the bottom right. the tube at the bottom right.
37. Effects>3D Effects>Drop Shadow, color black.

38. Layers>Merge>Merge All.
39. Image>Add borders, 2 pixels, symmetric, color #3195bf.
Image>Add borders, 20 pixels, symmetric, color #dde9ed.
Image>Add borders, 1 pixel, symmetric, color #3195bf.
40. Image>Resize, to 95%, resize all layers checked.
41. Sign your work and save as jpg.
The tube of this version is by Alies

Your versions here

If you have problems or doubts, or you find a not worked link, or only for tell me that you enjoyed this tutorial, write to me.
25 Octobre 2018
|
 ENGLISH VERSION
