This tutorial was translated with PSPX3 but it can also be made using other versions of PSP.
Since version PSP X4, Image>Mirror was replaced with Image>Flip Horizontal,
and Image>Flip with Image>Flip Vertical, there are some variables.
In versions X5 and X6, the functions have been improved by making available the Objects menu.
In the latest version X7 command Image>Mirror and Image>Flip returned, but with new differences.
See my schedule here
French translation here
Your versions here
For this tutorial, you will need:
Material here
Tube calguisblue11012016 by Guismo
Mist calguisrequins16012016 by Guismo
Tube bola seve_nines
Texto Requins_nines
3 Sélections.
Plugins
consult, if necessary, my filter section here
Filters Unlimited 2.0 here
VM Natural - Lakeside Reflection, Legoland here
Mura's Meister - Perspective Tiling here
Filters VM Natural can be used alone or imported into Filters Unlimited.
(How do, you see here)
If a plugin supplied appears with this icon  it must necessarily be imported into Unlimited

Copy the selections in the Selections Folder.
1. Open a new transparent image 900 x 600 pixels.
2. Set your foreground color to #004e7d,
and your background color to #00aedc.

Set your foreground color to a foreground/background gradient, style Linear.

Flood Fill  the transparent image with your Gradient.
3. Selections>Load/Save selection>Load Selection from Disk.
Look for and load the selection sel_requins_nines.

4. Effects>Plugins>Filters Unlimited 2.0 - VM Natural - Legoland.

Selections>Select None.
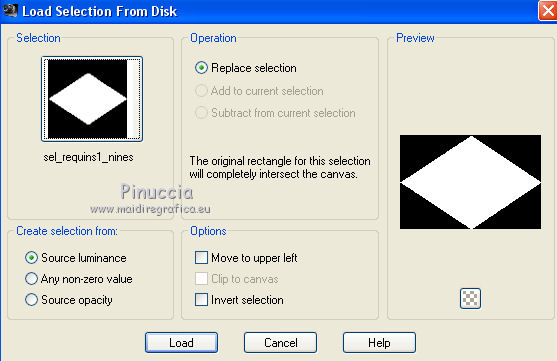
5. Selections>Load/Save selection>Load Selection from Disk.
Look for and load the selection sel_requins1_nines.

6. Layers>New Raster Layer.
7. Open the tube calguisrequins16012016 - Edit>Copy.
Go back to your work and go to Edit>Paste into Selection.
Keep selected.
8. Effects>Plugins>Filters Unlimited 2.0 - VM Natural - Lakeside Reflection.

Selections>Select None.
9. Activate the bottom layer.
10. Selections>Load/Save selection>Load Selection from Disk.
Look for and load the selection sel_requins2_nines.

11. Effects>Textures Effects>Blinds - color #075393.

12. Selections>Select None.
13. Layers>Merge>Merge Visible.
14. Layers>Duplicate.
15. Adjust>Blur>Gaussian Blur - radius 20.

16. Effects>Textures Effects>Blinds - color #00aedc.

17. Image>Canvas Size - 900 x 700 pixels.

18. Effects>Reflection Effects>Kaleidoscope.

19. Effects>Plugins>Mura's Meister - Perspective Tiling.

20. Activate your Magic Wand Tool 

clis on the transparente area to select it

Press 5 times CANC on the keyboard 
Selections>Select None.
21. Open the tube calguisblue11012016 - Edit>Copy.
Go back to your work and go to Edit>Paste as new layer.
Image>Mirror.
Move  the tube in the lower right, see my example.
22. Effects>3D Effects>Drop Shadow, color #f7fadb.

23. Open the tube bola_seve_nines - Edit>Copy.
Go back to your work and go to Edit>Paste as new layer.
Move  the tube in the upper left, see my example.
24. Layers>Duplicate.
Image>Mirror.
25. Open Texto Requins_nines - Edit>Copy.
Go back to your work and go to Edit>Paste as new layer.
Place  the text properly.
26. Layers>Merge>Merge All.
27. Image>Add borders, 2 pixels, symmetric, color #004e7d.
Image>Add borders, 10 pixels, symmetric, color #00aedc.
Image>Add borders, 30 pixels, symmetric, color #d8f7e8.
28. Sign your work and save as jpg.

If you have problems or doubt, or you find a not worked link, or only for tell me that you enjoyed this tutorial, write to me.
2 February 2016

