Here you find the original of this tutorial:

This tutorial was created with PSPX3 but it can also be made using other versions of PSP.
Since version PSP X4, Image>Mirror was replaced with Image>Flip Horizontal,
and Image>Flip with Image>Flip Vertical, there are some variables.
In versions X5 and X6, the functions have been improved by making available the Objects menu.
In the latest version X7 command Image>Mirror and Image>Flip returned, but with new differences.
See my schedule here
French translation here
Your versions here
For this tutorial, you will need:
Material here
Tube enfants_0100_lisat
Min@.mist.esterno.18.3.15
LF-Mask-219
Plugins
consult, if necessary, my filter section here
Filters Unlimited 2.0 here
Virtual Manipulation - Transmission here
VM Toolbox - Blast here
AAA Frames - Foto Frame here
Filters Visual Manipulation et VM Toolbox can be used alone or imported into Filters Unlimited.
(How do, you see here)
If a plugin supplied appears with this icon  it must necessarily be imported into Unlimited

Open the mask in PSP and minimize it with the rest of the material.
1. Set your foreground color to #b4b4b5,
and your background color to #dbdddb.

2. Open a new transparent image 900 x 600 pixels.
Flood Fill  with your foreground color #b4b4b5.
3. Open the tube Mina@.mist.esterno.18.3.15 - Edit>Copy.
Go back to your work and go to Edit>Paste as new layer.
Image>Mirror.
Move  the tube to the left side, see my final tag.
4. Change the Blend mode of this layer to Hard Light.
5. Open tube enfants_0100_lisat - - Edit>Copy.
Go back to your work and go to Edit>Paste as new layer.
6. Effects>Image Effects>Seamless Tiling, default settings.

7. Adjust>Blur>Gaussian Blur - radius 20.

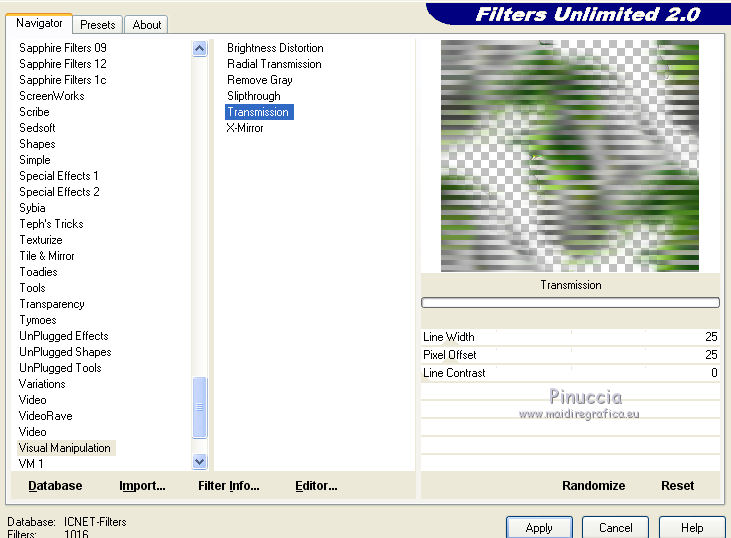
8. Effects>Plugins>Filters Unlimited 2.0 - Visual Manipulation - Transmission.

9. Layers>New Raster Layer.
Flood Fill  with your background color #dbdddb.
10. Layers>New Mask layer>From image
Open the menu under the source window and you'll see all the files open.
Select the mask LF-Mask-219:

Layers>Merge>Merge group.
11. Change the Blend mode of this layer to Soft Light.

12. Layers>Duplicate.
13. Effects>Distortion Effects>Twirl.

Change the Blend mode of this layer to Normal.

14. Edit>Paste as new layer (the tube enfants_0100_lisat is still in memory).
Image>Resize, 1 time to 80% and 1 time to 90%, resize all layers not checked.
Move  the tube to the right side.
15. Layers>Merge>Merge All.
16. Image>Add borders, 2 pixels, symmetric, color #205b00.
17. Effects>Plugins>AAA Frames - Foto Frame.

18. Edit>Copy.
19. Image>Add borders, 50 pixels, symmetric, color #dbdddb.
Activate the Magic Wand Tool 
and clic on this bord to select it.
20. Edit>Paste into Selection.
21. Adjust>Blur>Gaussian Blur - radius 20.

22. Selections>Invert.
23. Effects>3D Effects>Drop Shadow, color #dbdddb.

Repeat Drop Shadow, but vertical and horizontal 0/-25.
24. Selection>Invert.
26. Effects>Plugins>Filters Unlimited 2.0 - VM Toolbox - Blast.

Selections>Select None.
27. Effects>Plugins>AAA Frames - Foto Frame.

28. Image>Add borders, 2 pixels, symmetric, color white.
29. Sign your work and save as jpg.

If you have problems or doubt, or you find a not worked link, or only for tell me that you enjoyed this tutorial, write to me.
24 September 2015

