This tutorial was translated with PSPX3 but it can also be made using other versions of PSP.
Since version PSP X4, Image>Mirror was replaced with Image>Flip Horizontal,
and Image>Flip with Image>Flip Vertical, there are some variables.
In versions X5 and X6, the functions have been improved by making available the Objects menu.
In the latest version X7 command Image>Mirror and Image>Flip returned, but with new differences.
See my schedule here
French translation here
Your versions here
For this tutorial, you will need:
Material here
Tube K@rine_dreams_Sexy_Painting_3660_Fevrier_2017
Narah_mask_0346
marco_paint_nines
Plugins
consult, if necessary, my filter section here
Filters Unlimited 2.0 here
Simple - Zoom out and Flip here
AAA Frames - Foto Frame here
Nik Color Efex Pro 1.e - Graduated User Defined here
Filters Simple can be used alone or imported into Filters Unlimited.
(How do, you see here)
If a plugin supplied appears with this icon  it must necessarily be imported into Unlimited

You can change Blend Modes according to your colors.
In the newest versions of PSP, you don't find the foreground/background gradient (Corel_06_029).
You can use the gradients of the older versions.
The Gradient of CorelX here
Open the mask in PSP and minimize it with the rest of the material.

1. Open a new transparent image 900 x 650 pixels.
2. Set your foreground color to #354173.
Set your background color to #abb9de.

Flood Fill  the transparent image with your foreground color #354173.
3. Effects>Texture Effects>Blinds - color white.

4. Effects>Reflection Effects>Kaleidoscope.

5. Effects>Plugins>Nik Color Efex Pro 1.e - Graduated User Defined
set Color according to your tube; for me foreground color #354173.

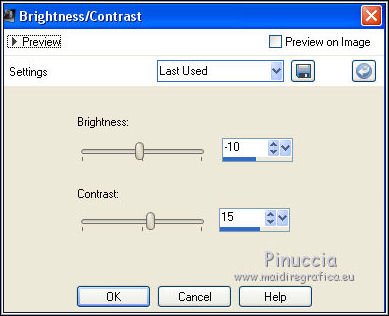
6. Adjust>Brightness and Contrast>Brightness and Contrast.

7. Layers>Duplicate.
Image>Resize, to 80%, resize all layers not checked.
8. Effects>Geometric Effects>Circle - 2 times with these settings.

9. Layers>New Raster Layer.
Flood Fill  with your background color #abb9de.
10. Layers>New Mask layer>From image
Open the menu under the source window and you'll see all the files open.
Select the mask Narah_mask_0346:

Layers>Merge>Merge group.
11. Adjust>Sharpness>Sharpen More.
12. Change the Blend mode of this layer to Hard Light.
Layers>Arrange>Move down.

13. Layers>Merge>Merge visible.
14. Effects>Plugins Externes>AAA Frames - Foto Frame.

15. Edit>Copy.
16. Image>Resize, to 90%, resize all layers not checked.
17. Activate the Magic Wand tool 
and clic on the transparent part to select it.
18. Edit>Paste into Selection.
Selections>Select None.
19. Open the tube Karine_dream_Sexy_Painting_3660 - Edit>Copy.
Go back to your work and go to Edit>Paste as new layer.
Image>Resize, to 80%, resize all layers not checked.
20. Effects>3D Effects>Drop Shadow, color #d2cace.

21. Open marco_paint_nines - Edit>Copy.
Go back to your work and go to Edit>Paste as new layer.
22. Layers>Merge>Merge All.
23. Image>Add borders, 2 pixels, symmetric, background color #abb9de.
Image>Add borders, 5 pixels, symmetric, foreground color #354173.
Image>Add borders, 30 pixels, symmetric, color #f7edeb.
24. Select the 30 pixels bord with the Magic Wand tool 
Effects>Plugins>Filters Unlimited 2.0 - Simple - Zoom out and flip.

25. Adjust>Blur>Gaussian Blur - radius 25.

26. Adjust>Blur>Radial Blur.

Selections>Select None.
27. Image>Add borders, 2 pixels, symmetric, #466384.
28. Sign your work and save as jpg.
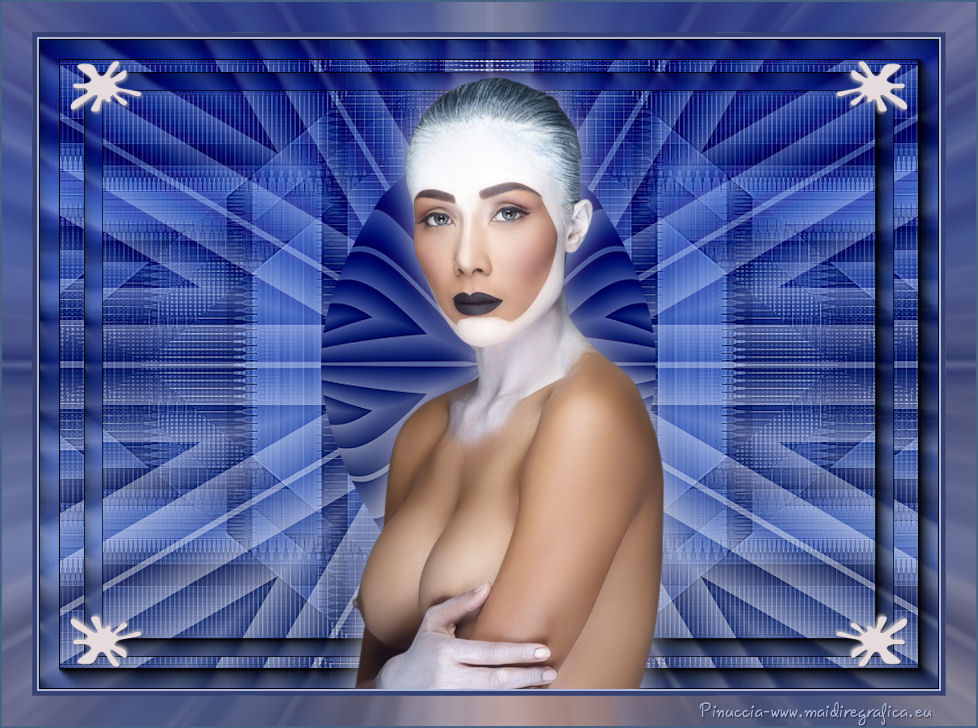
The tube of this version: wd_LeodaSeyna_50 de Womandesigns.


If you have problems or doubt, or you find a not worked link, or only for tell me that you enjoyed this tutorial, write to me.
9 March 2017

