|
TAG NICOL
 ENGLISH VERSION ENGLISH VERSION

Thanks Nines for your invitation to translate your tutorials

This tutorial was translated with PSPX7 but it can also be made using other versions of PSP.
Since version PSP X4, Image>Mirror was replaced with Image>Flip Horizontal,
and Image>Flip with Image>Flip Vertical, there are some variables.
In versions X5 and X6, the functions have been improved by making available the Objects menu.
In the latest version X7 command Image>Mirror and Image>Flip returned, but with new differences.
See my schedule here
French translation here
Your versions ici
For this tutorial, you will need:
Material here
Tube Grisi_Woman_780
315_paysage_p3_animabelle
Adorno nicol.nines
(you find here the links to the material authors' sites)
Plugins
consult, if necessary, my filter section here
Filters Unlimited 2.0 here
AP Lines - SilverLining here
VM Extravaganza - Picture in a Picture, Transmission here
Penta.com - Color dot here
Filters VM Extravaganza and Penta.com can be used alone or imported into Filters Unlimited.
(How do, you see here)
If a plugin supplied appears with this icon  it must necessarily be imported into Unlimited it must necessarily be imported into Unlimited

You can change Blend Modes according to your colors.
In the newest versions of PSP, you don't find the foreground/background gradient (Corel_06_029).
You can use the gradients of the older versions.
The Gradient of CorelX here
Copy the Selections in the Selections Folder.
1. Open a new transparent image 900 x 650 pixels.
2. Set your foreground color to #d1d8e2,
and your background color to #2b466d.

Set your foreground color to a Foreground/Background Gradient, style Linear.

Flood Fill  the transparent image with your Gradient. the transparent image with your Gradient.
3. Selections>Select All.
Selections>Modify>Contract - 30 pixels.
Press CANC on the keyboard 
Selections>Invert.
4. Effects>Plugins>AP Lines - SilverLining.

Selections>Select None.
5. Image>Resize, to 90%, resize all layers not checked.
6. Effects>3D Effects>Drop Shadow, color black.
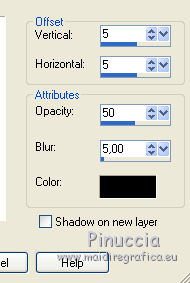
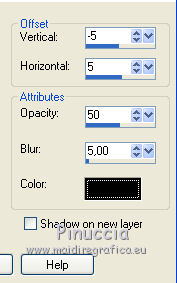
Repeat Drop Shadow, but vertical and horizontal -5.
7. Layers>New Raster Layer.
Layers>Arrange>Send to Bottom.
Flood Fill  the layer with your gradient. the layer with your gradient.
8. Open the tube 315_paysage_p3_animabelle and go to Edit>Copy.
Go back to your work and go to Edit>Paste as a new layer.
9. Adjust>Brightness and Contrast>Brightness and Contrast.

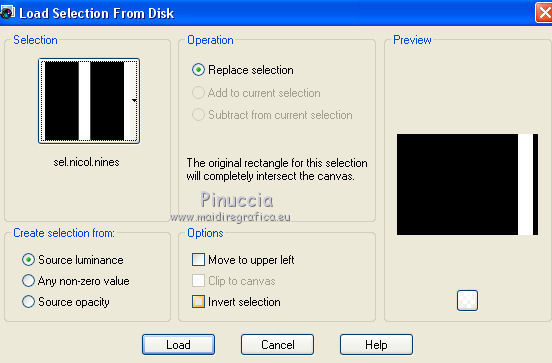
10. Selections>Load/Save Selection>Load Selection from Disk.
Look for and load the selection sel.nicol.nines
11. Layers>New Raster Layer.
Layers>Arrange>Bring to Top.
Flood Fill  the layer with your gradient. the layer with your gradient.
12. Effects>Plugins>Filters Unlimited 2.0 - VM Extravaganza - Picture in a picture.

Selections>Select None.
13. Effects>3D Effects>Drop Shadow, color black.
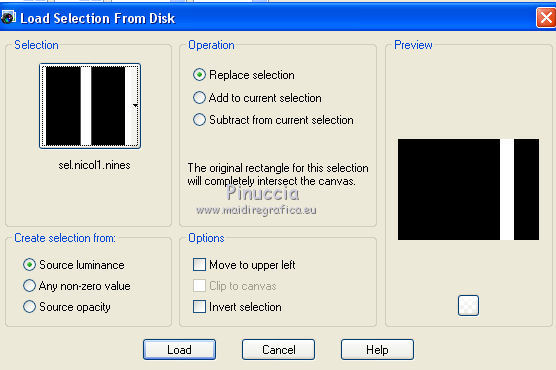
14. Selections>Load/Save Selection>Load Selection from Disk.
Look for and load the selection sel.nicol1.nines
15. Layers>New Raster Layer.
Flood Fill  the layer with your gradient. the layer with your gradient.
16. Effects>Plugins>Filters Unlimited 2.0 - VM Extravaganza - Transmission.

Selections>Select None.
17. Effects>3D Effects>Drop Shadow, color black.

18. Selections>Load/Save Selection>Load Selection from Disk.
Look for and load the selection sel.nicol2.nines

19. Layers>New Raster Layer.
Flood Fill  the layer with your gradient. the layer with your gradient.
Selections>Select None.
20. Layers>Merge>Merge All.
21. Image>Add borders, 2 pixels, symmetric, foreground color #d1d8e2.
Image>Add borders, 30 pixels, symmetric, background color #2b466d.
Select the border with your Magic Wand Tool
22. Effects>Plugins>Filters Unlimited 2.0 - Penta.com - Color dot.

23. Selections>Invert.
Effects>3D Effects>Drop Shadow, color black.

24. Open the tube Grisi_Woman_780 and go to Edit>Copy.
Go back to your work and go to Edit>Paste as a new layer.
Image>Resize, to 90%, resize all layers not checked.
Move  the tube at the bottom left. the tube at the bottom left.
25. Effects>3D Effects>Drop Shadow, same settings.

26. Open the tube Adorno nicol.nines, erase the watermark and go to Edit>Copy.
Go back to your work and go to Edit>Paste as a new layer.
Place  rightly the tube, or: rightly the tube, or:
Effects>Image Effects>Offset
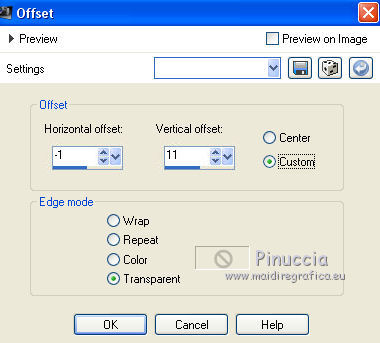
27. Layers>Merge>Merge All.
28. Image>Add borders, 5 pixels, symmetric, background color #2b466d.
29. Sign your work and save as jpg.
The tubes of this version are by Cibi-Bijoux

Your versions here

If you have problems or doubts, or you find a not worked link, write to me.
27 March 2019
|
 ENGLISH VERSION
