|
TAG MYMI
 ENGLISH VERSION ENGLISH VERSION
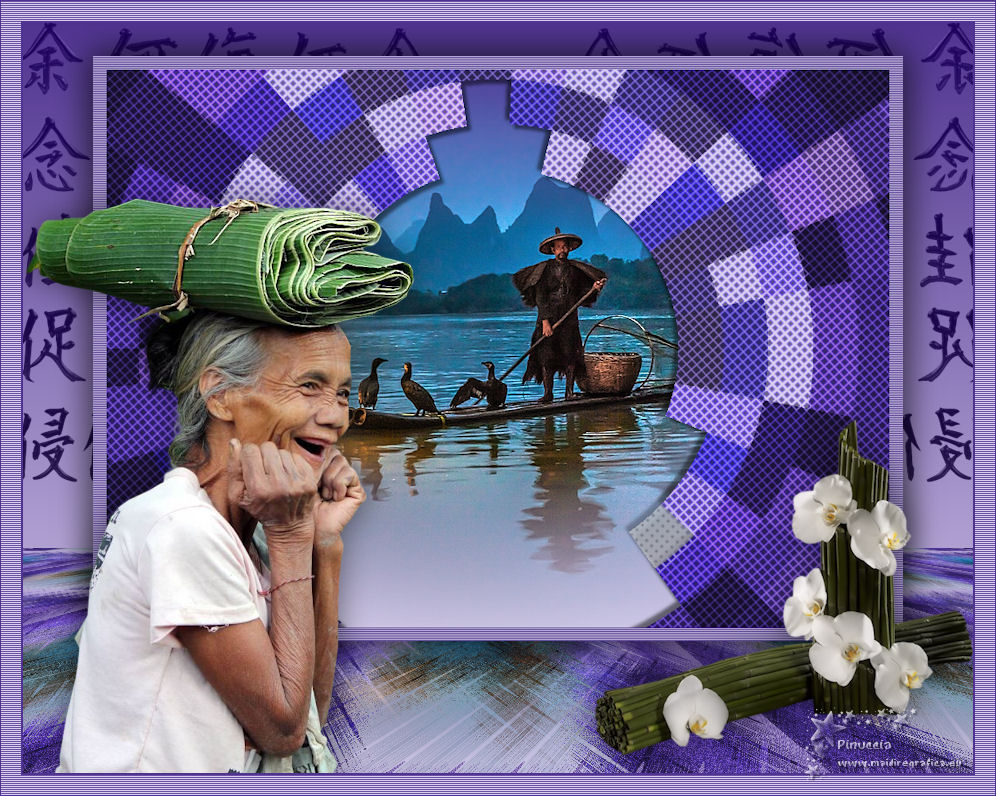
Thanks Nines for your invitation to translate your tutorials

This tutorial was translated with PSPX2 but it can also be made using other versions of PSP.
Since version PSP X4, Image>Mirror was replaced with Image>Flip Horizontal,
and Image>Flip with Image>Flip Vertical, there are some variables.
In versions X5 and X6, the functions have been improved by making available the Objects menu.
In the latest version X7 command Image>Mirror and Image>Flip returned, but with new differences.
See my schedule here
French translation here
your versions ici
For this tutorial, you will need:
Material here
Tube VERLAINE A 02 AOUT 2018
190_paysagem_p3_animabelle
Tube codycreationfleurs34
Forma 8_Nines
0rientalDing Accents-Lacey
(you find here the links to the material authors' sites)
Plugins
consult, if necessary, my filter section here
Filters Unlimited 2.0 here
VM Toolbox - Radial Mosaic here
AFS IMPORT - Xaggerat here
Mura's Meister - Perspective Tiling here
Filters VM Toolbox and AFS IMPORT can be used alone or imported into Filters Unlimited.
(How do, you see here)
If a plugin supplied appears with this icon  it must necessarily be imported into Unlimited it must necessarily be imported into Unlimited

You can change Blend Modes according to your colors.
In the newest versions of PSP, you don't find the foreground/background gradient (Corel_06_029).
You can use the gradients of the older versions.
The Gradient of CorelX here
1. Open a new transparent image 900 x 650 pixels.
2. Set your foreground color to #503390
and your background color to #d8cfee.

Set your foreground color to a Foreground/Background Gradient, style Linear.

Flood Fill  the transparent image with your Gradient. the transparent image with your Gradient.
3. Open Forma 8_Nines -Edit>Copy.
Go back to your work and go to Edit>Paste as new layer.
4. Effects>Image Effects>Offset.

5. Layers>Duplicate.
Image>Mirror.
Layers>Merge>Merge Down.
6. Effects>Artistic Effects>Halftone.

7. Effects>Plugins>Filters Unlimited 2.0 - VM Toolbox - Radial Mosaic.
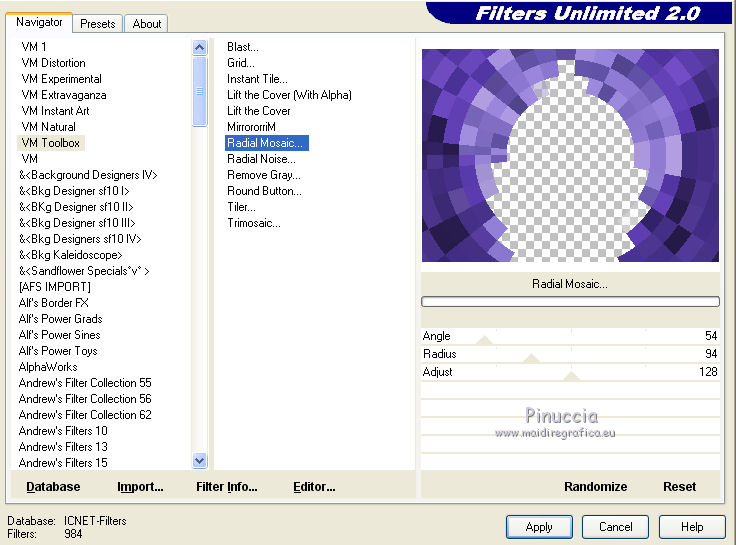
8. Effects>Artistic Effects>Halftone, same settings.

9. Effects>3D Effects>Drop Shadow, color black.
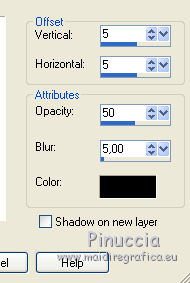
Repeat Drop Shadow, but vertical and horizontal -5.
10. Open the tube 190_paysage_p3_animabelle - Edit>Copy.
Go back to your work and go to Edit>Paste as new layer.
11. Layers>New Raster Layer.
Set your foreground color to Color.
Flood Fill  the layer with your foreground color #503390. the layer with your foreground color #503390.
12. Selections>Select All.
Selections>Modify>Contract - 15 pixels.
Press CANC on the keyboard 
Selections>Invert.
13. Effects>Texture Effects>Blinds - background color #d8cfee.

Selections>Select None.
14. Layers>Merge>Merge visible.
15.Edit>Copy.
16. Image>Resize, to 90%, resize all layers not checked.
17. Image>Canvas Size - 950 x 750 pixels.

18. Effects>3D Effects>Drop Shadow, color black.

Edit>Repeat Drop Shadow.
19. Layers>New Raster Layer.
Layers>Arrange>Send to Bottom.
20. Selections>Select All.
Edit>Paste into Selection.
Selections>Select None.
21. Effects>Plugins>Filters Unlimited 2.0 - AFS IMPORT - XAGGERAT.
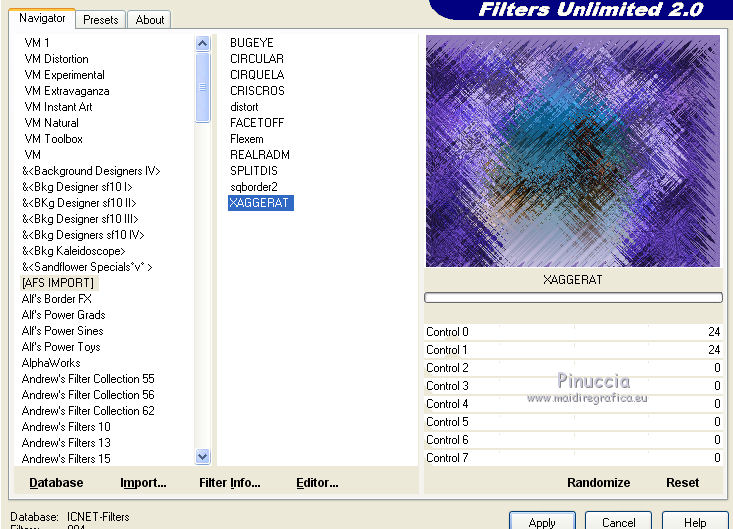
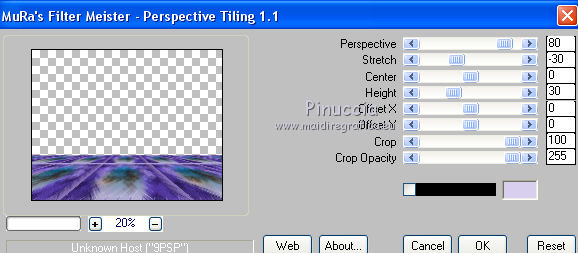
22. Effects>Plugins>Mura's Meister - Perspective Tiling.
23 Layers>New Raster Layer.
Layers>Arrange>Send to Bottom.
24. Set your foreground color to Gradient.

Flood Fill  the layer with your Gradient. the layer with your Gradient.
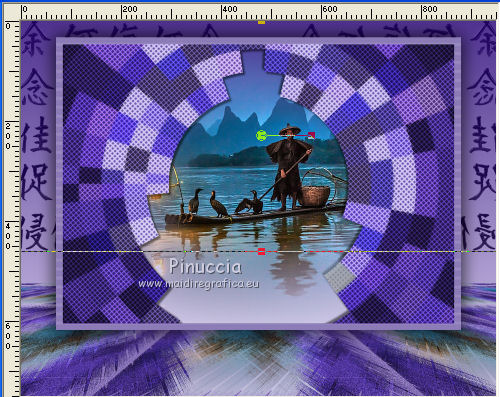
25. Open the tube 0rientalDing Accents-Lacey - Edit>Copy.
Go back to your work and go to Edit>Paste as new layer.
Change the Blend Mode of this layer to Luminance (legacy).
Move  the tube at the top. the tube at the top.
26. Activate the top layer.
Open the tube Verlaine A 02 Aout 2018 - Edit>Copy.
Go back to your work and go to Edit>Paste as new layer.
Erase the watermark.
Image>Resize, to 80%, resize all layers not checked.
Move  the tube to the left side. the tube to the left side.
27. Effects>3D Effects>Drop Shadow, same settings.

28. Open the tube codycreationfleurs34 - Edit>Copy.
Go back to your work and go to Edit>Paste as new layer.
Erase the watermark.
Image>Resize, 2 times to 80%, resize all layers not checked.
Effects>3D Effects>Drop Shadow, same settings.
Move  the tube at the bottom right. the tube at the bottom right.
29. Layers>Merge>Merge All.
30. Image>Add borders, 2 pixels, symmetric, color #503390.
Image>Add borders, 20 pixels, color #d8cfee.
31. Activate the Magic Wand Tool 
and click on the 20 pixels border to select it.
32. Effects>Texture Effects>Blinds - foreground color #503390.

Selections>Select None.
33. Image>Add borders, 1 pixels, symmetric, foreground color #503390.
34. Sign your work and save as.
Your versions here

If you have problems or doubts, or you find a not worked link, or only for tell me that you enjoyed this tutorial, write to me.
24 August 2018
|
 ENGLISH VERSION
