|
TAG MY CATS
 ENGLISH VERSION ENGLISH VERSION
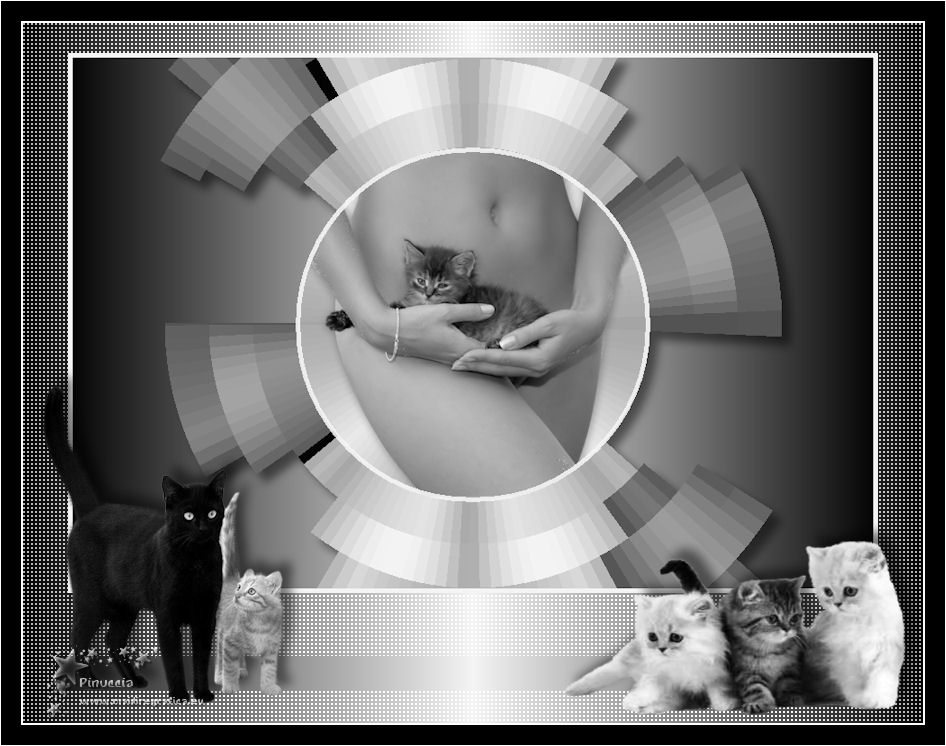
Here you find the original of this tutorial:

This tutorial was translated with PSPX2 but it can also be made using other versions of PSP.
Since version PSP X4, Image>Mirror was replaced with Image>Flip Horizontal,
and Image>Flip with Image>Flip Vertical, there are some variables.
In versions X5 and X6, the functions have been improved by making available the Objects menu.
In the latest version X7 command Image>Mirror and Image>Flip returned, but with new differences.
See my schedule here
French translation here
your versions ici
For this tutorial, you will need:
Material here
Tube MR_Sensuality by Maryse
Tube calguischatteetchzton16112016 by Guismo
Tube L33AC130102016 by Lecture
(you find here the links to the material authors' sites)
Plugins
consult, if necessary, my filter section here
Filters Unlimited 2.0 here
Mehdi - Sorting Tiles here
VM Toolbox - Radial Mosaic here
AFS IMPORT - sqborder2 here
Filters AFS IMPORT et VM Toolbox can be used alone or imported into Filters Unlimited.
(How do, you see here)
If a plugin supplied appears with this icon  it must necessarily be imported into Unlimited it must necessarily be imported into Unlimited

You can change Blend Modes according to your colors.
In the newest versions of PSP, you don't find the foreground/background gradient (Corel_06_029).
You can use the gradients of the older versions.
The Gradient of CorelX here
Copy the Selection in the Selections Folder.
1. Open a new transparent image 900 x 600 pixels.
2. Set your foreground color to #f4f4f4,
and your background color to #030303.
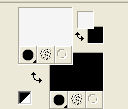
Set your foreground color to a Foreground/Background Gradient, style Linear.

Flood Fill  the transparent image with your Gradient. the transparent image with your Gradient.
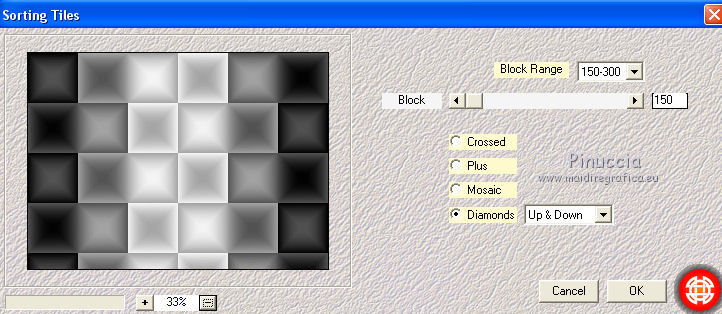
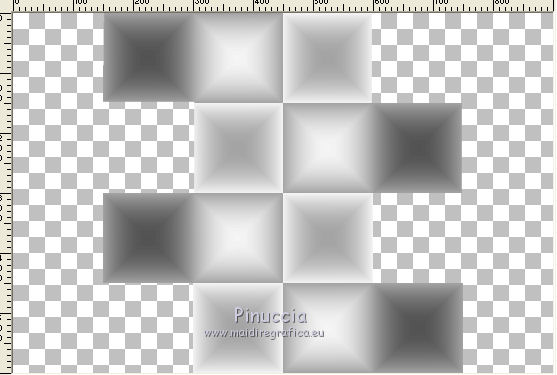
3. Effects>Plugins>Mehdi - Sorting Tiles
4. Activate the Freehand Selection 
and select the central part as below
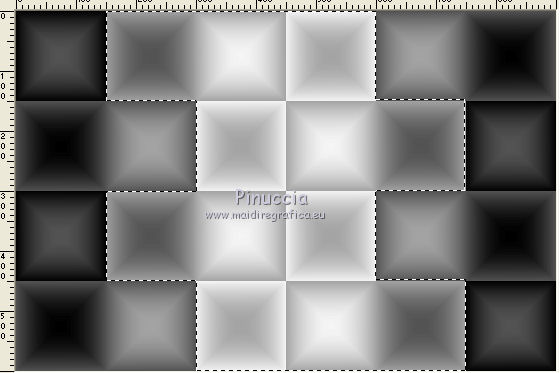
5. Selections>Inverser.
Press CANC on the keyboard 
Selections>Select None.
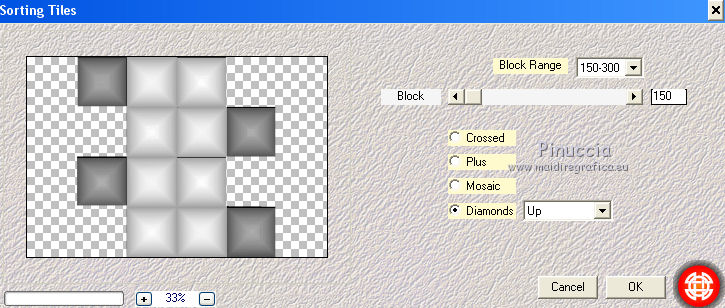
6. Effects>Plugins>Mehdi - Sorting Tiles.
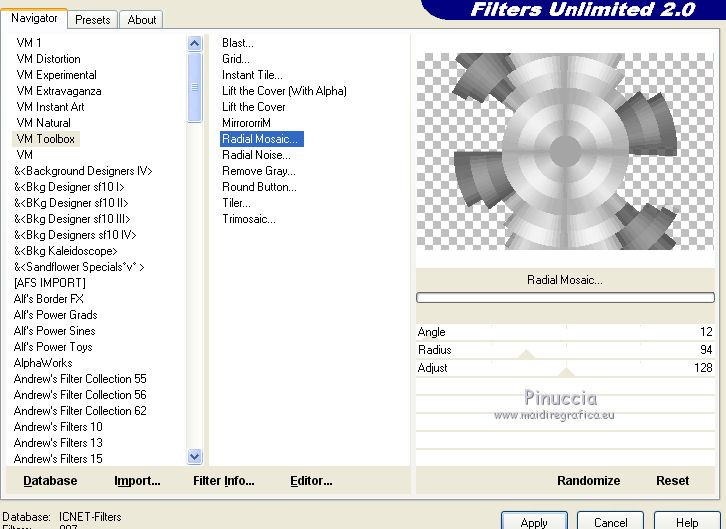
7. Effects>Plugins>Filters Unlimited 2.0 - VM Toolbox - Radial Mosaic
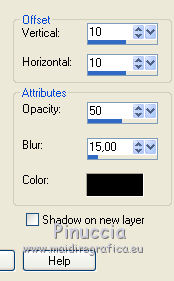
8. Effects>3D Effects>Drop Shadow, color black.
9. Selections>Load/Save Selection>Load Selection from Disk
Look for and load the selection sel.torso.nines.
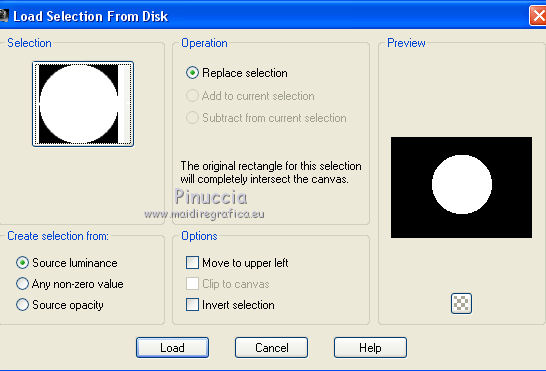
10. Selections>Modify>Expand - 5 pixels.
Open the tube MR_Sensuality, erase the watermark - Edit>Copy.
Go back to your work and go to Edit>Paste as new layer.
Image>Resize, to 50%, resize all layers not checked.
Place  the tube over the selection the tube over the selection
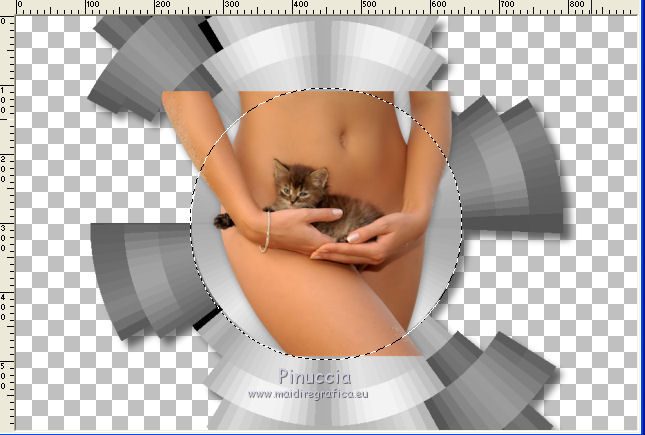
Selections>Invert.
Press CANC on the keyboard.
Change the Blend Mode of this layer to Luminance (legacy).
Selections>Invert.
11. Layers>New Raster Layer.
Set your foreground to Color
Flood Fill  the layer with your foreground color #f4f4f4. the layer with your foreground color #f4f4f4.
12 Selections>Modify>Contract - 5 pixels.
Press CANC on the keyboard.
Selections>Select None.
13. Reduce the opacity of this layer to 90%.
14. Layers>New Raster Layer.
Layers>Arrange>Send to Bottom.
Set your foreground color to Gradient.
Flood Fill  the layer with the Gradient. the layer with the Gradient.
15. Layers>New Raster Layer.
Layers>Arrange>Bring to Top.
Set your foreground color to Color
Flood Fill  with your foreground color to #f4f4f4. with your foreground color to #f4f4f4.
16. Selections>Select All.
Selections>Modify>Contract - 5 pixels.
Press CANC on the keyboard.
Selections>Select None.
17. Layers>Merge>Merge visible.
Image>Resize, to 90%, resize all layers not checked.
18. Layers>New Raster Layer.
Layers>Arrange>Send to Bottom.
Flood Fill  the layer with your Gradient. the layer with your Gradient.
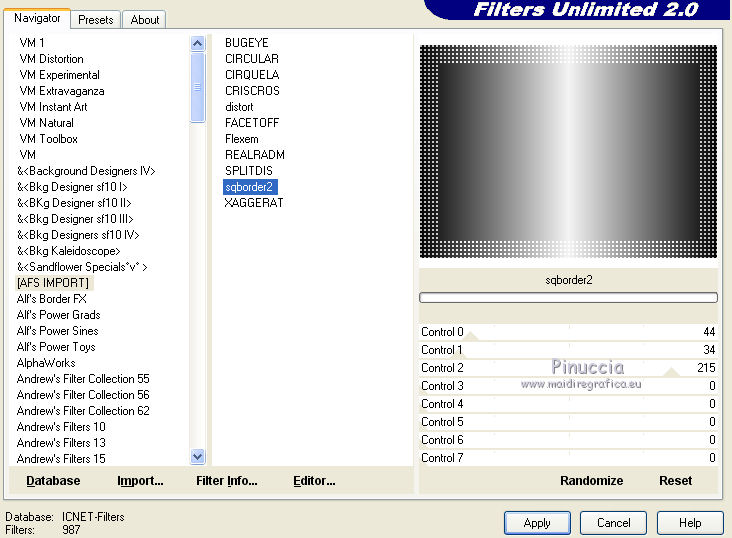
19. Effects>Plugins>Filters Unlimited 2.0 - AFS IMPORT - sqborder2.
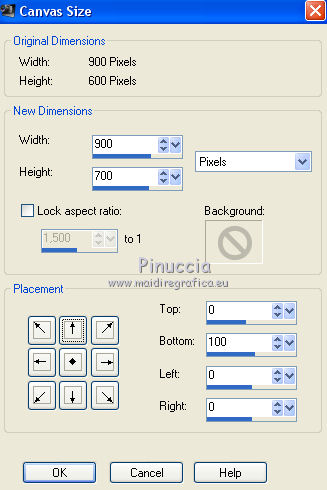
20. Image>Canvas Size - 900 x 700 pixels.
21. Activate the Magic Wand Tool 
and click on the transparent part to select it.
Flood Fill  the selection with your Gradient. the selection with your Gradient.
22. Effects>Plugins>Filters Unlimited 2.0 - AFS IMPORT - sqborder2
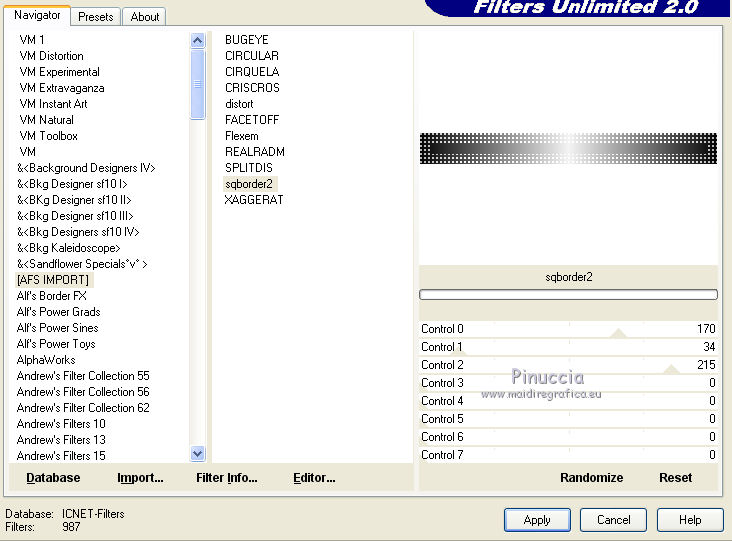
Selections>Select None.
23. Activate the top layer.
Open the tube calguischatteetchzton16112016 - Edit>Copy.
Go back to your work and go to Edit>Paste as new layer.
Erase the watermark.
Image>Resize, 2 times to 80%, resize all layers not checked.
Move  the tube at the bottom left. the tube at the bottom left.
Change the Blend Mode of this layer to Luminance (legacy).
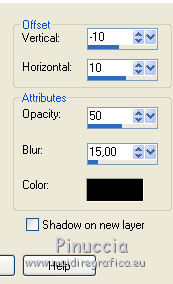
24. Effects>3D Effects>Drop Shadow, color black.
25. Open the tube L33AC130102016 - Edit>Copy.
Go back to your work and go to Edit>Paste as new layer.
Image>Resize, to 80%, resize all layers not checked.
Move  the tube at the bottom right. the tube at the bottom right.
26. Effects>3D Effects>Drop Shadow, same settings.
Change the Blend Mode of this layer to Luminance (legacy).
27. Layers>Merge>Merge All.
28. Image>Add borders, 2 pixels, symmeric, color #ffffff.
Image>Add borders, 20 pixels, symmetric, color #000000.
Image>Add borders, 1 pixel, symmetric, color #ffffff.
29. Sign your work and save as jpg.
Your versions here

If you have problems or doubts, or you find a not worked link, or only for tell me that you enjoyed this tutorial, write to me.
11 September 2018
|
 ENGLISH VERSION
