This tutorial was translated with PSPX3 but it can also be made using other versions of PSP.
Since version PSP X4, Image>Mirror was replaced with Image>Flip Horizontal,
and Image>Flip with Image>Flip Vertical, there are some variables.
In versions X5 and X6, the functions have been improved by making available the Objects menu.
In the latest version X7 command Image>Mirror and Image>Flip returned, but with new differences.
See my schedule here
French translation here
Your versions here
For this tutorial, you will need:
Material here
Tube Mary 0512-12
Tube calguissexie 16032012 by Guismo
Tube calguissexy 16032012 by Guismo
Mask 1293
Texto-ac
Preset Emboss 3
Plugins
consult, if necessary, my filter section here
Filters Unlimited 2.0 here
Graphics Plus - Cross Shadow here
L&K's - L&K's Elvida here
Filters Graphics Plus can be used alone or imported into Filters Unlimited.
(How do, you see here)
If a plugin supplied appears with this icon  it must necessarily be imported into Unlimited

Copy the preset Emboss 3 in the Presets Folder.
Open the mask 1293 in PSP et minimize it with the rest of the material.
1. Open a new transparent image 850 x 650 pixels.
2. Set your foreground color to #f1ded8,
and your background color to #b69e94.
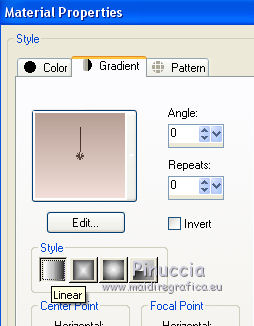
Set your foreground color to a Foreground/background Gradient, style Linear.

Flood fill  the transparent image with your background color #b69e94.
3. Effects>Texture Effects>Blinds, foreground color #f1ded8.

4. Effects> User Defined Filter - select the preset Emboss 3 and ok.

5. Layers>New Raster Layer.
Flood fill  the layer with the gradient.
6. Layers>New Mask layer>From image
Open the menu under the source window and you'll see all the files open.
Select the mask 1293:

Adjust>Sharpness>Sharpen More.
7. Effects>3D Effects>Drop Shadow, color black.

8. Selection Tool 
(no matter the type of selection, because with the custom selection your always get a rectangle)
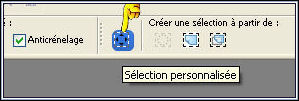
clic on the Custom Selection 
and set the following settings.

9. Layers>New Raster Layer.
Open one of the two tubes calguissexie16032012 - Edit>Copy.
Go back to your work and go to Edit>Paste into Selection.
Selections>Select None.
10. Change the Blend Mode of this layer to Luminance (Legacy), opacity 80%.
11. Custom Selection 

12. Layers>New Raster Layer.
Open the second tube calguissexy16032012 - Edit>Copy.
Go back to your work and go to Edit>Paste into Selection.
Selections>Select None.
Change the Blend Mode of this layer to Luminance (Legacy), opacity 80%.
13. Layers>Merge>Merge all.
14. Image>Add borders, 2 pixels, symmetric, color black.
Image>Add borders, 50 pixels, symmetric, color #f1ded8.
15. Activate the Magic Wand tool 
anc clic on the 50 pixels bord to select it.
16. Effects>Plugins>Graphics Plus - Cross shadow.

17. Effects>Plugins>L&K's - L&K's Elvida.

18. Effects>Effects 3D>Buttonize, color #b69e94.

19. Selections>Invert.
20. Effects>3D Effects>Cutout, color black.

Selections>Select None.
21. Open the tube Mary 0512-15 - Edit>Copy.
Go back to your work and go to Edit>Paste as new layer.
Image>Resize, 1 time to 80 and 1 time to 90%, resize all layers not cheched.
22. Effects>3D Effects>Drop Shadow, colore black.

23. Open the image "texto" - Edit>Copy.
Go back to your work and go to Edit>Paste as new layer.
24. Layers>Merge>Merge all.
Image>Add borders, 2 pixels, symmetric, color black.
25. Sign your work and save as jpg.
The tube of this version is by Min@


If you have problems or doubt, or you find a not worked link, or only for tell me that you enjoyed this tutorial, write to me.
10 March 2016

