This tutorial was translated with PSPX3 but it can also be made using other versions of PSP.
Since version PSP X4, Image>Mirror was replaced with Image>Flip Horizontal,
and Image>Flip with Image>Flip Vertical, there are some variables.
In versions X5 and X6, the functions have been improved by making available the Objects menu.
In the latest version X7 command Image>Mirror and Image>Flip returned, but with new differences.
See my schedule here
French translation here
Your versions here
For this tutorial, you will need:
Material here
Tube 2217-girl-LB TUBES
Tube animaux_0095_lisat
Mistymoonnim.Masker
Misted_calguismiste30092012 by Guismo
TubeNaraPamplona 1534
Adorno Sinedot_nines
Plugins
consult, if necessary, my filter section here
AP 01 [Innovations] - Lines SilverLining here
Adjust - Variations here

You can change Blend Modes according to your colors.
In the newest versions of PSP, you don't find the foreground/background gradient (Corel_06_029).
You can use the gradients of the older versions.
The Gradient of CorelX here
1. Open a new transparent image 900 x 650 pixels.
2. Set your foreground color to #2f415d
and your foreground color to #a3a2a7.
Set your foreground color to a Foreground/Background Gradient, style Sunburst.
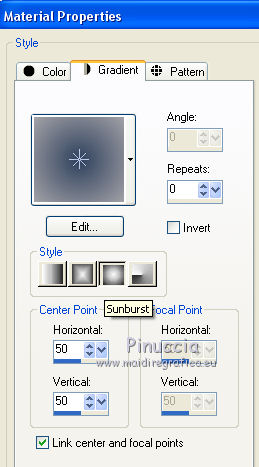
Flood Fill  the trasparent image with your gradient.
3. Layers>New Raster Layer.
Selections>Select All.
4. Ouvrir le misted mistymoonnim - Edit>Copy.
Go back to your work and go to Edit>Paste into Selection.
Selections>Select None.
5. Change the Blend Mode of this layer to Luminance (legacy).
6. Open the tube calguismiste30092021 - Edit>Copy.
Go back to your work and go to Edit>Paste as new layer.
Image>Resize, 3 time to 80%, resize all layers not checked.
Change the Blend Mode of this layer to Luminance (Legacy) and opacity to 60%.
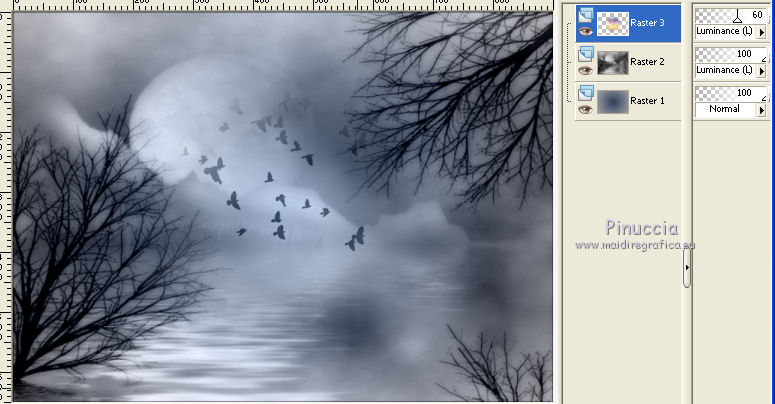
7. Open the tube TubeNaraPamplona 1534 - Edit>Copy.
Go back to your work and go to Edit>Paste as new layer.
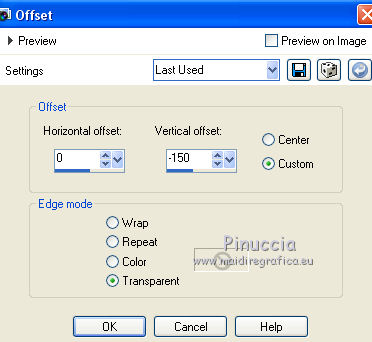
8. Effects>Image Effects>Offset.
9. Layers>New Raster Layer.
Set your foreground color to Color,
flood fill  the layer with your foreground color #2f415d.
10. Selections>Select All.
Selections>Modify>Contract - 15 pixels.
Press CANC on the keyboard 
Selections>Invert.
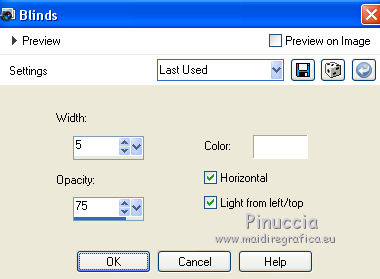
11. Effects>Texture Effects>Blinds - color white.
12. Selections>Invert.
Effects>3D Effects>Buttonize, color white.
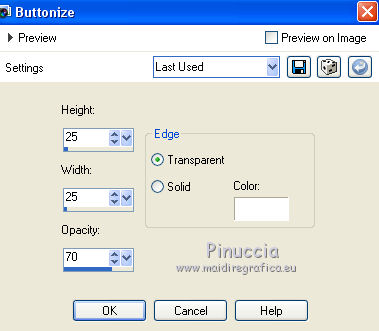
Edit>Repeat Buttonize.
Selections>Select None.
13. Layers>Merge>Merge visible.
14. Layers>Duplicate.
Image>Resize, to 90%, resize all layers not checked.
15. Again Layers>Duplicate.
Image>Resize, to 90%, resize all layers not checked.
16. And now we have 3 layers of the landscape.
17. Open the deco Adorno Sinedot_nines - Edit>Copy.
Go back to your work and go to Edit>Paste as new layer.
Change the Blend Mode of this layer to Soft Light.
18. Layers>Merge>Merge All.
19. Image>Add borders, 50 pixels, symmetric, color white.
Activate the Magic Wand tool 
and clic on the white bord to select it.
20. Set your foreground color to Gradient and change the style to Radial.
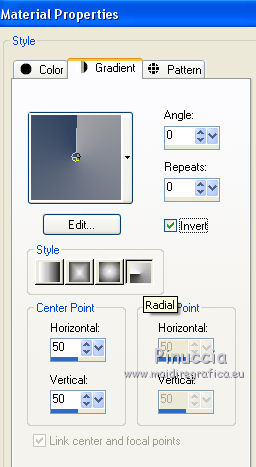
Flood Fill  the selection with your gradient.
21. Effects>Plugins>AP 01 [Innovations] - Lines SilverLining.

22. Effects>3D Effects>Inner Bevel.
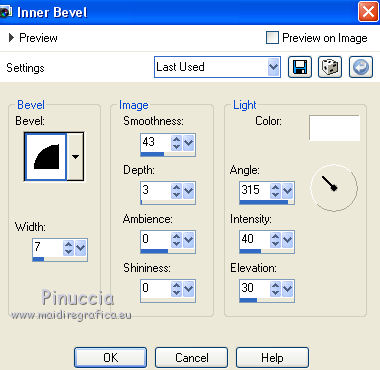
23. Selections>Invert.
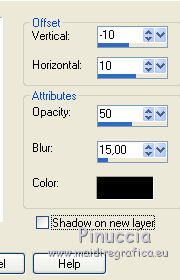
Effects>3D Effects>Drop Shadow, color black.

Repeat Drop Shadow, vertical and horizontal -10.
Selections>Select None.
24. Open the tube 2217-girl-LB TUBES - Edit>Copy.
Go back to your work and go to Edit>Paste as new layer.
Image>Resize, to 90%, resize all layers not checked.
25. Effects>3D Effects>Drop Shadow, color black.
26. Open the tube animaux_0095_lisat - Edit>Copy.
Go back to your work and go to Edit>Paste as new layer.
Erase the watermark.
Image>Resize 1 time to 50% and 1 time to 80%, resize all layers not checked.
Effects>3D Effects>Drop Shadow, same settings.

27. Layers>Merge>Merge All.
Effects>Plugins>Adjust - Variations
1 clic on Original, 1 clic on More Blue and ok.

28. Sign your work and save as jpg.

If you have problems or doubts, or you find a not worked link, or only for tell me that you enjoyed this tutorial, write to me.
13 August 2016

