|
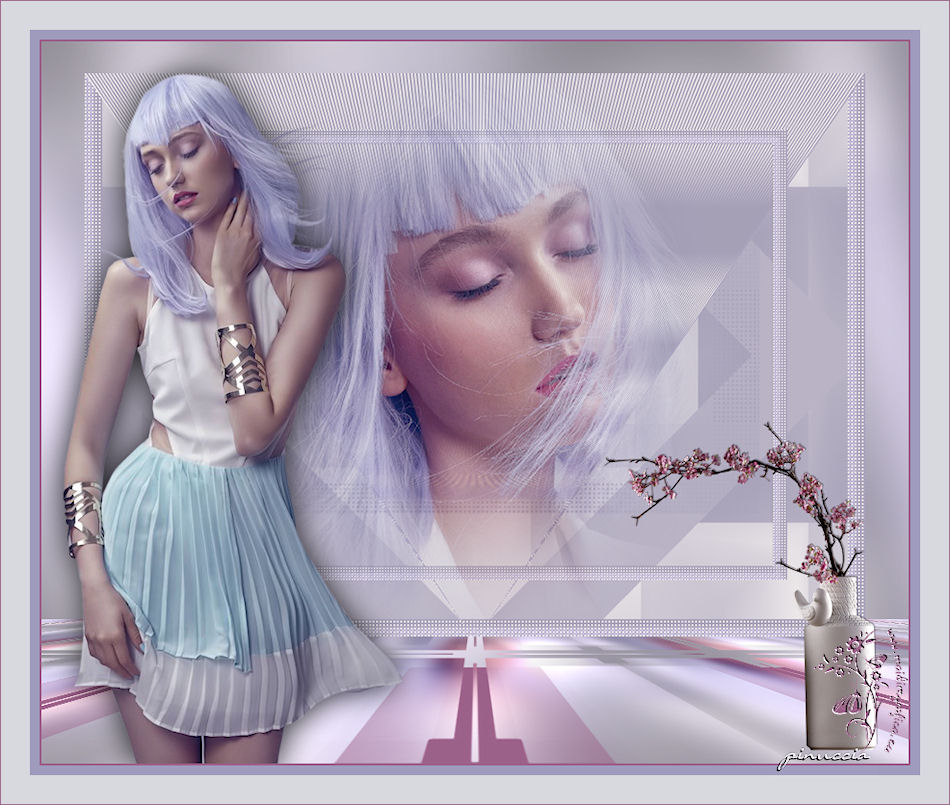
TAG MARY LES BALADES
 ENGLISH VERSION ENGLISH VERSION

Here you find the original of this tutorial:

This tutorial was translated with PSPX7 but it can also be made using other versions of PSP.
Since version PSP X4, Image>Mirror was replaced with Image>Flip Horizontal,
and Image>Flip with Image>Flip Vertical, there are some variables.
In versions X5 and X6, the functions have been improved by making available the Objects menu.
In the latest version X7 command Image>Mirror and Image>Flip returned, but with new differences.
See my schedule here
French translation here
Your versions ici
For this tutorial, you will need:
Material here
Tube calguisdouceur11032014 by Guismo
calguismist27022017 by Guismo
Tube calguisblossomspring27032017
Narah_mask_0307
(you find here the links to the material authors' sites)
Plugins
consult, if necessary, my filter section here
Filters Unlimited 2.0 here
Tramages - Pool Shadow here
Mura's Meister - Perspective Tiling here
Filters Tramages can be used alone or imported into Filters Unlimited.
(How do, you see here)
If a plugin supplied appears with this icon  it must necessarily be imported into Unlimited it must necessarily be imported into Unlimited

You can change Blend Modes according to your colors.
Open the masks in PSP and minimize it with the rest of the material.
1. Open a new transparent image 900 x 650 pixels.
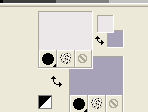
2. Set your foreground color to #ece8e9,
Set your Background color to #a8a2b9.

Flood Fill  the transparent image with your foreground color #ece8e9. the transparent image with your foreground color #ece8e9.
3. Layers>New Raster Layer.
Flood Fill  with your background color #a8a2b9. with your background color #a8a2b9.
4. Layers>New Mask layer>From image
Open the menu under the source window and you'll see all the files open.
Select the mask Narah_mask_0307.

Layers>Merge>Merge Group.
5. Layers>New Raster Layer.
Flood Fill  with your background color #a8a2b9. with your background color #a8a2b9.
6. Selections>Select All.
Selections>Modify>Contract - 20 pixels.
Press CANC on the keyboard 
Selections>Invert.
7. Effects>3D Effects>Inner Bevel.

8. Effects>Texture Effects>Weave
weave color: background color #a8a2b9
gap color: foreground color #ece8e9.

Selections>Select None.
9. Layers>Duplicate - 2 times and you'll have 3 layers of the frame.
Activate the layers of the first copy.
10. Effects>Geometric Effects>Perspective Vertical

11. Activate the layer of the 2nd copy.
Image>Resize, to 80%, resize all layers not checked.
12. Open the tube calguismist27022017 by Guismo - Edit>Copy.
Go back to your work and go to Edit>Paste as new layer.
Image>Resize, to 80%, resize all layers not checked.
Erase the watermark.
13. Layers>Merge>Merge visible.
14. Edit>Copy.
15. Image>Resize, to 90%, resize all layers not checked.
16. Layers>New Raster Layer.
Layers>Arrange>Send to bottom.
17. Selections>Select All.
Edit>Paste into Selection.
18. Adjust>Blur>Gaussian Blur - radius 25.

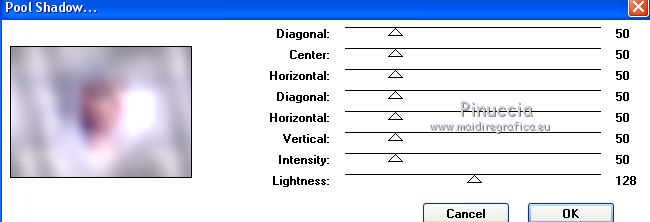
19. Effects>Plugins>Tramages - Pool Shadow.

Selections>Select None.
20. Layers>Duplicate.
Layers>New Mask layer>From image
Open the menu under the source window and
Select the mask maskcameronF82.

Layers>Merge>Merge Group.
21. Image>Canvas Size - 900 x 750 pixels.

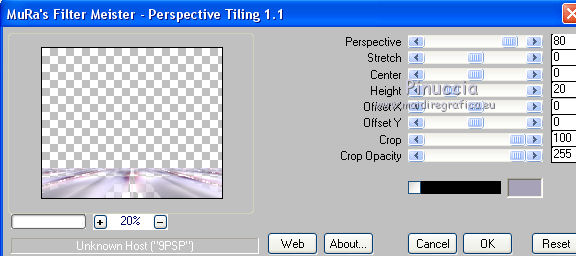
22. Effects>Plugins>Mura's Meister - Perspective Tiling.

23. Layers>New Raster Layer.
Layers>Arrange>Send to Bottom.
Set your foreground color to #9c6189.
Flood Fill  with your foreground color #9c6189. with your foreground color #9c6189.
24. Activate again the top layer.
Open the tube calguisdouceur11032014 - Edit>Copy.
Go back to your work and go to Edit>Paste as new layer.
Image>Resize, to 80%, resize all layers not checked.
Erase the watermark.
Image>Mirror.
Move  the tube to the left side. the tube to the left side.
25. Effects>3D Effects>Drop Shadow, color black.

26. Open the tube calguisblossomspring27032017 - Edit>Copy.
Go back to your work and go to Edit>Paste as new layer.
Image>Resize, to 50%, resize all layers not checked.
Erase the watermark.
Move  the tube in the lower right. the tube in the lower right.
27. Effects>3D Effects>Drop Shadow, color black.

28. Layers>Merge>Merge All.
29.
29. Image>Add borders, 2 pixels, symmetric, color #9c6189.
Image>Add borders, 10 pixels, symmetric, color #9e9bbd.
Image>Add borders, 30 pixel, symmetric, color #d7d9de.
Image>Add borders, 1 pixel, symmetric, color #9c6189.
30. Image>Resize, to 90%, resize all layers checked.
31. Sign your work and save as jpg.
Your versions here

If you have problems or doubts, or you find a not worked link, or only for tell me that you enjoyed this tutorial, write to me.
29 October 2017
|
 ENGLISH VERSION
