|
TAG MARIE ANTOINETTE
 ENGLISH VERSION ENGLISH VERSION
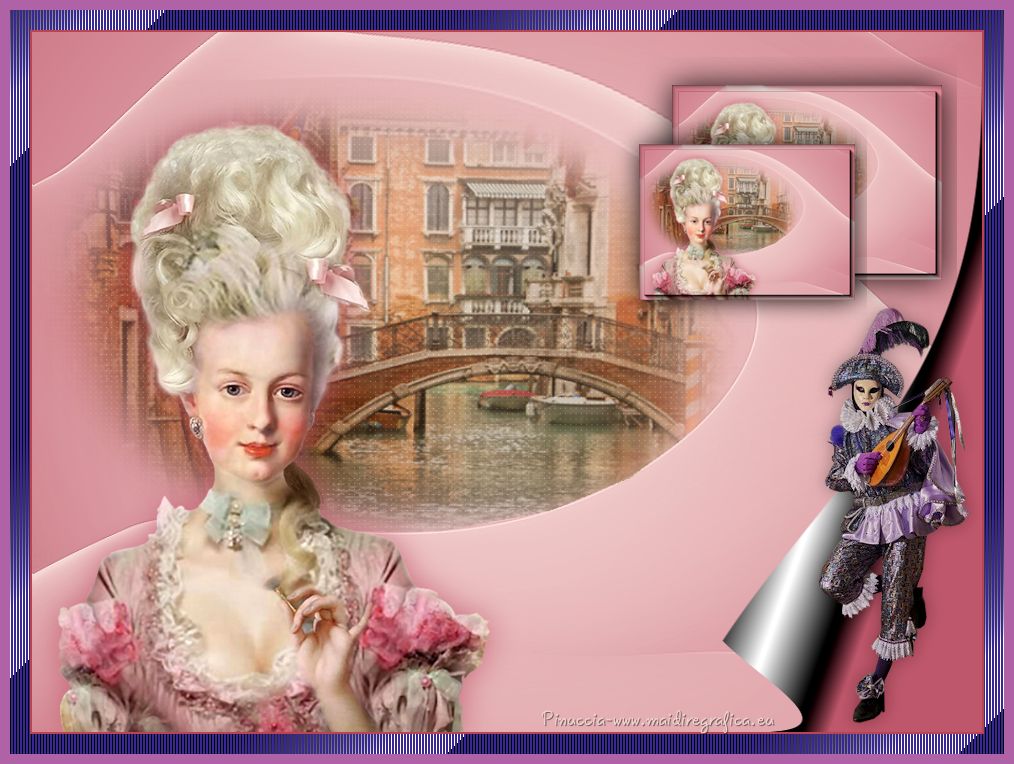
Here you find the original of this tutorial:

This tutorial was translated with PSPX7 but it can also be made using other versions of PSP.
Since version PSP X4, Image>Mirror was replaced with Image>Flip Horizontal,
and Image>Flip with Image>Flip Vertical, there are some variables.
In versions X5 and X6, the functions have been improved by making available the Objects menu.
In the latest version X7 command Image>Mirror and Image>Flip returned, but with new differences.
See my schedule here
French translation here
Your versions ici
For this tutorial, you will need:
Material here
Tube libellulegraphisme_marie_antoinette2
calguisvenisecarnaval02022018
Mistvenece4-coly
Forma3_Nines
(you find here the links to the material authors' sites)
Plugins
consult, if necessary, my filter section here
Filters Unlimited 2.0 here
Tramages - Tow the line ici
Filters Tramages can be used alone or imported into Filters Unlimited.
(How do, you see here)
If a plugin supplied appears with this icon  it must necessarily be imported into Unlimited it must necessarily be imported into Unlimited

You can change Blend Modes according to your colors.
In the newest versions of PSP, you don't find the foreground/background gradient (Corel_06_029).
You can use the gradients of the older versions.
The Gradient of CorelX here
1. Open a new transparent image 900 x 650 pixels.
Set your foreground color to #bd6072,
Set your background color to #eed2cf.
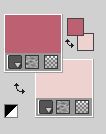
Set your foreground color to a Foreground/Background Gradient, style Sunburst
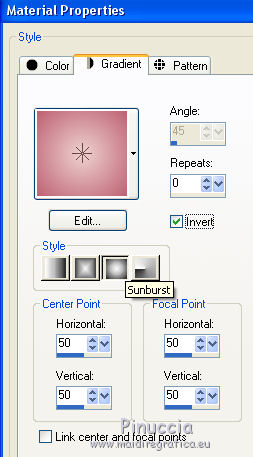
Flood Fill  the transparent image with your Gradient. the transparent image with your Gradient.
3. Layers>New Raster Layer.
Flood Fill  with your background color #eed2cf. with your background color #eed2cf.
4. Open the image Forma3_Nines and minimize it.
Layers>New Mask layer>From image
Open the menu under the source window and you'll see all the files open.
Select the image.
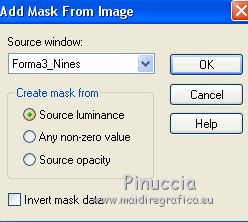
Layers>Merge>Merge group.
5. Effects>Distortion Effects>Warp.
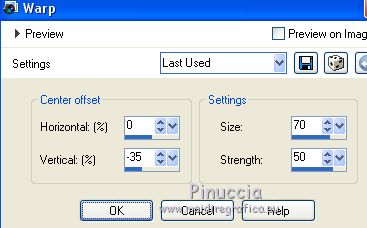
Adjust>Sharpness>Sharpen.
6. Layers>New Raster Layer.
Selections>Load/Save Selection>Load Selection from Disk.
Look for and load the selection sel.262.nines.
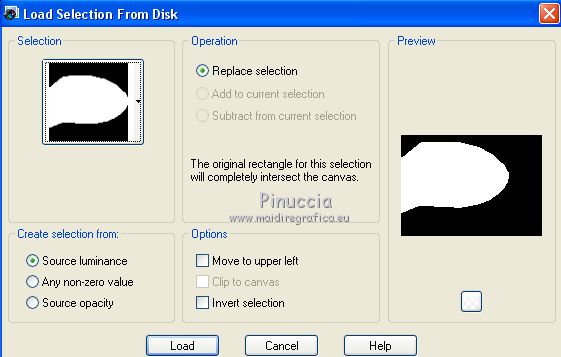
7. Open mistvenice4-coly, erase the watermark, and go to Edit>Copy.
Go back to your work and go to Edit>Paste into Selection.
Keep selected.
8. Adjust>Blur>Gaussian Blur - radius 15.

9. Adjust>Blur>Radial Blur.
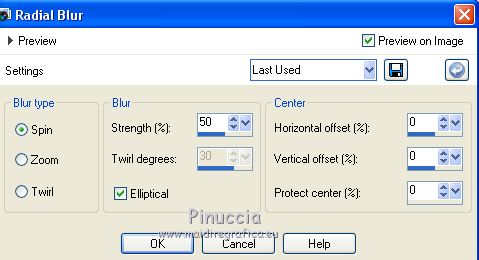
10. Effects>Texture Effects>Weave
weave color: foreground color #bd6072
gap color: background color #eed2cf.
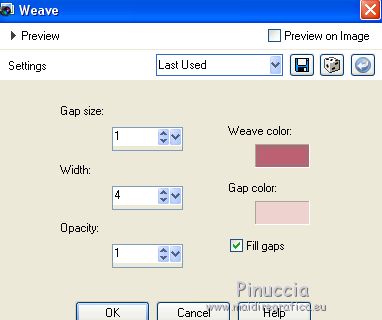
11. Layers>New Raster Layer.
Edit>Paste into Selection (the tube mistvenice4 is still in memory).
Selections>Select None.
Reduce the opacity of this layer to 60%.
12. Layers>Merge>Merge visible.
13. Window>Dupliquer and mininize this copy.
14. Open the tube Libellulegraphisme_marie_antoinette2, erase the watermark and go to Edit>Copy.
Minimize the tube; you'll use it again later
Go back to your work and go to Edit>Paste as new layer.
Image>Resize, 2 times to 80%, resize all layers not checked.
15. Effects>3D Effects>Drop Shadow, foreground color #bd6072.

16. Layers>Merge>Merge visible.
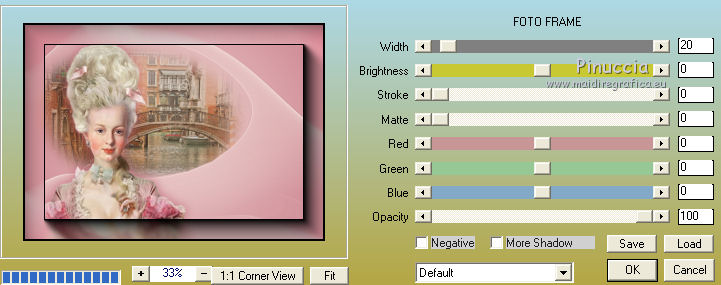
17. Effects>Plugins>AAA Frames - Foto frame.
18. Image>Resize, to 30%, resize all layers not checked.
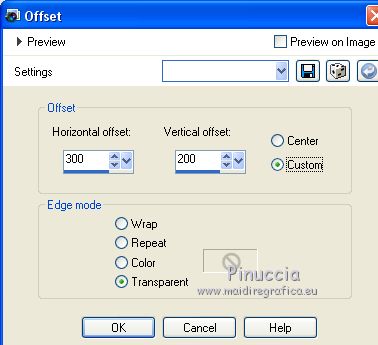
19. Effects>Image Effects>Offset.
20. Effects>3D Effects>Drop Shadow - color black.

21. Layers>Duplicate.
Image>Resize, to 80%, resize all layers not checked.
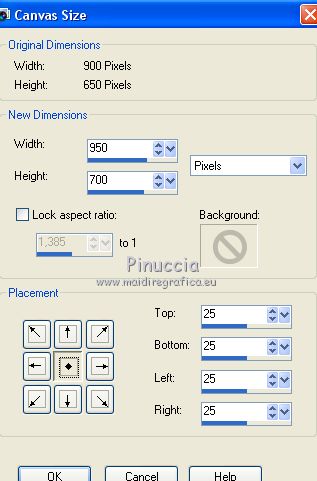
22. Image>Canvas Size - 950 x 700 pixels.
23. Layers>New Raster Layer.
Selections>Select All.
Activate the image minimized at step 13.
Edit>Copy.
Go back to your work and go to Edit>Paste into Selection.
Selections>Select None.
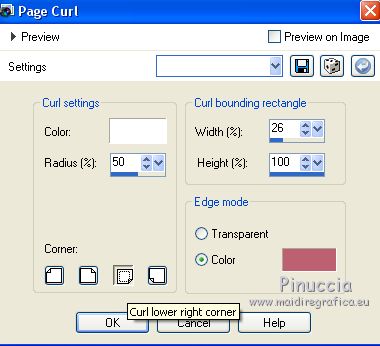
24. Effects>Image Effects>Page Curl, foreground color #bd6072.
25. Open the tube calguisvenisecarnaval02022018 - Edit>Copy.
Go back to your work and go to Edit>Paste as new layer.
Image>Resize, to 80%, resize all layers not checked.
Move  the tube at the bottom right, see my example. the tube at the bottom right, see my example.
26. Effects>3D Effects>Drop Shadow, color black.
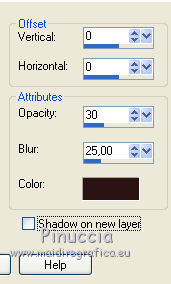
27. Activate again the tube libellulegraphisme_marie_antoinette2 - Edit>Copy.
Go back to your work and go to Edit>Paste as new layer.
Image>Resize, 2 times to 80%, resize all layers not checked.
Move  the tube at the bottom left. the tube at the bottom left.
28. Effects>3D Effects>Drop Shadow, foreground color #bd6072.

29. Layers>Merge>Merge All.
30. Image>Add borders, 2 pixels, symmetric, color #bb4f5c.
Image>Add borders, 20 pixels, symmetric, color #453596.
31. Activate the Magic Wand Tool 
and click on the 20 pixels border to select it.
32. Effects>Plugins>Tramages - Tow the line.
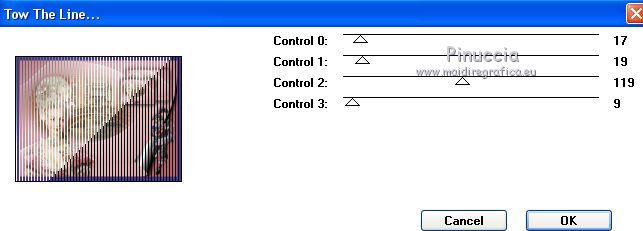
Selections>Select None.
33. Image>Add borders, 10 pixels, symmetric, color #b06aa8.
34. Adjust>Brightness and Contrast>Brightness and Contrast.
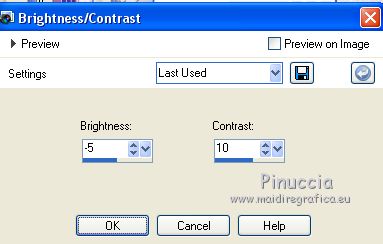
35. Sign your work and save as jpg.
Your versions ici

If you have problems or doubts, or you find a not worked link, or only for tell me that you enjoyed this tutorial, write to me.
21 February 2018
|
 ENGLISH VERSION
