|
TAG LU
 ENGLISH VERSION ENGLISH VERSION

Here you find the original of this tutorial:

This tutorial was translated with PSPX7 but it can also be made using other versions of PSP.
Since version PSP X4, Image>Mirror was replaced with Image>Flip Horizontal,
and Image>Flip with Image>Flip Vertical, there are some variables.
In versions X5 and X6, the functions have been improved by making available the Objects menu.
In the latest version X7 command Image>Mirror and Image>Flip returned, but with new differences.
See my schedule here
French translation here
Vos versions ici
For this tutorial, you will need:
Material here
Tube FB0134 by Isa
Narah_Mask_1123
Narah_Mask_1139
ubocww1y
Adorno_redonditos azules_nines
Seleccion sel_novia_nines
(you find here the links to the material authors' sites)
Plugins
consult, if necessary, my filter section here
Filters Unlimited 2.0 here
Tramages - Tow the line here
AP Lines - Lines SilverLining here
Filters Tramages can be used alone or imported into Filters Unlimited.
(How do, you see here)
If a plugin supplied appears with this icon  it must necessarily be imported into Unlimited it must necessarily be imported into Unlimited

You can change Blend Modes according to your colors.
In the newest versions of PSP, you don't find the foreground/background gradient (Corel_06_029).
You can use the gradients of the older versions.
The Gradient of CorelX here
Copy the selection in the Selections Folder.
Open the masks in PSP and minimize it with the rest of the material.
1. Open a new transparent image 900 x 600 pixels.
2. Set your foreground color to #ba4c90,
Set your Background color to #630063.

Set your Foreground color to a Foreground/Background Gradient, style Linear.
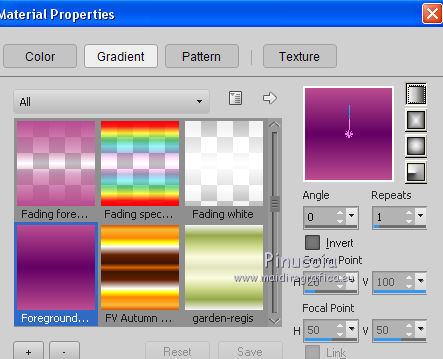
Flood Fill  the transparent image with your background color #630063. the transparent image with your background color #630063.
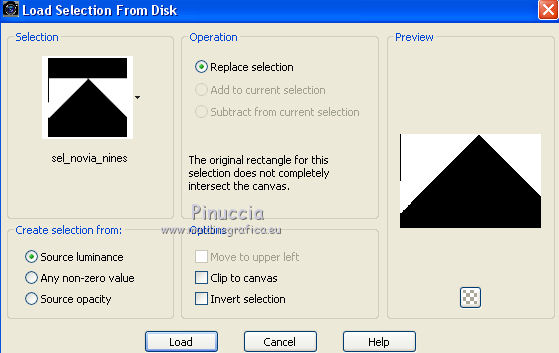
3. Selections>Load/Save Selection>Load Selection from Disk.
Look for and load the selection sel_novia_nines.
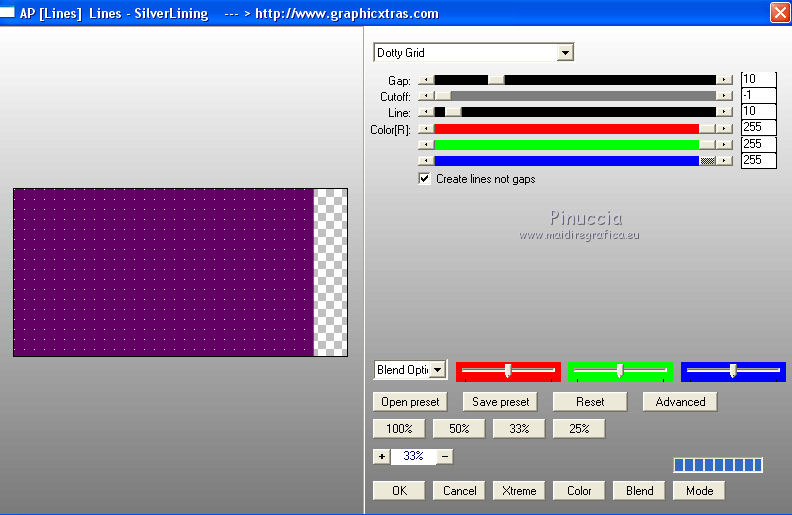
4. Effects>Plugins>AP Lines - Lines SilverLining.
Selections>Select None.
5. Open the tube ubocww1y - Edit>Copy.
Go back to your work and go to Edit>Paste as new layer.
6. Image>Free Rotate - 45 degrees to left.

7. Change the Blend Mode of this layer to Luminance (legacy) and reduce the opacity to 50%.
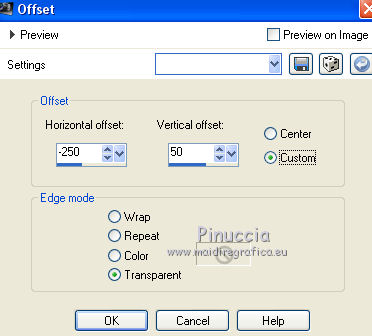
8. Effects>Image Effects>Offset.
9. Layers>New Raster Layer.
Flood Fill  the layer with your gradient. the layer with your gradient.
10. Layers>New Mask layer>From image
Open the menu under the source window and you'll see all the files open.
Select the mask Narah_Mask_1123.
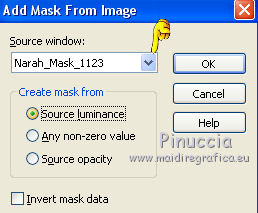
Layers>Merge>Merge Group.
11. Effects>Plugins>Tramages - Tow the line.
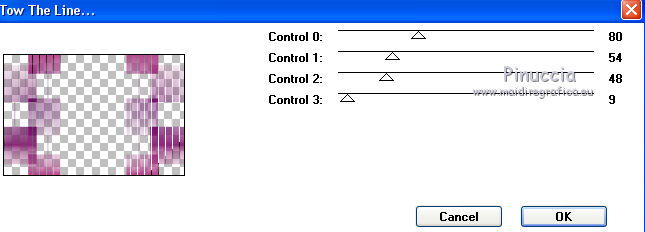
Effects>Edge Effects>Enhance More.
12. Effects>3D Effects>Drop Shadow, color black.
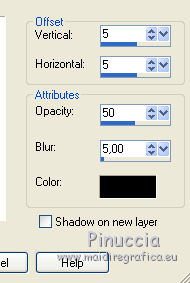
13. Open the tube FB0134 - Edit>Copy.
Go back to your work and go to Edit>Paste as new layer.
Image>Resize, to 90%, resize all layers not checked.
Move  the tube at the bottom, on the bord. the tube at the bottom, on the bord.
14. Effects>3D Effects>Drop Shadow, color #e6dbd6.
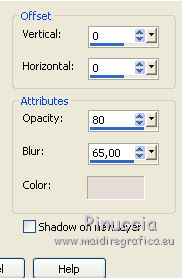
15. Set your foreground color to #7b47be.
Layers>New Raster Layer.
Flood Fill  the layer with your new foreground color. the layer with your new foreground color.
16. Layers>New Mask layer>From image
Open the menu under the source window and select the mask Narah_Mask_1139.
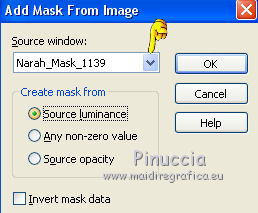
Layers>Merge>Merge group.
17. Layers>Merge>Merge visible.
18. Effects>Plugins>AAA Frames - Frame Works.
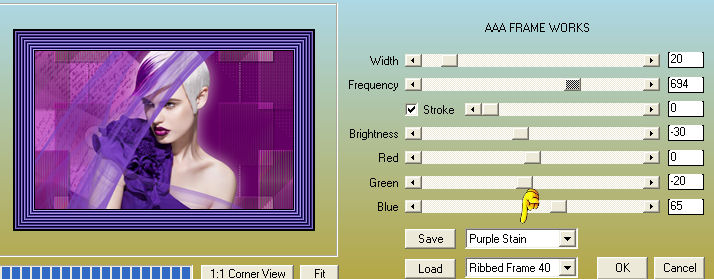
19. Edit>Copy.
Image>Canvas Size - 950 x 650 pixels.
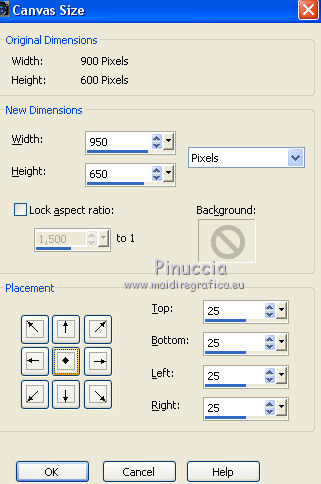
20. Layers>New Raster Layer.
Layers>Arrange>Send to Bottom.
21. Selections>Select All.
Edit>Paste into Selection.
22. Adjust>Blur>Gaussian Blur - radius 30.

Selections>Select None.
23. Layers>Merge>Merge All.
24. Image>Add borders, 30 pixels, symmetric, background color #630063.
25. Open the tube Adorno_redonditos azules_nines - Edit>Copy.
Go back to your work and go to Edit>Paste as new layer.
26. Layers>Merge>Merge All.
27. Image>Add borders, 2 pixels, symmetric, color #310656.
28. Sign your work and save as jpg.
Vos versions here

If you have problems or doubts, or you find a not worked link, or only for tell me that you enjoyed this tutorial, write to me.
29 October 2017
|
 ENGLISH VERSION

 ENGLISH VERSION
