Here you find the original of this tutorial:

This tutorial was created with PSP X2 but it can also be made using other versions of PSP.
Since version PSP X4, Image>Mirror was replaced with Image>Flip Horizontal,
and Image>Flip with Image>Flip Vertical, there are some variables.
In versions X5 and X6, the functions have been improved by making available the Objects menu.
In the latest version X7 command Image>Mirror and Image>Flip returned, but with new differences.
See my schedule here
French translation here
Your versions here
For this tutorial, you will need:
Material here
The tubes are by Min@, Créaline et Nimue la Fée.
The mask is by Narah.
Plugins
AP 01 [Innovations] - Lines SilverLining here
Mura's Meister - Perspective Tiling here
Xero - Fritillary here

Open the mask in PSP and minimize with the rest of the material.
1. Set the Foreground color to #e1b99b,
and the Background color to #ded3ce.

2. Open a new transparent image 950 x 600 pixels.
Flood Fill  with the foreground color #e1b99b.
3. Layers>New Raster Layer.
Flood Fill  with the background color #ded3ce.
4. Layers>New Mask layer>From image.
Open the menu under the source window and you'll see all the files open.
Select the mask Narah_mask_0786.

Layers>Merge>Merge group.
Adjust>Sharpness>Sharpen more.
5. Activate Selection Tool 
clic on Custom selection 
with these settings.

6. Layers>New Raster Layer.
Open the tube 143NLF160108 - Edit>Copy.
Back to your work and go to Edit>Past into Selection.
Selections>Select None.
7. Layers>Merge>Merge visible.
8. Layers>Duplicate.
9. Effects>Image Effects>Seamless Tiling, default.

10. Adjust>Blur>Gaussian blur - radius 15.

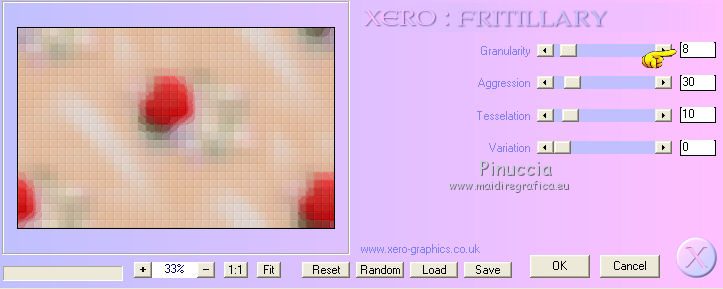
11. Effects>Plugins>Xero - Fritillary
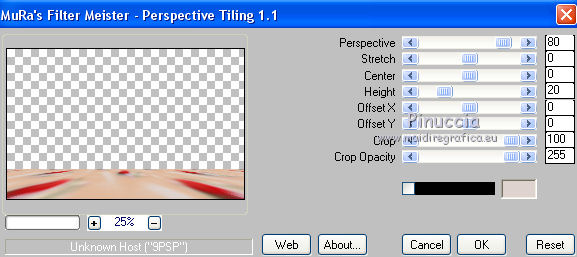
12. Effects>Plugins>Mura's Meister - Perspective Tiling.
13. Activate the bottom layer - the original of Merged.
Custom selection 

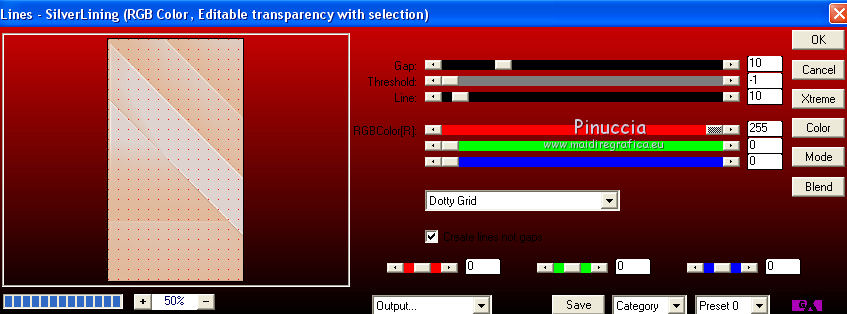
14. Effects>Plugins>AP 01 [Innovations] - Lines SilverLining.
Selections>Select None.
15. Custom selection 

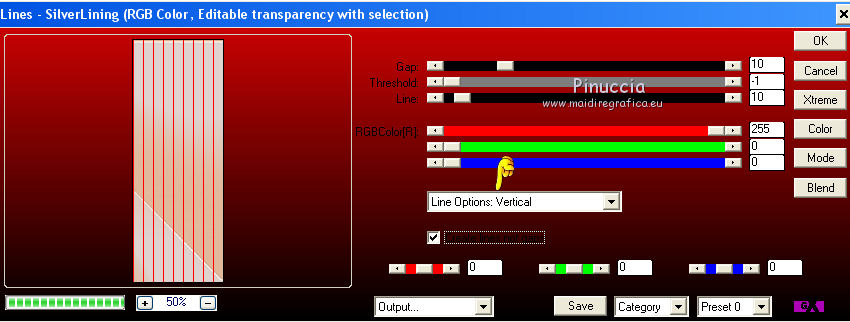
16. Effects>Plugins>AP 01 [Innovations] - Lines SilverLining,
same settages, but Line Options:Vertical.
Selections>Select None.
17. Activate the top layer.
Layers>New Raster Layer.
Set the Background color to #ce0609.

Flood Fill  the layer with the background color #ce0609.
18. Selections>Select All.
Selections>Modify>Contract - 2 pixels.
Press CANC on the keyboard 
19. Flood Fill  with the foreground color #e1b99b.
Selections>Modify>Contract - 2 pixels.
Press CANC on the keyboard.
20. Flood Fill  with the red background color #ce0609.
Selections>Modify>Contract - 2 pixels.
Press CANC on the keyboard.
Selections>Select None.
21. Layers>Merge>Merge All.
22. Image>Add borders - 20 pixels, symmetric, foreground color #e1b99b.
Activate the Magic Wand Tool 
clic on the bord to select it.
23. Effects>Plugins>Xero - Fritillary, same settings.

24. Selections>Invert.
Effects>3D Effects>Drop Shadow, color black.

Repeat Drop Shadow, but vertical et horizontal -5.
Selections>Select None.
25. Open the tube Min@.Lady6.25.02.15 - Edit>Copy.
Back to your work and go to Edit>Past as new layer.
Image>Resize - 1 time to 80% and 1 time to 90%, resize all layers not checked.
Move  the tube to the left side.
26. Effects>3D Effects>Drop Shadow, color black.

27. Open the tube tubeflower_73_bycrealine - Edit>Copy.
Back to your work and go to Edit>Past as new layer.
Image>Resize - 80%, resize all layers not checked.
Move  the tube at the bottom right.
28. Effects>3D Effects 3D>Drop Shadow, color black.

29. Layers>Merge>Merge All.
30. Image>Add borders - 5 pixels, symmetric, color #670000.
31. Sign your work et save as jpg.

If you have problems or doubt, or you find a not worked link, or only for tell me that you enjoyed this tutorial, write to me.
26 March 2015

