Here you find the original of this tutorial:

This tutorial was created with PSP X2 but it can also be made using other versions of PSP.
Since version PSP X4, Image>Mirror was replaced with Image>Flip Horizontal,
and Image>Flip with Image>Flip Vertical, there are some variables.
In versions X5 and X6, the functions have been improved by making available the Objects menu.
In the latest version X7 command Image>Mirror and Image>Flip returned, but with new differences.
See my schedule here
French translation here
Your versions here
For this tutorial, you will need:
Material here
The tubes are by Tocha, Animabelle and Verocreations.
The mask is by Narah.

Copy the selections in the Selections folder.
Open the mask in PSP and minimize with the rest of the material.
1. Set the Foreground color to #532519,
and the Background color to #f7bf63.

Set the foreground color on Foreground/background Gradient, style Linear.

2. Open a new transparent image 900 x 600 pixels.
Flood Fill  with the gradient.
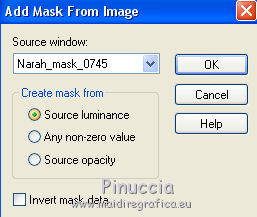
3. Layers>New Mask layer>From image.
Open the menu under the source window and you'll see all the files open.
Select the mask narah_mask_0745.

Layers>Merge>Merge group.
Adjust>Sharpness>Sharpen more.
5. Activate the bottom layer - Raster 1.
Selections>Load/Save selection>Load Selections From Disk.
Look for and load the selection sel_live_nines.

6. Effects>Texture Effects>Tiles - color white.

Selections>Select None.
7. Stay on the bottom layer - Raster 1.
Selections>Load/Save selection>Load Selections From Disk.
Look for and load the selection sel_live1_nines.

8. Effects>Texture Effects>Blinds - color white.

Keep selected.
9. Open the tube Tocha24760 - Edit>Copy.
Back to your work and go to Edit>Paste as new layer.
Layers>Arrange>Bring to Top.
Image>Resize - to 80%, resize all layers not checked.
Move  the tube on the selection.
Selections>Invert.
Press CANC on the keyboard 
Selections>Select None.
10. Open the tube 023_st_valentin_animabelle_p2 y redi - Edit>Copy.
Back to your work and go to Edit>Paste as new layer.
Image>Resize, 2 times to 80%, resize all layers not checked.
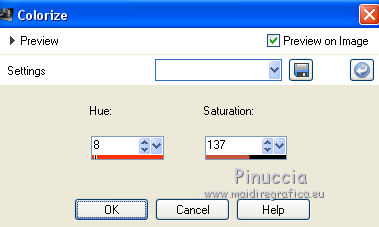
11. Adjust>Hue and Saturation>Colorize.

12. Effects>3D Effects>Drop Shadow, color black.

Move  the tube to the right side.

13. Layers>Duplicate.
Image>Mirror.
14. Layers>Merge>All.
15. Image>Add borders, 3 pixels, symmetric, foreground color #532519.
16. Edit>Copy.
Edit>Paste as new image.
Minimizer this image et back to your work.
17. Image>Add borders, symmetric not checked, color white.

18. Activate the Tool Magic Wand 
clic on the white border to select.
Flood Fill  the selection with the gradient.
19. Selections>Invert.
Effects>3D Effects>Drop Shadow, color black.

Repeat Drop Shadow, but vertical et horizontal to -5.
Selections>Select None.
20. Activate the image minimized at point 16.
Image>Resize, 2 times to 50%, resize all layers checked.
Edit>Copy.
Back to your work and go to Edit>Paste as new layer.
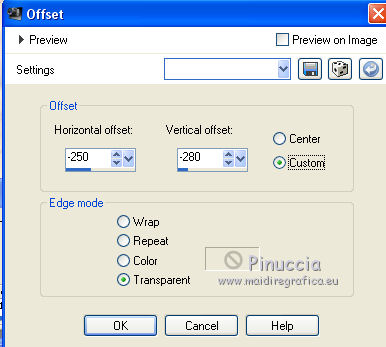
21. Effects>Image Effects>Offset.

22. Effects>3D Effects>Drop Shadow, color black.

23. Open the tube Ck_Kitamor_Grapa1 - Edit>Copy.
Back to your work and go to Edit>Paste as new layer.
Move  on the left side of the little frame.

24. Layers>Duplicate.
Move  the tube to the right side.

25. Layers>Merge>Merge down - 2 times
(to have the frame and the clips on one layer).
26. Layers>Duplicate.
Image>Mirror.
27. Open the tube valentin5-verocracion - Edit>Copy.
Back to your work and go to Edit>Past as new layer.
Move  the tube as below.

28. Sign your work.
29. Layers>Merge>All.
30. Image>Add borders, 3 pixels, symmetric, foreground color #532519.
31. Save as jpg.

If you have problems or doubt, or you find a not worked link, or only for tell me that you enjoyed this tutorial, write to me.
2 March 2015

